


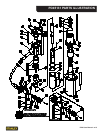
PD45 User Manual ◄ 11
CHARGING THE ACCUMULATOR
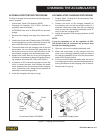
ACCUMULATOR TESTING PROCEDURE
To check or charge the accumulator the following equip-
ment is required:
• Accumulator Tester (Part Number 02835).
• Charging Kit Assembly (P/N 31254); (includes a
regulator, hose and ttings).
• NITROGEN bottle with an 800 psi/56 bar minimum
charge.
1. Remove the charging valve plug from the post driv-
er.
2. Holding the chuck end of Stanley tester (P/N 02835),
turn the gauge fully counter-clockwise to ensure the
stem inside the chuck is completely retracted.
3. Thread the tester onto the charging valve of the tool
accumulator (do not advance the gauge-end into
the chuck end; turn as a unit). Seat the chuck on the
accumulator charging valve and hand tighten only.
4. Advance the valve stem by turning the gauge-end
clockwise until pressure is read on the gauge (charg-
ing pressure should be 500–700 psi/34–38 bar).
5. If pressure is OK unscrew the gauge-end from the
chuck to retract the stem, then unscrew the entire
tester assembly from the tool accumulator charging
valve. If pressure is low, charge the accumulator as
described in the following section.
6. Install the charging valve cap (or plug).
ACCUMULATOR CHARGING PROCEDURE
1. Perform Steps 1 through 4 of the Accumulator Test-
ing Procedure above.
2. Connect the chuck of the charging assembly to
the charging valve on the accumulator tester or, if
preferred, remove the tester from the tool charging
valve and connect the charging assembly chuck di-
rectly to the tool charging valve.
3. Adjust the regulator to the charging pressure of 600
psi/42 bar.
NOTE:
It may be necessary to set the regulator at 650–
700 psi/45–48 bar to overcome any pressure drop
through the charging system.
4. Open the valve on the charging assembly hose.
5. When the accumulator is fully charged close the
valve on the charging assembly hose and remove
the charging assembly chuck from the accumulator
tester of tool charging valve.
6. If the accumulator tester has been used, be sure to
turn the gauge-end fully counterclockwise before re-
moving the tester from the charging valve of the tool.
7. Replace the O-ring plug.
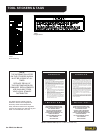
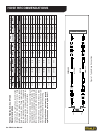
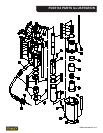
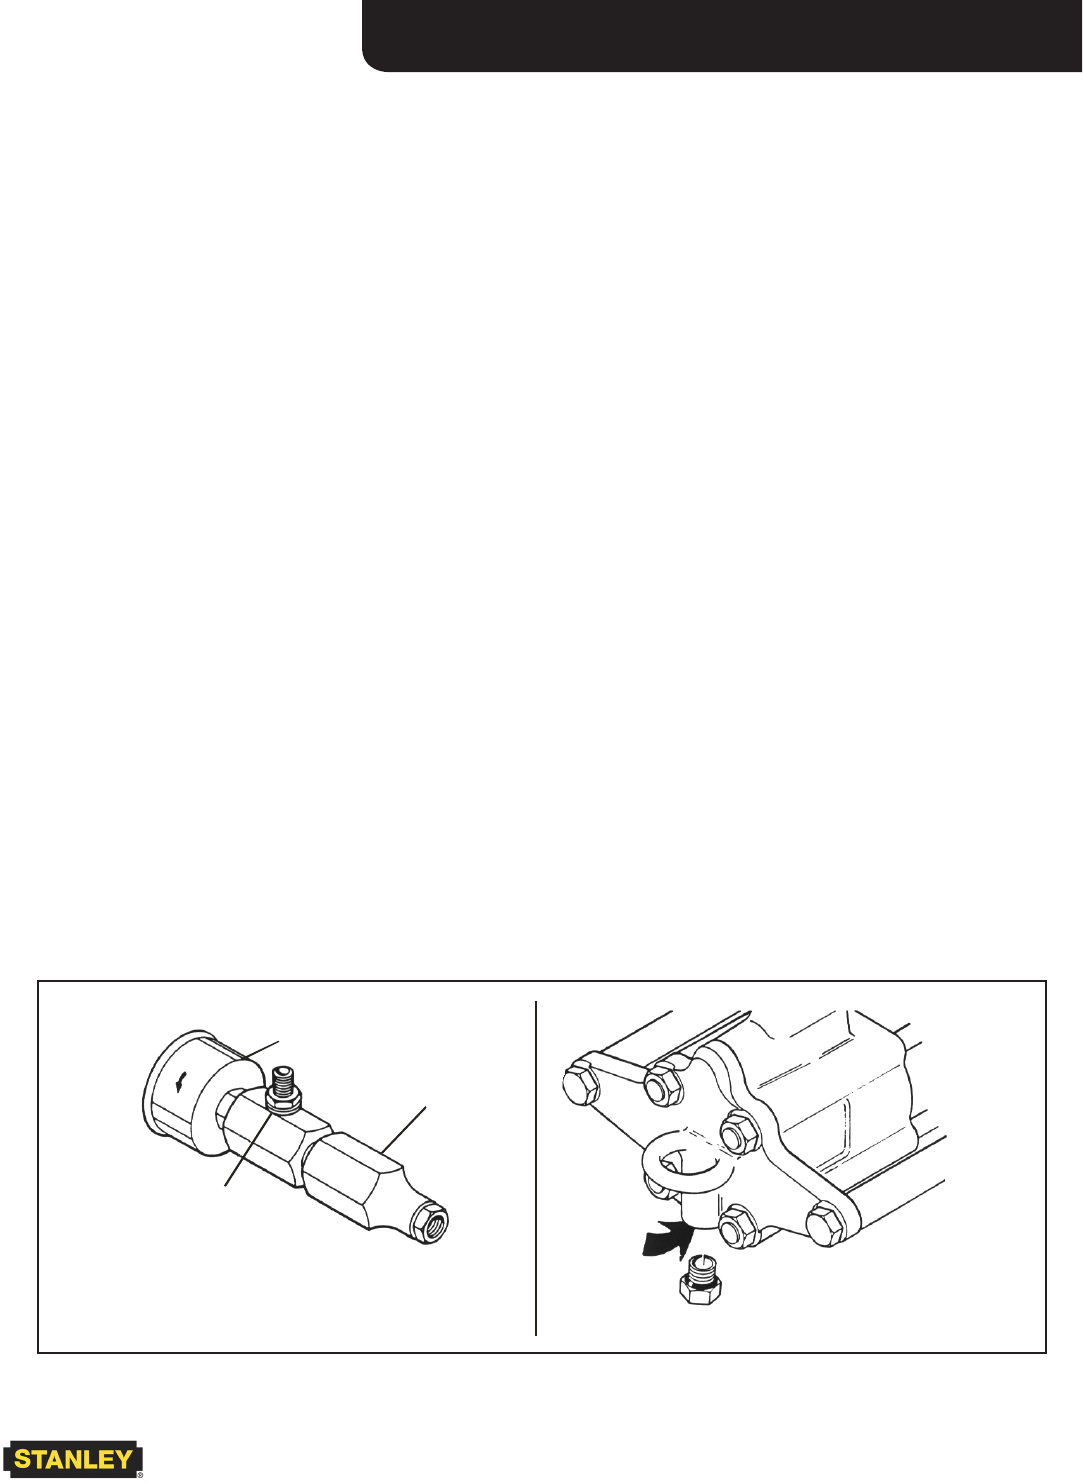
Guage
Chuck
Tes ter
Charging
Valve
Accumulator Tester (P/N 02835) Location Of Charging Valve
Figure 2. Charging the Accumulator