


-
6-
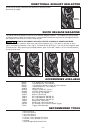
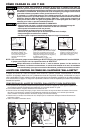
LOADING THE 400 & 500
EYE PROTECTION which conforms to ANSI specifications and provides protection against
flying particles both from the FRONT and SIDE should ALWAYS be worn by the operator and
others in the work area when connecting to air supply, loading, operating or servicing this tool.
Eye protection is required to guard against flying fasteners and debris, which could cause
severe eye injury.
The employer and/or user must ensure that proper eye protection is worn. Eye protection
equipment must conform to the requirements of the American National Standards Institute,
ANSI Z87.1 and provide both frontal and side protection. NOTE: Non-side shielded spectacles
and face shields alone do not provide adequate protection.
TO PREVENT ACCIDENTAL INJURIES:
•Never place a hand or any other part of the body in nail discharge area of tool while
the air supply is connected.
• Never point the tool at anyone else.
• Never engage in horseplay.
•Never pull the trigger unless nose is directed at the work.
•Always handle the tool with care.
• Do not pull the trigger or depress the trip mechanism while loading the tool.
A
B
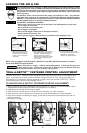
1. Move pusher to rear until
latched. Cover will open.
Pusher front will drop into
notch on top of magazine
assembly.
2. Drop staple stick over magazine
and slide forward. Repeat until
magazine is loaded, allowing
enough space for pusher to
disengage the magazine and the
cover to close. Approximately
1/2" (13mm)
3. Pull and hold top part of knob
(A) and depress bottom part of
knob (B) in a clockwise
direction to release pusher.
NOTE: Use only staples recommended by Bostitch for the 400 & 500 Series staplers or staples
which meet BOSTITCH specifications.
Always disconnect air supply: 1. Before making adjustments; 2. When servicing the tool;
3. When clearing a jam; 4. When tool is not in use; 5. When moving to a different work area,
as accidental actuation may occur, possibly causing injury.
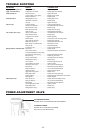
“DIAL-A-DEPTH™” FASTENER CONTROL ADJUSTMENT
The DIAL-A-DEPTH™ Fastener Control adjustment feature provides close control of the fastener drive
depth; from flush with the work surface to shallow or deep countersink. First, set the air pressure for
consistent drive in the specific work as described on page 5, then use the DIAL-A-DEPTH™ Fastener
Control adjustment to give the desired depth of drive.
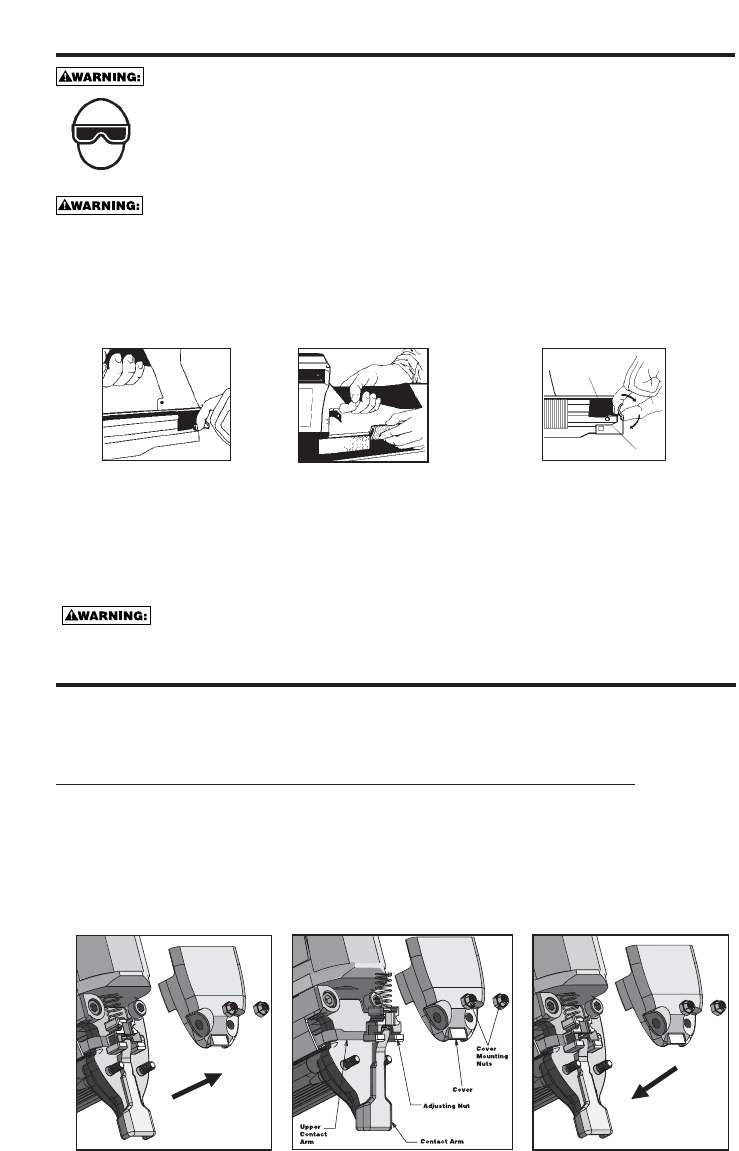
TO ADJUST DIAL-A DEPTH™ FASTENER CONTROL ADJUSTMENT:
1. With air pressure set (refer to Setting the Correct Pressure on (Page 5), drive a few fasteners into a
representative material sample to determine if adjustment is necessary.
2. If adjustment is required, disconnnect air supply.
3. Refer to label on outside of door for direction to turn adjusting nut. (See illustration)
4. Open trip cover and turn adjusting nut as shown to set the desired fastener countersink depth.
5. Close cover. Before reconnecting air supply, check that trip mechanism parts operate freely with no
binding or sticking.
6. Reconnect air supply.