bq24610/616/617/30EVM
HPA422
ACPWR
J1
PGND
SYS
J5
PGND
BAT
VREF
JP3
PG
TS
APPLICATIONCIRCUIT
PH
TP12
SYS
VBAT
TP1
ACPWR
STAT1
J
3
J2
JP1
U1
JP5
J4
V
Iin
I
Power
supply#1
Isys
V
Ibat
V
I
Load
#1
Load
#2
I
TP2
JP2
GND
VEXT
TTC
ISET1
ACSET
ISET2
VEXT
GND
VREF
HI
L
O
Power
sup ply#2
I
/ACDRV
/BATDRV
CE PG /STAT1 /STAT2
VCC
TP9
JP4
Oscilloscope
www.ti.com
Test Summary
2.2.5 METERS
Seven Fluke 75 multimeters, (equivalent or better)
Or: Four equivalent voltage meters and three equivalent current meters.
The current meters must be capable of measuring 5A+ current
2.3 Equipment Setup
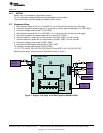
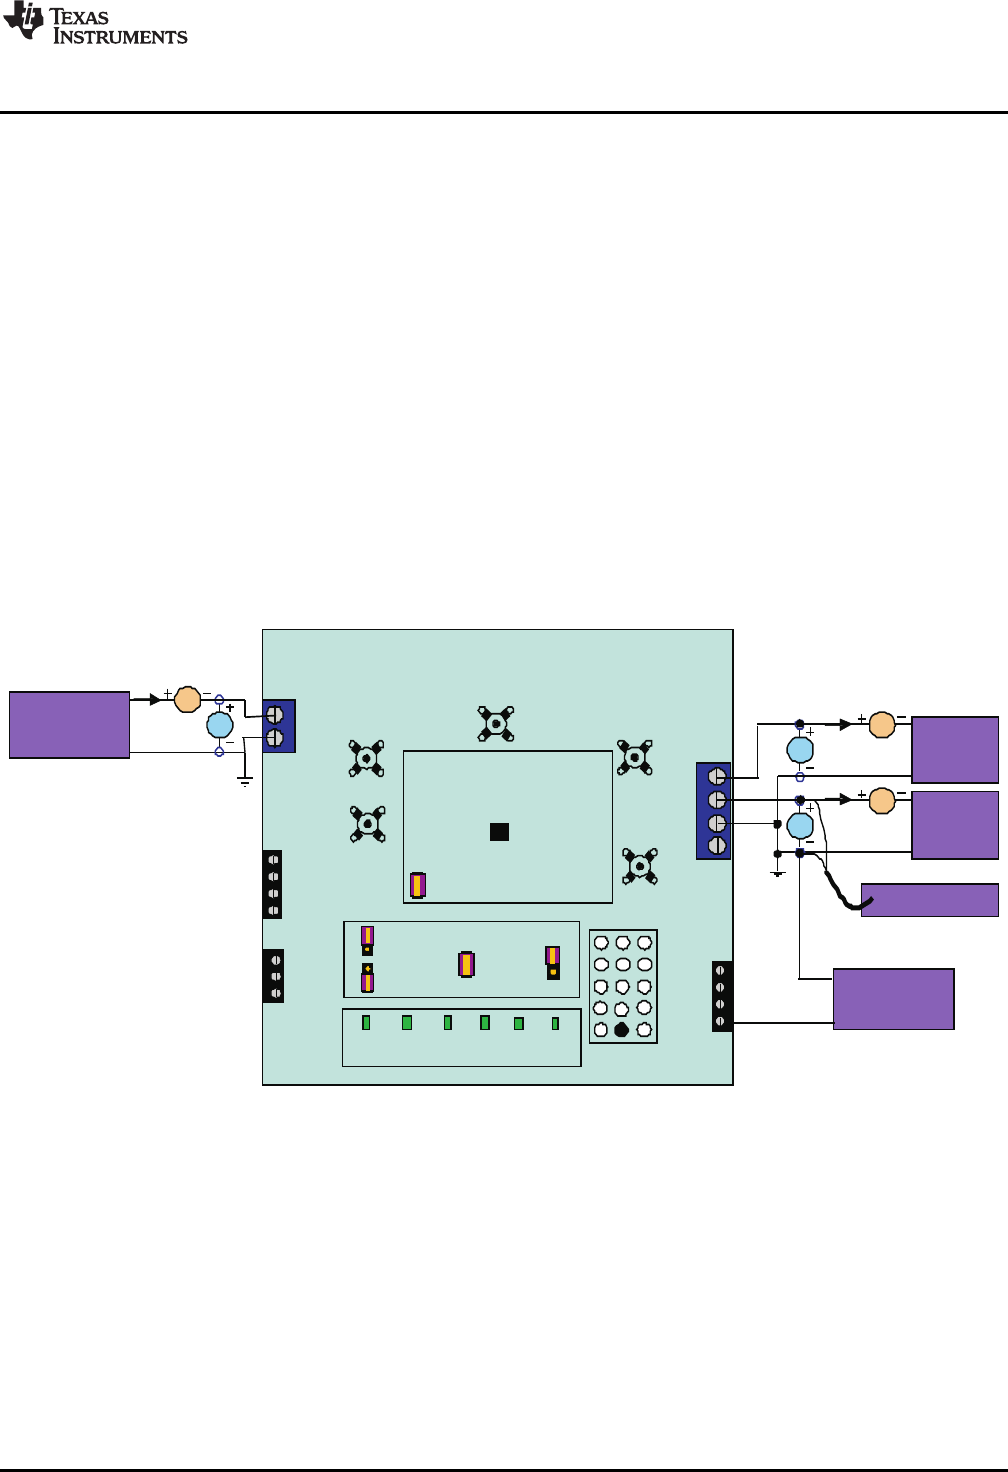
1. Set the power supply #1 for 0V ± 100mVDC, 5.0 ± 0.1A current limit and then turn off supply.
2. Connect the output of power supply #1 in series with a current meter (multimeter) to J1 (VIN, GND).
3. Connect a voltage meter across J1 (VIN, GND).
4. Set the power supply #2 for 0V ± 100mVDC, 1.0 ± 0.1A current limit and then turn off supply.
5. Connect the output of the power supply #2 to J4 and J5 (TS, GND).
6. Connect Load #1 in series with a current meter to J5 (SYS, GND). Turn off Load #1
7. Connect Load #2 in series with a current meter to J5 (BAT, GND). Turn off Load #2.
8. Connect a voltage meter across J5 (BAT, GND).
9. Connect an oscilloscope's probe across J5 (BAT, GND)
10. Connect a voltage meter across J5 (SYS, GND).
11. JP1 (TTC and HI): ON, JP2: ON, JP3 (VPULLUP and VREF): ON, JP4: ON, JP5: OFF.
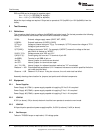
After the above steps, the test setup for HPA422 is shown in Figure 1.
Figure 1. Original Test Setup for HPA422 (bq2461x/bq2463x EVM)
5
SLUU396A–January 2010–Revised July 2010 bq2461x/bq2463x EVM (HPA422) Multi-Cell Synchronous Switch-Mode Charger
Copyright © 2010, Texas Instruments Incorporated


