


14 ProSpray 3.34
GB
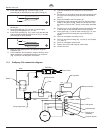
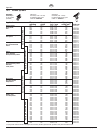
Cleaning the unit (shutting down) Remedy in case of faults
Type of malfunction
A. Unitdoesnotstart
B. Unitdoesnotdrawinmaterial
C. Unitdrawsinmaterial,butthe
pressure does not build up
Possible cause
1. Novoltageapplied.
2. Pressure setting too low.
3. ON/OFFswitchdefective.
1. ReliefvalveissettoSPRAY(p
spray).
2. Filterprojectsovertheuidlevel
and sucks air.
3. Filter clogged.
4. Suction hose/suction tube is loose,
i.e. the unit is sucking in outside air.
1. Tip heavily worn.
2. Tip too large.
3. Pressure setting too low.
4. Filter clogged.
5. Coatingmaterialowsthroughthe
return hose when the relief valve is
intheSPRAY(p spray) position.
6. Packings sticky or worn.
7. Valveballsworn.
8. Valveseatsworn.
Measures for eliminating the malfunction
1. Check voltage supply.
2. Turn up pressure control knob.
3. Replace.
1. Set relief valve to PRIME (k circulation).
2. Rellthecoatingmaterial.
3. Cleanorreplacethelter.
4. Clean connecting points. Tighten suction tube.
1. Replace
2. For selection of a smaller tip, see Tip table on Page
20.
3. Turn pressure control knob clockwise to increase.
4. Cleanorreplacethelter.
5. Remove and clean or replace relief valve.
6. Remove and clean or replace packings.
7. Remove and replace valve balls.
8. Remove and replace valve seats.
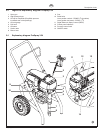
9. Remedy in case of faults
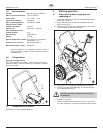
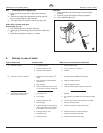
8.3 Cleaning Airless spray gun
1. Rinse Airless spray gun with an appropriate cleaning
agent.
2. Clean tip thoroughly with appropriate cleaning agent so
that no coating material residue remains.
3. Thoroughly clean the outside of the Airless spray gun.
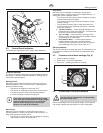
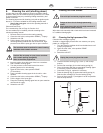
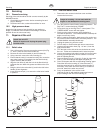
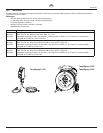
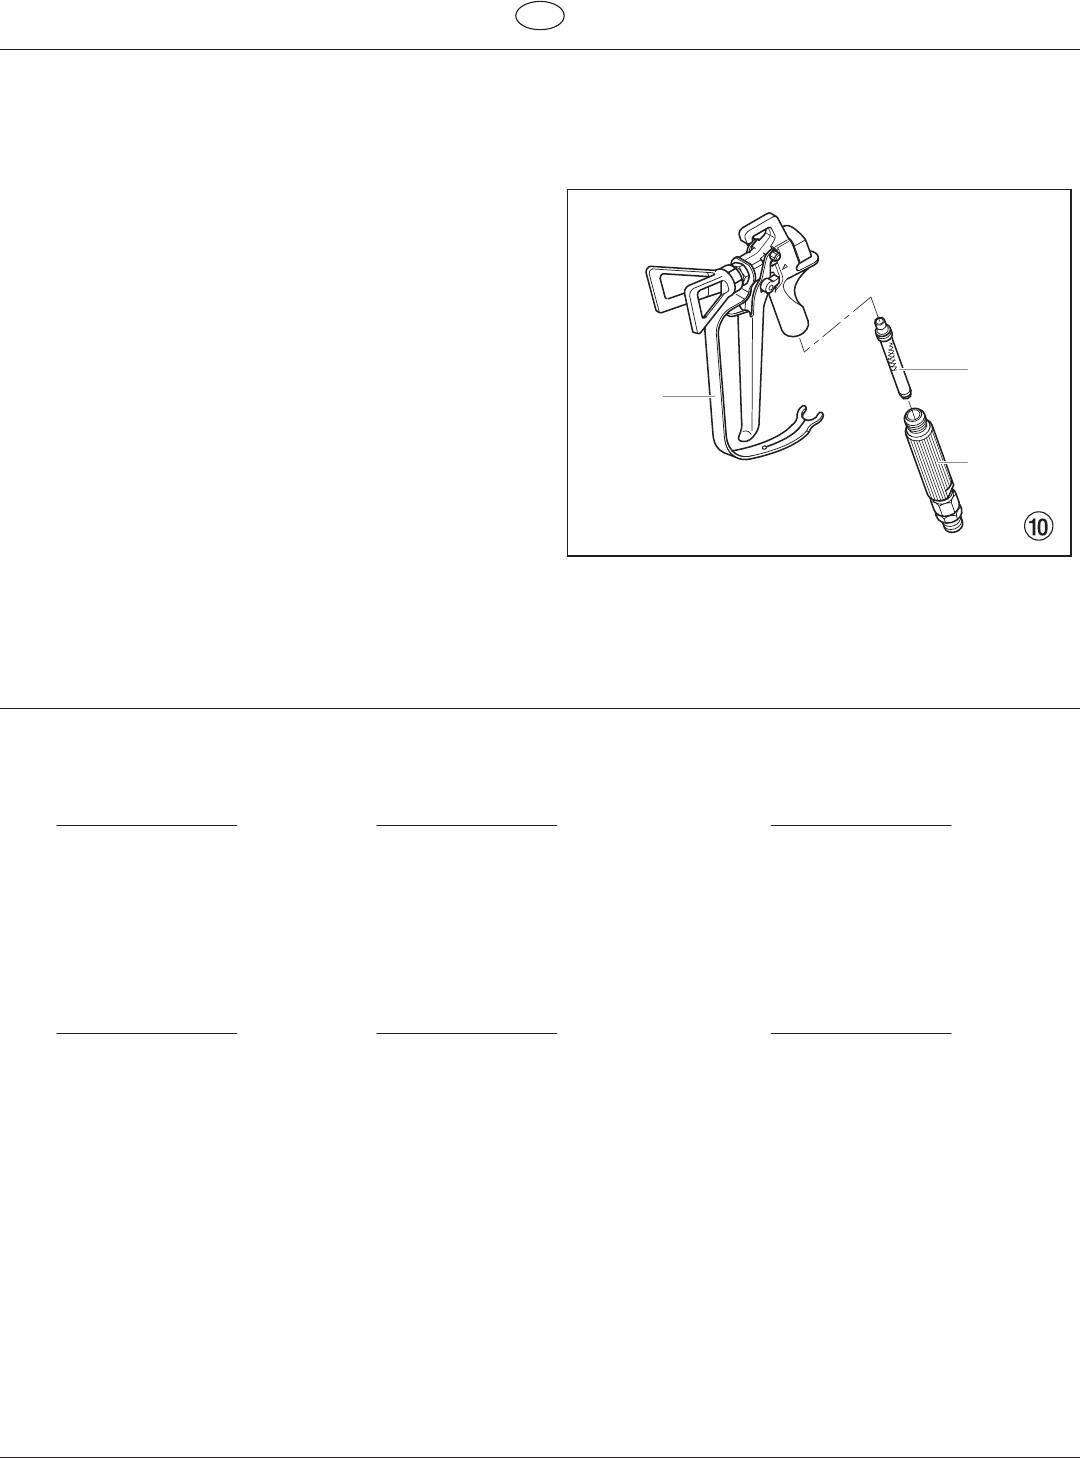
Intake lter in Airless spray gun
Disassembly (Fig. 10)
1. Pull protective guard (1) forward vigorously.
2. Screwgrip(2)outofthegunhousing.Removeintakelter
(3).
3. Intakeltercongestedordefective–replace.
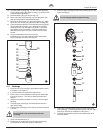
Assembly
1. Placeintakelter(3)withthelongconeintothegun
housing.
2. Screw in grip (2) into the gun housing and tight en.
3. Slot in protective guard (1).
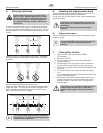
W
arning:
keep clear
of tip
250 bar
m
ax.3600 psi
3
2
1