


10 11
OPERATION
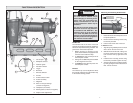
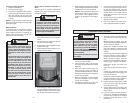
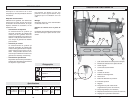
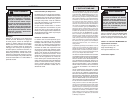
Selecting Actuation Mode
The selectable trigger can be set to either
Single Sequential Actuation mode or Contact
Actuation mode.
1. Push in and hold the Actuation
Selector.
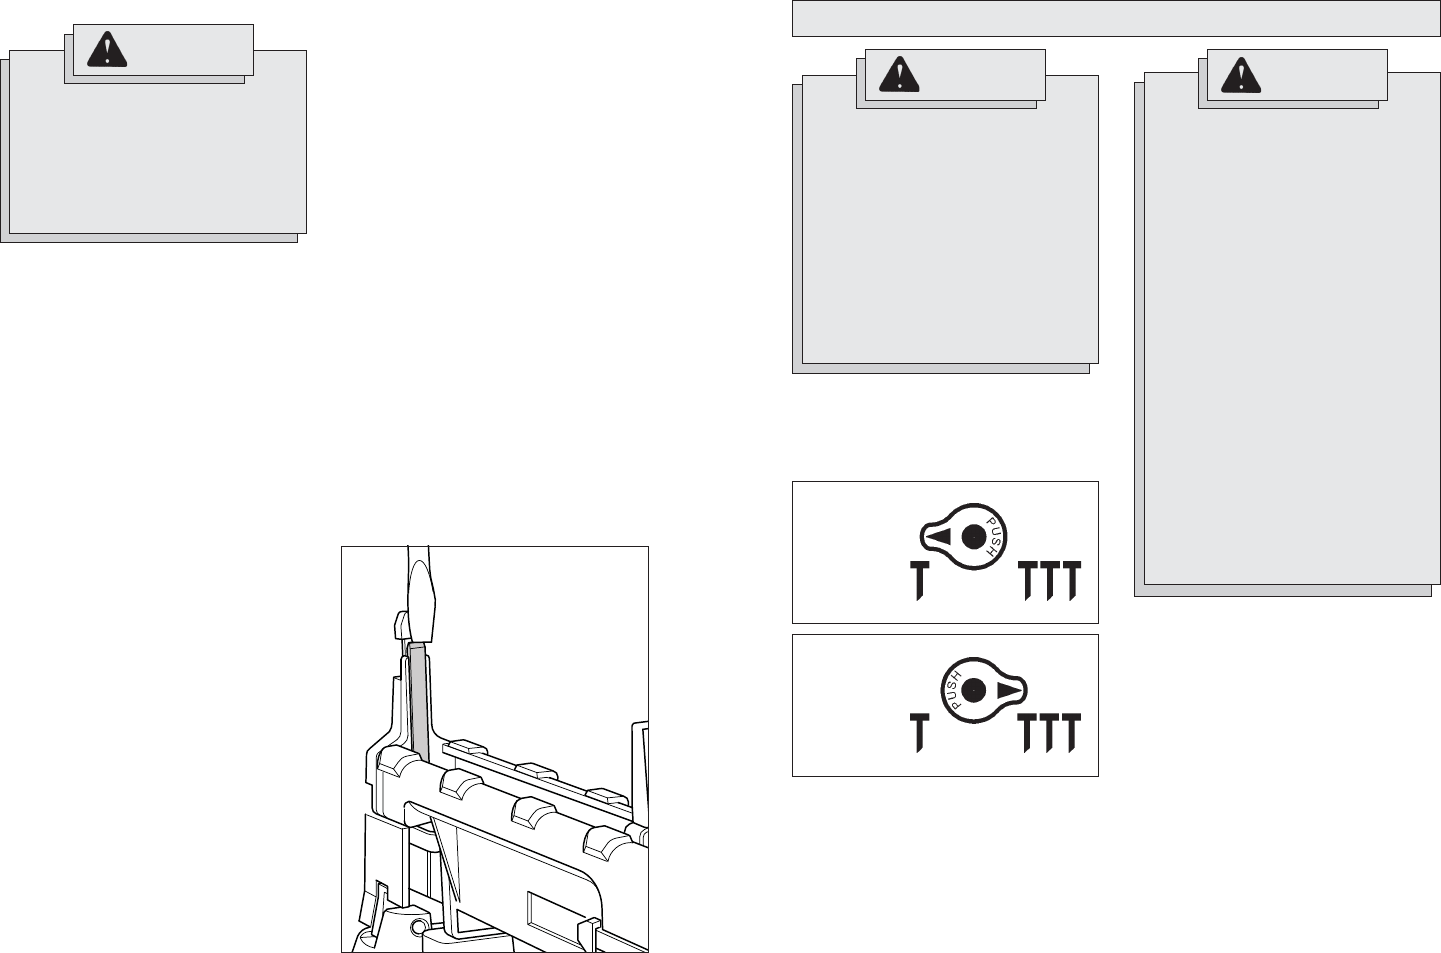
2. Rotate the Selector to Single Sequen-
tial Actuation (T) or Contact Actuation
(TTT).
3. Release the Actuation Selector.
NOTE: Be sure the selector is snapped
into position. Understand the actuation
process before use.
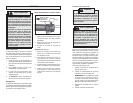
Fig. 5
Single
Sequential
Actuation
Fig. 6
Contact
Actuation
Single Sequential Actuation Operation
1. Grip the handle fi rmly.
2. Position the nose of the tool on the work
surface.
3. Push the tool against the work surface,
compressing the workpiece contact.
4. Pull the trigger to drive the fastener. The
tool will recoil away from the workpiece
as the fastener is driven.
5. Remove your fi nger from the trigger and
remove the tool from the workpiece.
NOTE: If the tool is not removed from
the workpiece, another fastener may be
driven if the trigger is pulled again.
WARNING
The operator and other people in the
work area must wear eye protection
in accordance with ANSI Z87.1. Eye
protection does not fi t all operators
in the same way. Make sure the eye
protection chosen has side shields or
provides protection from fl ying debris
both from the front and sides. The
employer is responsible for enforcing
the use of eye protection by the opera-
tor and other people in the work area.
When required, wear head protection
in accordance with ANSI Z89.1.
WARNING
To reduce the risk of injury to your-
self and others, test the tool before
beginning work each day according to
the "Required Daily Testing" section.
Do not use the tool unless you thor-
oughly understand the actuation
operation selected.
Disconnect the air supply from the
tool and remove fastener strips
before leaving the work area, mov-
ing the tool to another location, or
handing the tool to another person.
Failure to do so could result in seri-
ous injury.
Do not carry an air hose or a tool con-
nected to an air hose when climbing
ladders, rigging or scaffolding. Do
not attach an air hose or tool con-
nected to an air hose to your body
when working at elevated heights.
Attach the hose to the structure to
reduce the risk of loss of balance and
injury if the hose shifts.
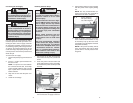
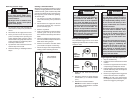
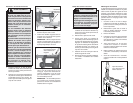
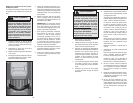
Tap screwdriver
to free fastener
Fig. 4
Clearing a Jammed Fastener
Most jams are caused by a fastener or part of
a fastener wedging between the driver blade
and the fastener guide. Fastener strips with
an incorrect collation angle or the wrong fas-
tener type may cause continuous jamming.
To clear the jam:
1. Lay the tool on its side and point the
nose of the tool away from yourself and
others.
2. Disconnect the air supply from the tool
and remove fastener strip. Leave the
pusher assembly open.
3. Remove any debris.
4. Insert a screwdriver into the end of the
fastener guide. The tip of the screw-
driver should contact the tip of the driver
blade.
5. Tap the screwdriver gently with a ham-
mer. The screwdriver will push the driver
blade back, freeing the jam.
6. Remove the fastener and other debris
(use needle-nose pliers if necessary).
7. Follow the steps under "Required Daily
Testing" before restarting the work.
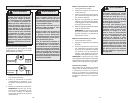
1. Lay the tool on its side and point the
nose of the tool away from yourself and
others.
2.
Disconnect the air supply from the tool.
3.
Place your hand on the end cap of the
pusher assembly before pressing the
pusher release button. Press the pusher
release button and gently slide back the
pusher assembly. Do not allow the pusher
assembly to slide back fast.
4. Tip down the nose of the tool to remove
fastener strip from the tool.
5. Reload according to "Installing Fastener
Strips".
WARNING
To avoid serious injury, disconnect
the tool from the air supply before
removing fastener strips or clearing
a jammed fastener.
Keep fi ngers clear of fastener track
of magazine. Pusher could pinch
fi ngers, causing injury.
Removing Fastener Strips