


1 of 6
For technical questions and replacement parts, please call 1-800-222-5381.
Thank you very much for choosing a , Product! For future reference, please
complete the owner's record below:
Model: _______________ Purchase Date: _______________
Save the receipt, warranty and these instructions. It is important that you read the entire
manual to become familiar with this product before using it.
This machine is designed for certain applications only. strongly
recommends that this machine is not modified and/or used for any application other than
that for which it was designed. If you have any questions relative to a particular
application, DO NOT use the machine until you have first contacted Northern Tool +
Equipment to determine if it can or should be performed on the product.
Before using this product, please read the following instructions carefully.
SAVE THIS MANUAL
You will need this manual for the safety warnings and precautions, assembly, operating,
inspection, maintenance and cleaning procedures, parts list and assembly diagram. Keep
this manual and invoice in a safe and dry place for future reference.
GENERAL SAFETY RULES
Read and understand all instructions.
Failure to follow all instructions listed in the following pages may result in electric shock,
fire, and/or serious injury.
WORK AREA
1.Keep your work area clean and well lit. Cluttered benches and dark areas invite
accidents.
2.Do not operate pneumatic tools in explosive atmospheres, such as in the
presence of flammable liquids, gases, or dust. Pneumatic tools create sparks which
may ignite flammables.
3.Keep bystanders, children, pets and onlookers away while operating a pneumatic
tool. Distractions can cause you to lose control. Protect others in the work area from
debris such as metal filings and sparks. Provide barriers or shields as needed.
Wel-Bilt
The distributor
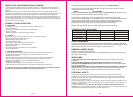
TECHNICAL SPECIFICATIONS
PERSONAL SAFETY
1.Stay alert. Watch what you are doing, and use common sense when operating a
pneumatic tool. Do not use a pneumatic tool while tired or under the influence of drugs,
alcohol, or medication. A moment of inattention while operating pneumatic tools may
result in serious personal injury.
2.Dress properly. Do not wear loose clothing or jewelry. Contain long hair. Keep your hair,
clothing, and gloves away from moving parts. Loose clothes, jewelry, or long hair can be
caught in moving parts.
3.Avoid accidental starting. Be sure the trigger is off before connecting to the air
supply. Carrying pneumatic tools with your finger on the trigger, or connecting pneumatic
tools to the air supply with the trigger on, invites accidents.
Item
Square Drive
Free Speed
Max. Torque
Air Consumption
Description
1/2in.
7000 RPM
230 ft-lbs
8 CFM
1/4in.- 18NPT
3/8in.
90 PSI
Description
Air Inlet Diameter
Min. Hose Size
Max. air pressure
Item
TM
4 of 6
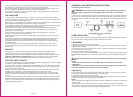
INSPECTION, MAINTENANCE AND CLEANING
1.Always make sure the trigger is in its "OFF" position, and disconnect the tool from its
compressed air supply before performing any inspection, adjustments, maintenance, or
cleaning.
2.Before each use, inspect the general condition of the tool. Check for loose screws,
misalignment or binding of moving parts, cracked or broken parts, damaged air hose, and
any other condition that may affect its safe operation. If abnormal noise or vibration
occurs, have the problem corrected before further use. Do not use damaged equipment.
3.Daily: With a clean cloth, remove all dirt, oil, and grease from the tool. If necessary, you
may use a mild detergent. Do not use solvents, as damaged to the tool may occur. Do not
immerse the tool in any liquids.
GENERAL TOUBLE SHOOTING
l TROUBLES
ØTool does not run at a normal speed or at a variable speed
ØThe motor blocks
ØAutomatic start when connected to compressed air
ØTorque reduces
ØAbnormal vibrating Heat rising at the housing
l CAUSES
ØAir supply is not enough (air pressure not in a required standard)
ØSpeed controller/switch breaks down
ØRotor blades break or wear out
ØDust gets into the motor
ØThrottle lever or starting trigger malfunctions
ØAir leakage at the inlet or somewhere else
ØBearing damages
ØCorrespondent O-rings wear out or out of position
ØLack of lubricating
l TROUBLE SHOOTING
ØCheck the air hose to see whether it is blocked or twisted for less air supply
ØCheck the air compressor to gain the correct air pressure required
ØReplace rotor blades
ØDisassemble the tool and clean the inner structure under proper instructions
ØCheck and fix the throttle lever or starting trigger for accurate operation
ØCheck the air leakage and fix it under proper instruction
ØReplace new bearing
ØReplace the damaged O-ring or put it back in correct position
ØOil/Lubricate the tool consistently until it gains the right speed and torque.
l NOTE: For any other problems that cannot be corrected by the operator, please
contact the distributor from whom you purchased the tool.