


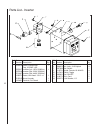
11
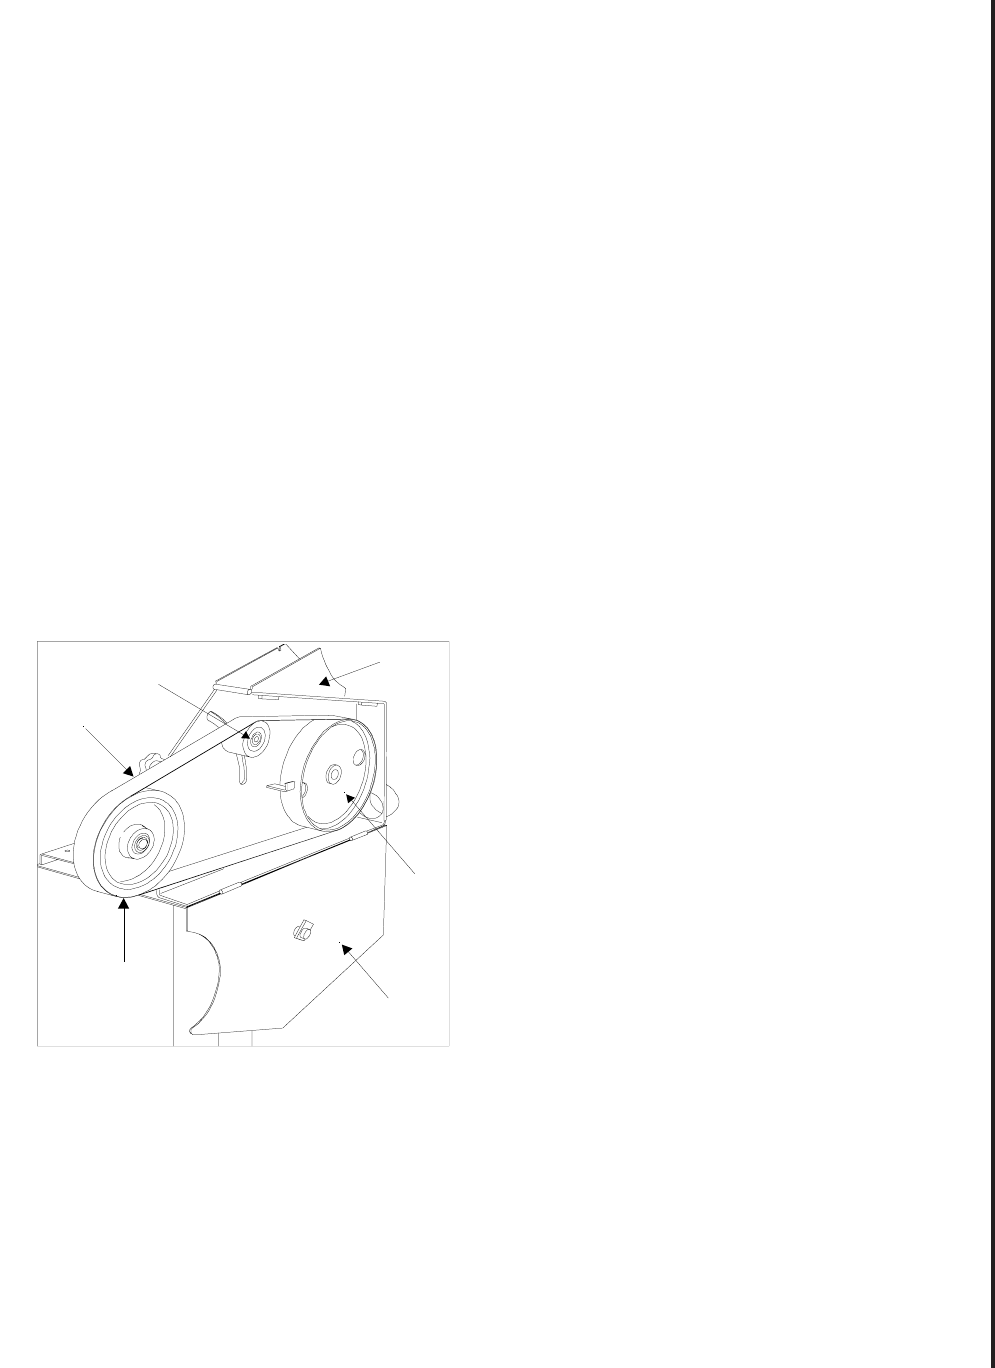
Replacement of Grinding Belt
WARNING: DO NOT OPERATE THE MACHINE WITH
THE SIDE PANEL OPEN. DISCONNECT ELECTRI-
CAL POWER TO THE MACHINE BEFORE PERFORM-
ING ANY MAINTENANCE.
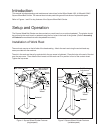
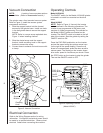
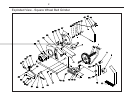
1. Refer to Figure 7. Lower the belt tension lever to
release tension on the belt.
2. Loosen the knob on the left side of the machine
and raise upper guard. Turn the knob on the side
panel and lower the side panel.
3. If required, loosen work rest to provide clearance
for belt removal.
4. Remove the belt from the drive wheel, idler
wheel, and contact wheel. Install the replace-
ment belt over the drive wheel, idler wheel, and
contact wheel.
5. Raise the belt tension lever to tighten the belt
against the wheels. Tighten the belt until it is just
taut. A moderate tension will provide faster
cutting, longer belt life, and better tracking. Do
not over-tension the belt.
6. Check belt tracking by spinning the drive wheel
by hand. Adjust tracking if required. (Refer to
Checking Belt Tracking.)
Figure 7: Replacement of Grinding Belt
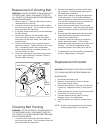
Checking Belt Tracking
WARNING: DO NOT OPERATE THE MACHINE WITH
THE SIDE PANEL OPEN. DISCONNECT ELECTRI-
CAL POWER TO THE MACHINE BEFORE PERFORM-
ING ANY MAINTENANCE.
1. Loosen the knob on the left side of the machine
and raise upper guard. Turn the knob on the side
panel and lower the side panel.
2. Spin the drive wheel by hand and check track-
ing of the belt. If the belt tracks either right or
left, adjustment is required.
3. Use an Allen wrench to change the alignment
of the idler wheel. Turn the idler adjustment
screw clockwise to cause the belt to track right.
Turn the idler adjustment screw counterclock-
wise to cause the belt to track left.
4. Close side panel and secure by turning the
knob on the panel. Lower the upper belt guard
and secure with the knob on the left side of the
grinder.
5. Connect electrical power and start the grinder.
Check belt tracking (the belt should be cen-
tered on the contact wheel.
6. If required, adjust belt tracking to center the
belt on the contact wheel. Turn the idler
adjustment screw clockwise to move the belt to
the right. Turn the idler adjustment screw
counterclockwise to move the belt to the left.
7. If the belt does not track properly, increase belt
tension. Repeat steps 1 through 6.
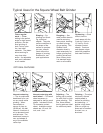
Replacement of Inverter
WARNING: DISCONNECT ELECTRICAL POWER
TO THE MACHINE BEFORE PERFORMING ANY
MAINTENANCE.
1. Disconnect electrical power.
2. Remove access panel on front of inverter.
Disconnect inverter wiring.
3. Remove four screws (1) and four nuts (6) from
inverter (2). Separate inverter (2) from mount
(4).
4. Install replacement inverter (2) and secure with
four screws (1) and four nuts (6).
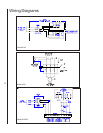
5. Connect electrical wiring (refer to Wiring
Diagram section for connections).
6. Start belt grinder and check for proper opera-
tion.
NOTE: Inverter is pre-programmed at the factory,
further programming is not required.
Idler Wheel
Grinding
Belt
Contact
Wheel
Side
Panel
Drive
Wheel
Upper
Guard