77
Recording Audio
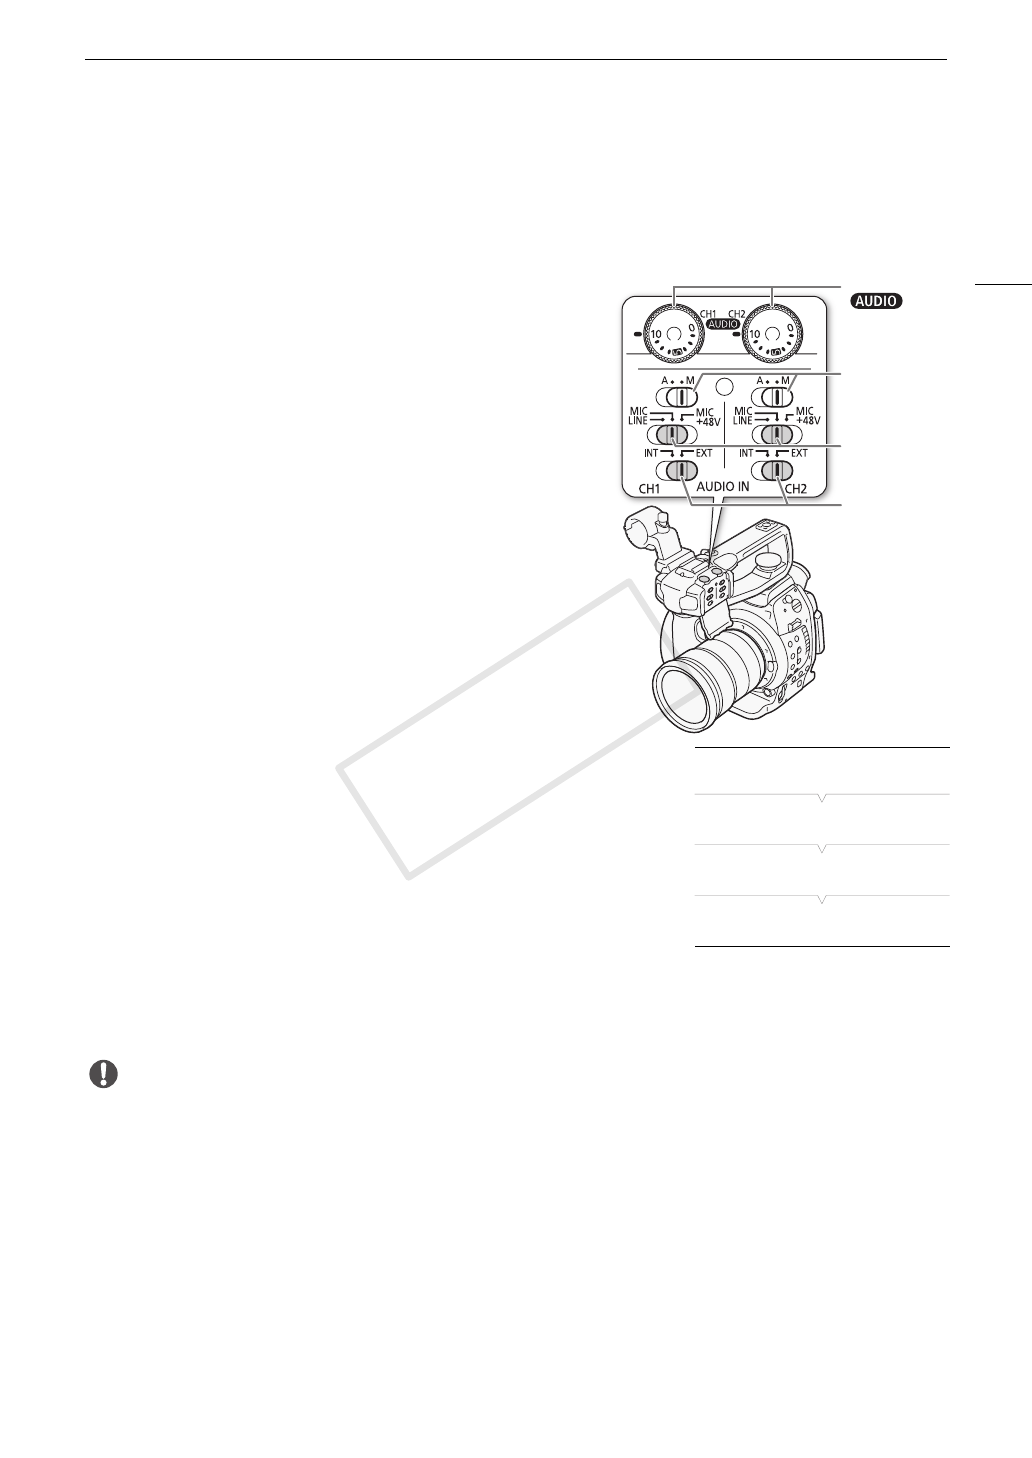
Using Audio Input from the XLR Terminals
Using the XLR terminals CH1 and CH2, you can record audio independently to the two audio channels from a
microphone or analog audio input source.
Switching Between Microphone and Line Input
1 Set the AUDIO IN switch of the desired channel to EXT.
2 Set the XLR terminal switch of the desired channel to LINE or
MIC.
• To supply a microphone with phantom power, set the switch to
MIC+48V instead. Make sure to connect the microphone first,
before turning the phantom power on. Keep the microphone
connected when turning off the phantom power.
• When using the XLR terminal to record to only one channel, use
the CH1 terminal.
Selecting the Recording Channel
You can select to which channel the camcorder will record audio.
1 Open the [XLR Rec Channel] submenu.
[¡ Audio Setup] > [Audio Input] > [XLR Rec Channel]
2 Select the desired option and then press the joystick.
Options
IMPORTANT
• When connecting a microphone or device that does not support phantom power, make sure to set the XLR
terminal switch to MIC or LINE, respectively. If you set the switch to MIC+48V, the microphone or device may
be damaged.
[CH1]: Records audio to each channel separately. Audio input
into CH1 is recorded to channel 1, while audio input into
CH2 is recorded to channel 2.
[CH1/CH2]: Audio input into CH1 is recorded to both channels. Audio
input into CH2 will not be recorded.
CH1/CH2
dials
CH1/CH2
audio level
switches
XLR terminal
switches
CH1/CH2
AUDIO IN
switches
[¡ Audio Setup]
[
Audio Input]
[XLR Rec Channel]
[CH1]


