Recording Movies and Photos
41
Recording in AUTO Mode
When you use mode to shoot video and take photos, the camcorder will automatically adjust
various settings for you.
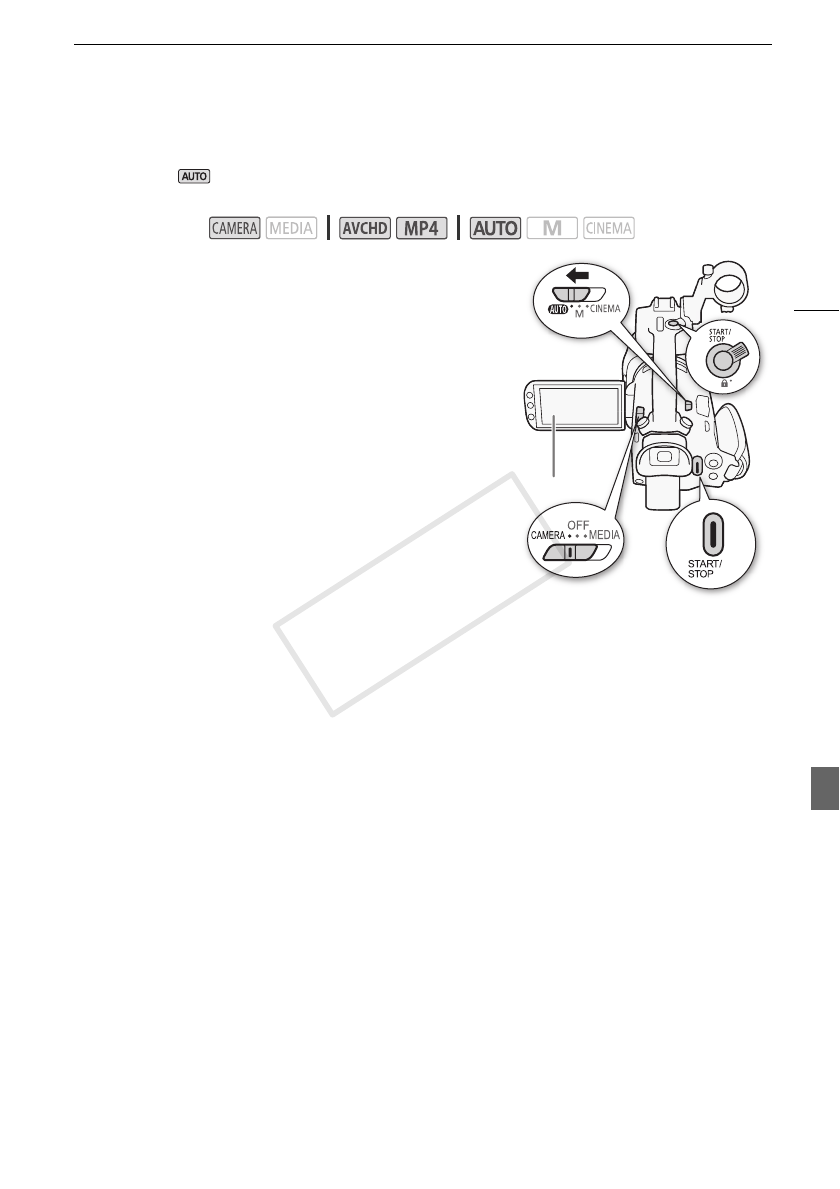
1 Set the mode switch to N.
2 Set the power switch to CAMERA.
To record video
Press Y to begin recording.
• During recording, Ü will appear on the screen. Additionally, if
the handle unit is attached to the camcorder, the tally lamp will
illuminate.
• The ACCESS indicator will flash from time to time while the
scene is being recorded.
• Press Y again to pause the recording. Ü will
change to Û and the scene will be recorded on the memory
card selected for recording movies. The tally lamp will also go
out.
• You can also press Y on the handle unit or wireless
controller.
To take photos
Touch [PHOTO].
• In the lower center of the screen, a green icon (g) will appear. Also, in the upper right of the screen,
{Ð will appear with the icon of the memory card selected for recording photos. The ACCESS
indicator will flash as the photo is being recorded.
• You can record photos simultaneously while recording a movie. In that case, the green icon will not
appear.
• You can also press Z on the wireless controller.
When you have finished recording
1 Set the lens barrier switch to CLOSED to close the lens barrier.
2 Make sure that the ACCESS indicator is off.
3 Set the power switch to OFF.
4 Close the OLED panel and return the viewfinder to its retracted position.
Operating modes:
[PHOTO]


