Installing Cooking Components
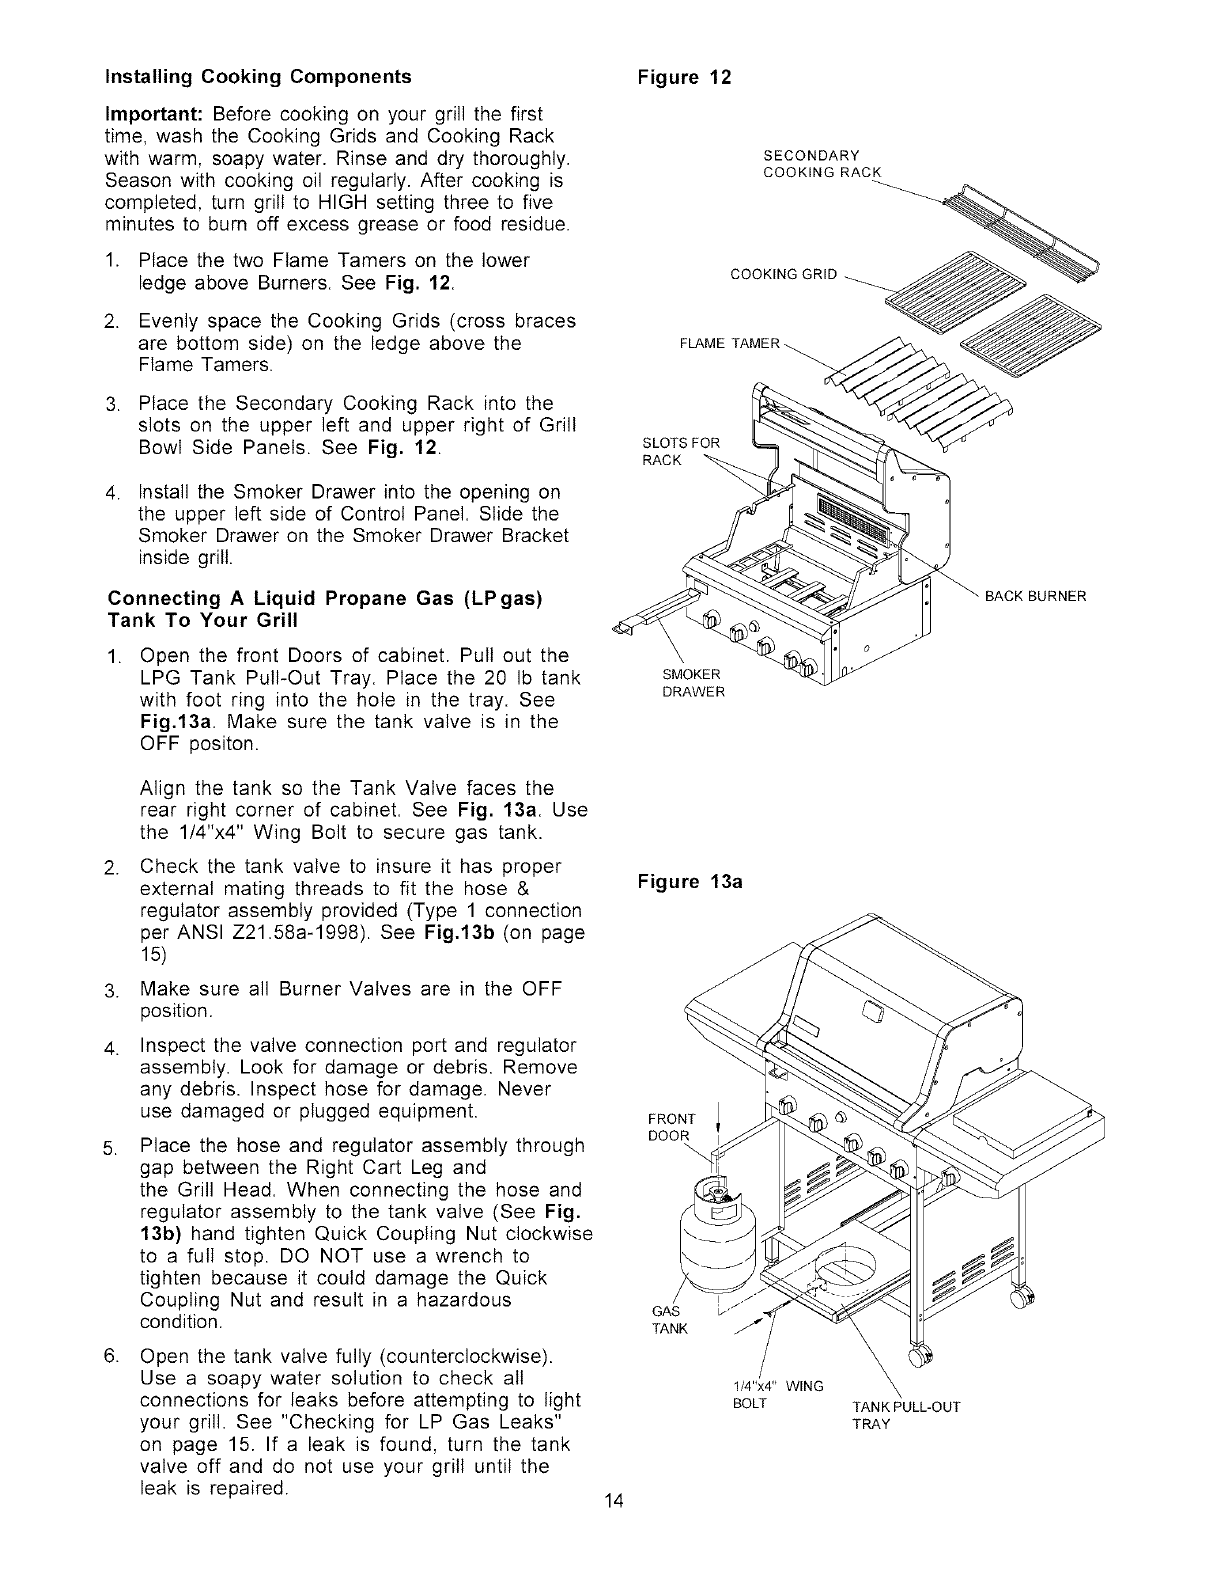
Figure 12
Important: Before cooking on your grill the first
time, wash the Cooking Grids and Cooking Rack
with warm, soapy water. Rinse and dry thoroughly.
Season with cooking oil regularly. After cooking is
completed, turn grill to HIGH setting three to five
minutes to burn off excess grease or food residue.
1. Place the two Flame Tamers on the lower
ledge above Burners. See Fig. 12.
2. Evenly space the Cooking Grids (cross braces
are bottom side) on the ledge above the
Flame Tamers.
3. Place the Secondary Cooking Rack into the
slots on the upper left and upper right of Grill
Bowl Side Panels. See Fig. 12.
.
Install the Smoker Drawer into the opening on
the upper left side of Control Panel. Slide the
Smoker Drawer on the Smoker Drawer Bracket
inside grill.
Connecting A Liquid Propane Gas (LPgas)
Tank To Your Grill
1. Open the front Doors of cabinet. Pull out the
LPG Tank Pull-Out Tray. Place the 20 Ib tank
with foot ring into the hole in the tray. See
Fig.13a. Make sure the tank valve is in the
OFF positon.
SECONDARY
COOKING RACK
COOKING GRID
FLAME TAMER
SLOTSFOR
RACK
SMOKER
DRAWER
BURNER
.
.
4.
5.
.
Align the tank so the Tank Valve faces the
rear right corner of cabinet. See Fig. 13a. Use
the 1/4"x4" Wing Bolt to secure gas tank.
Check the tank valve to insure it has proper
external mating threads to fit the hose &
regulator assembly provided (Type 1 connection
per ANSI Z21.58a-1998). See Fig.13b (on page
15)
Make sure all Burner Valves are in the OFF
position.
Inspect the valve connection port and regulator
assembly. Look for damage or debris. Remove
any debris. Inspect hose for damage. Never
use damaged or plugged equipment.
Place the hose and regulator assembly through
gap between the Right Cart Leg and
the Grill Head. When connecting the hose and
regulator assembly to the tank valve (See Fig.
13b) hand tighten Quick Coupling Nut clockwise
to a full stop. DO NOT use a wrench to
tighten because it could damage the Quick
Coupling Nut and result in a hazardous
condition.
Open the tank valve fully (counterclockwise).
Use a soapy water solution to check all
connections for leaks before attempting to light
your grill. See "Checking for LP Gas Leaks"
on page 15. If a leak is found, turn the tank
valve off and do not use your grill until the
leak is repaired.
Figure 13a
FRONT
DOOR
1/4"x4" WING
BOLT
14
TANK PULL-OUT
TRAY
