For Grill Models 16690/17690
Add the Extra 4" Extension Spit
For Grill Models 16680/17680, 16228/17228
Add the Extra 6-1/2" Extension Spit
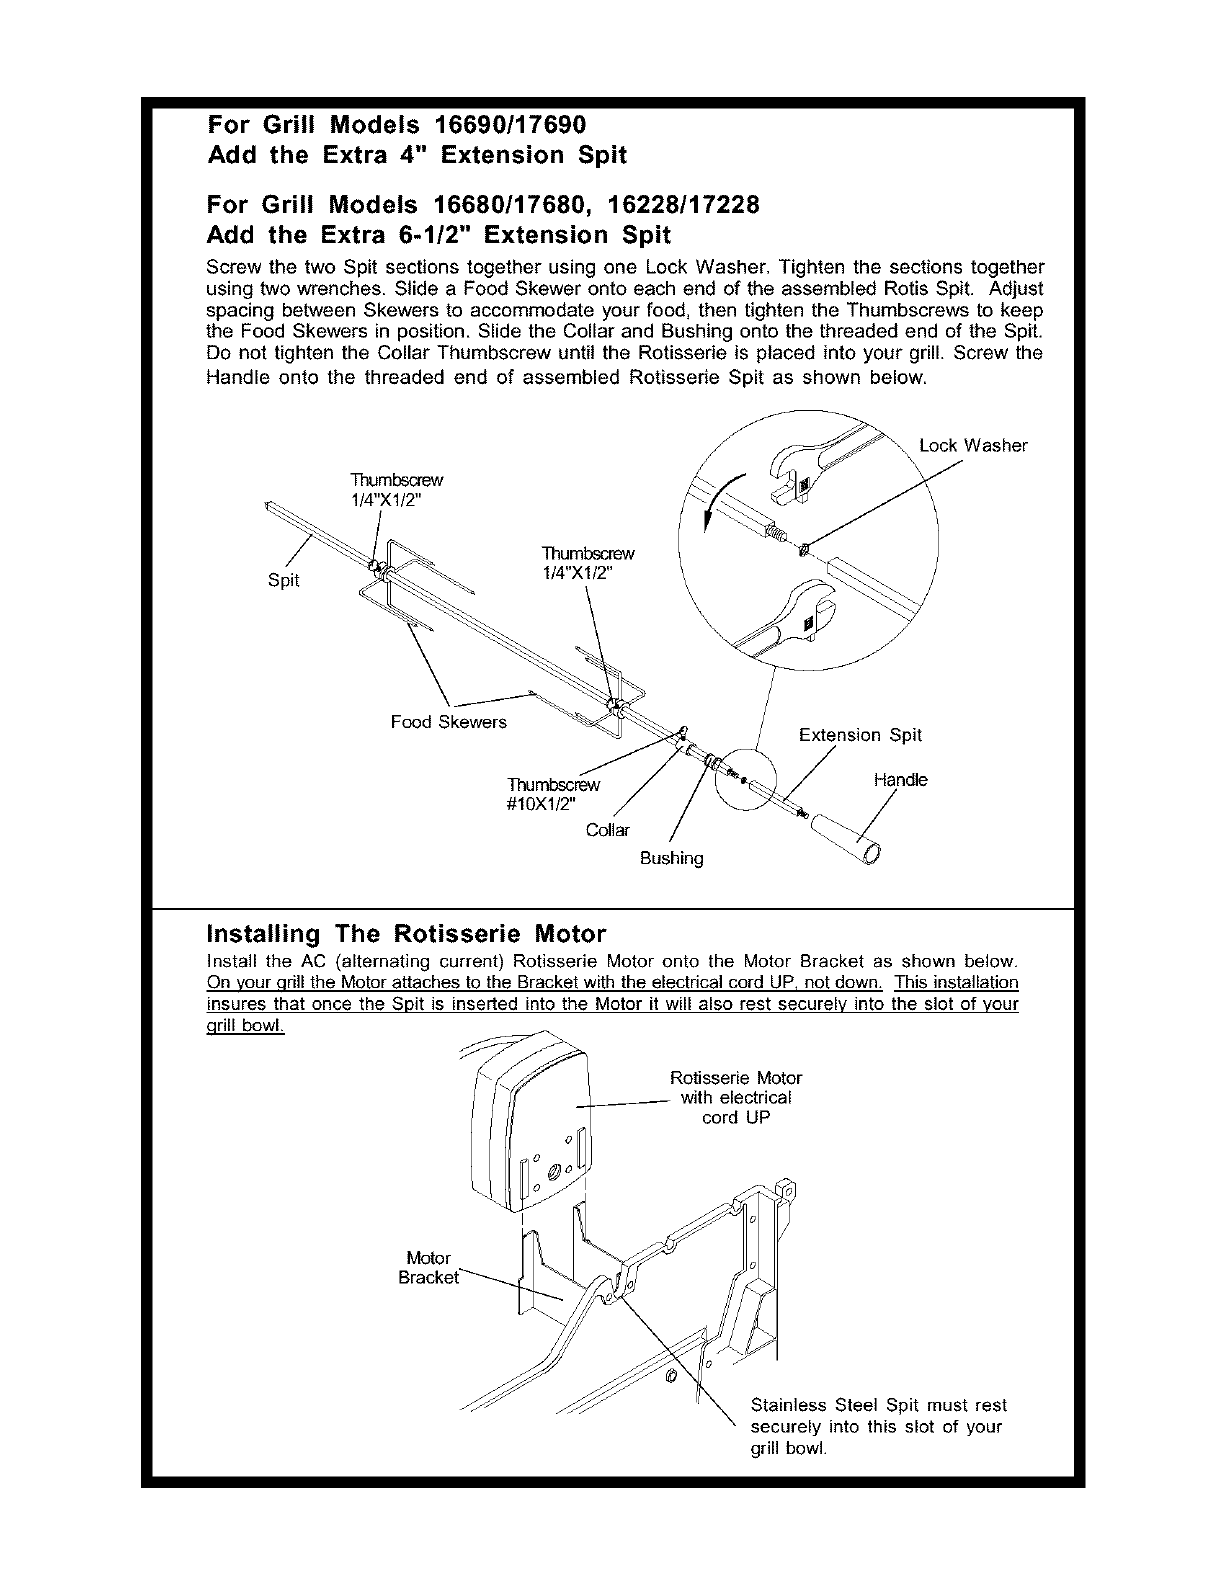
Screw the two Spit sections together using one Lock Washer. Tighten the sections together
using two wrenches. Slide a Food Skewer onto each end of the assembled Rotis Spit. Adjust
spacing between Skewers to accommodate your food, then tighten the Thumbscrews to keep
the Food Skewers in position. Slide the Collar and Bushing onto the threaded end of the Spit.
Do not tighten the Collar Thumbscrew until the Rotisserie is placed into your grill. Screw the
Handle onto the threaded end of assembled Rotisserie Spit as shown below.
Spit
Thumbscrew
1/4"X1/2"
Thumbscrew
1/4"Xl/2"
\
\
\
\
\
Lock Washer
\
Food Skewers
Extension Spit
Thumbscrew Handle
#10X1/2" /
Collar Bushing
Installing The Rotisserie Motor
install the AC (alternating current) Rotisserie Motor onto the Motor Bracket as shown below.
On your grill the Motor attaches to the Bracket with the electrical cord UP, not down. This installation
insures that once the Spit is inserted into the Motor it will also rest securely into the slot of your
clrill bowl.
Rotisserie Motor
with electrical
cord UP
Motor
Bracket_
Stainless Steel Spit must rest
securely into this slot of your
grill bowl.
