25
USING YOUR REFRIGERATOR
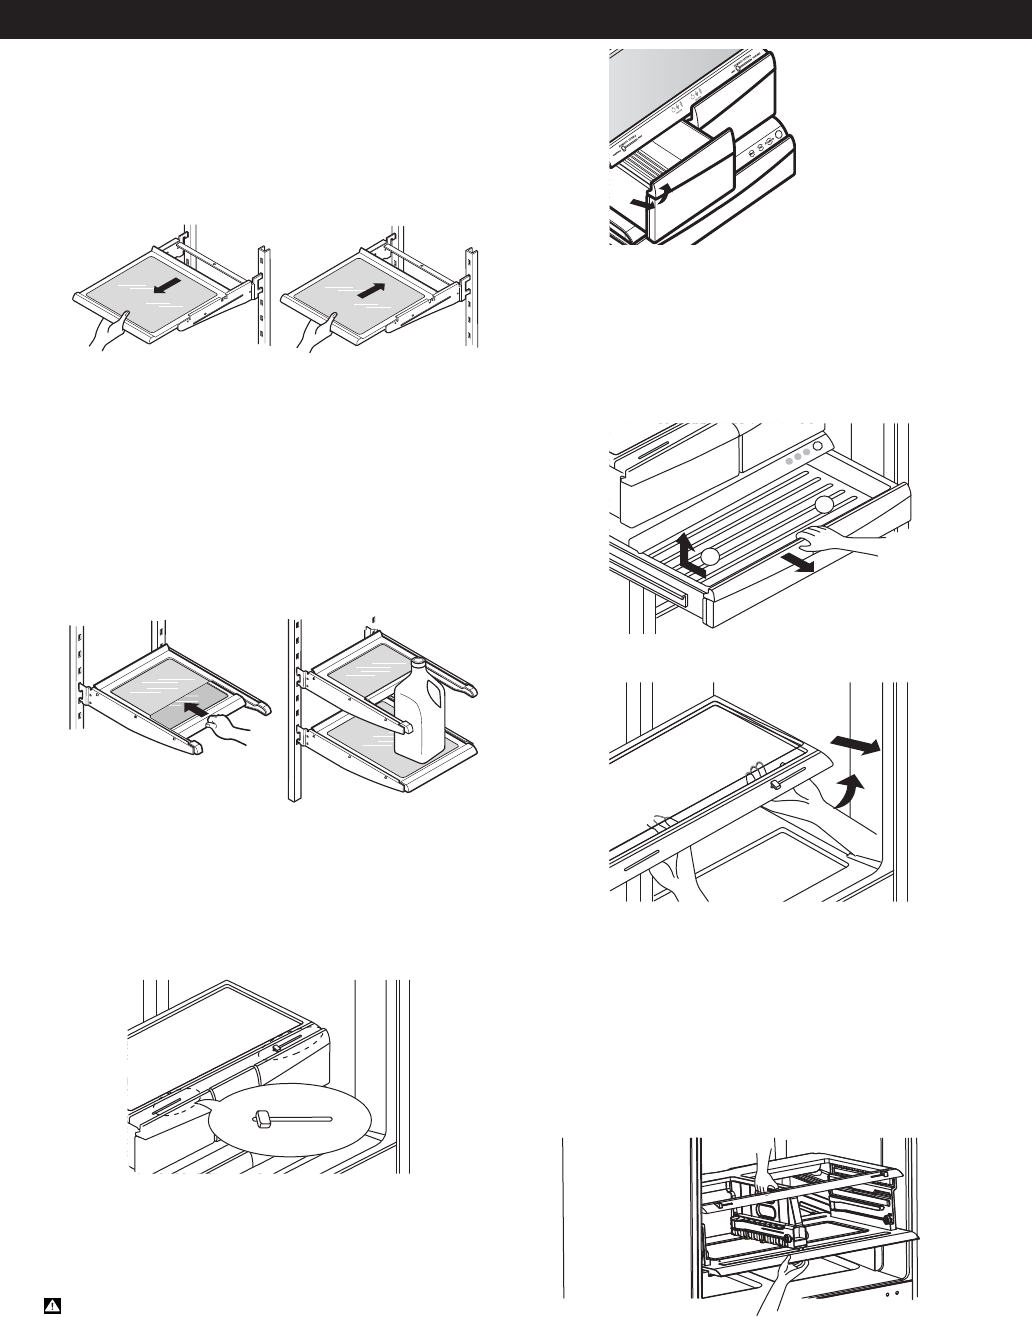
Sliding Shelves (in some models)
You can slide some of the shelves in your refrigerator
towards inside or outside like explained below.
ţTo slide the shelf towards the outside: Pull towards you,
figure A.
ţTo slide the shelf towards the inside: Push until it stops,
figure B.
Figure A Figure B
In order to remove a shelf from a metal frame
ţPull the shelf until it stops.
ţIncline the front of the shelf towards the top and pull
forward.
ţLift the shelf in the manner it moves across the
support openings.
To put back into place just reverse these steps.
Functional Shelves (Folding Shelves, in some models)
You can store tall articles like gallons or bottles just by
simply folding the shelf in half.
CRISPER HUMIDITY CONTROL (in some models)
You can control the amount of humidity in the moisture-
sealed crispers. Adjust the control to any setting between
HIGH and LOW.
ţ“High”: keeps moist air in the crisper for best storage
of vegetables.
ţ“Low”: lets moist air out of the crisper for best storage
of fruits.
To remove or replace the crisper:
ţTo remove, slide the crispers out to full extension.
ţLift the front of the crisper up, then pull it straight out.
ţTo install, slightly tilt up the front and insert thedrawer into
the frame and push it back intoplace.
CAUTION:
Be careful when you handle the glass
cover because it could loose.
To remove the glass:
MEAT
DELI
PRODUCE
TEMP. SELECTOR
LOW
HIGH
LOW
LOW
HIGH
MEAT
DELI
PRODUCE
TEMP. SELECTORTEMP. SELECTORTEMP. SELECTORTEMP. SELECTOR
LOW
2
1
L
WOLWO
HIG H
LO W
HIG H
LO W
HIG H
LO W
HIG H
LO W
ţ-JGUVQUIFHMBTTVOEFSUIFDSJTQFSDPWFS
ţ1VMMUIFHMBTTVQBOEPVU
To remove or replace the crisper cover support:
NOTE:
Remove glass before removing the crisper cover
support.
ţ
ţ
While holding the crisper cover support with both
hands (as shown in the image below). Pull forward and
slightly lift the front part.
Remove the door in door case before removing
the crispers.
H
U
M
I
D
I
T
Y
S
E
T
T
I
N
G
V
E
G
E
T
A
B
L
E
F
R
U
IT
H
U
M
I
D
I
T
Y
S
E
T
T
I
N
G
V
E
G
E
T
A
B
L
E
F
R
U
I
T
To remove or replace Glide‘N’Serve drawer
1. To remove, pull the drawer out to full extension.
2. Lift the front of the drawer up, then pull it straight out
To install, slightly tilt up the front and insert the drawer
into the frame and push it back into place.
NOTE: Removing the fixed door bin is recommended to
reduce the risk of door bin scratches.


