10 Functional overview (cont’d)
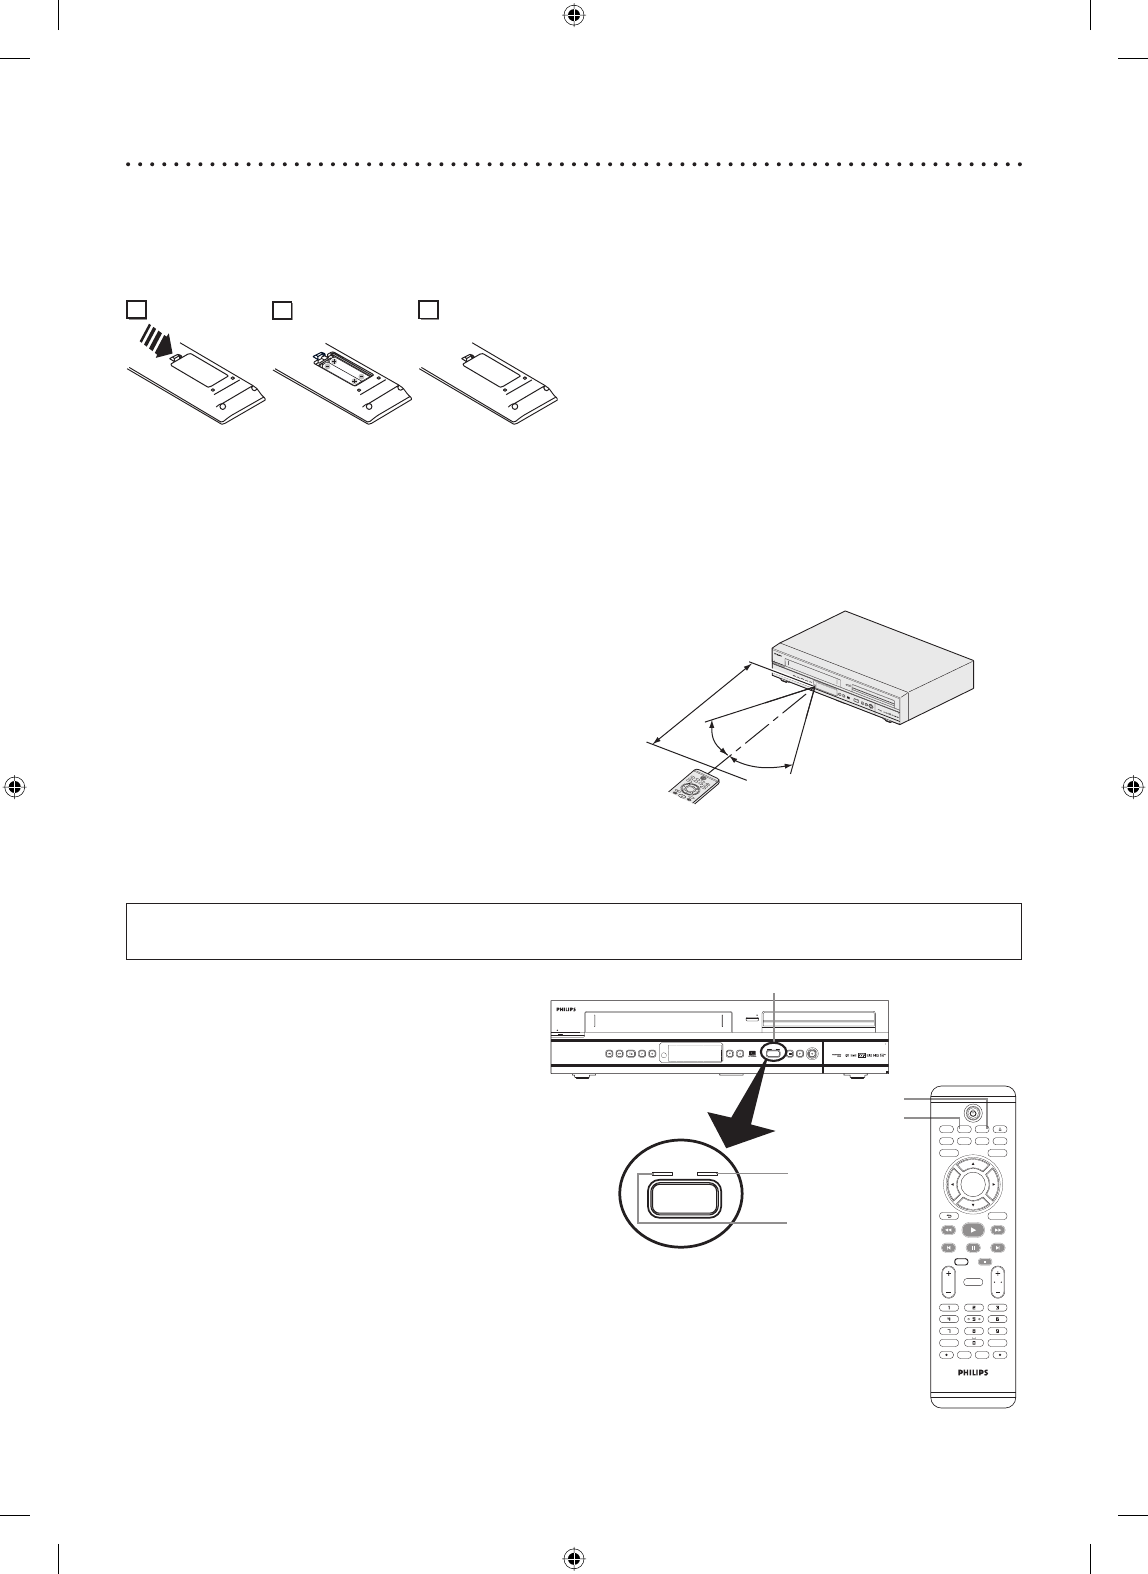
Installing batteries in the remote control
Install two “AAA” size batteries (supplied) matching the
polarity indicated inside battery compartment of the
remote control.
2
1
3
Note:
Incorrect use of batteries can result in hazards such as
leakage and bursting. Please observe the following:
• Do not mix new and old batteries together.
• Do not use different kinds of batteries together,
although they may look similar, different batteries may
have different voltages.
• Make sure that the plus and minus ends of each battery
match the indications in the battery compartment.
• Remove batteries from equipment that is not going to
be used for a month or more.
• When disposing of used batteries, please comply with
governmental regulations or environmental public
instruction’s rules that apply in your country or area.
• Do not recharge, short-circuit, heat, burn or
disassemble batteries.
Using a remote control
Keep in mind the following when using the remote
control:
• Make sure that there is no obstacle between the
remote control and the remote sensor on the unit.
• Remote operation may become unreliable if strong
sunlight or fluorescent light is shining on the remote
sensor of the unit.
• Remote control for different devices can interfere
with each other. Avoid using remote control for other
equipment located close to the unit.
• Replace the batteries when you notice a fall off in the
operating range of the remote control.
• The maximum operable ranges from the unit are as
follows.
- Line of sight: approx. 23 feet (7 m)
- Either side of the center:
approx. 16 feet (5 m) within 30°
- Above: approx. 16 feet (5 m) within 15°
- Below: approx. 10 feet (3 m) within 30°
D
V
D
R
E
C
O
R
D
E
R
4
H
E
A
D
H
I
-
F
I
S
T
E
R
E
O
O
N
E
T
O
U
C
H
R
E
C
O
R
D
I
N
G
•
L
O
N
G
P
L
A
Y
D
V
D
R
3
4
3
5
V
D
V
D
R
E
C
O
R
D
E
R
/
V
C
R
S
T
A
N
D
B
Y
-
O
N
R
E
W
F
.
F
W
D
P
L
A
Y
P
L
A
Y
R
E
C
S
T
O
P
/
E
J
E
C
T
S
T
O
P
R
E
C
C
H
A
N
N
E
L
S
O
U
R
C
E
V
C
R
D
V
D
O
P
E
N
O
P
E
N
/
C
L
O
S
E
30˚
30˚
T
V
/
V
I
D
E
O
V
C
R
D
V
D
S
E
A
R
C
H
A
U
D
I
O
T
I
T
L
E
R
A
P
I
D
P
L
A
Y
O
P
E
N
/
C
L
O
S
E
S
E
T
U
P
D
I
S
C
M
E
N
U
D
I
S
P
L
A
Y
B
A
C
K
O
K
R
E
W
F
F
W
P
L
A
Y
P
R
E
V
P
A
U
S
E
N
E
X
T
C
O
M
M
E
R
C
I
A
L
S
K
I
P
C
H
T
V
V
O
L
.
@
/
:
A
B
C
G
H
I
J
K
L
P
Q
R
S
D
I
R
E
C
T
D
U
B
B
I
N
G
S
T
O
P
Within about
23 feet (7 m)
Remote
control
The VCR/DVD recorder switching
Because this product is a combination of a VCR and a DVD recorder, you must select first which component you wish
to operate with [SOURCE].
VCR MODE
Press [VCR] on the remote control.
(Verify that the VCR indicator is lit.)
DVD MODE
Press [DVD] on the remote control.
(Verify that the DVD indicator is lit.)
Note:
• Pressing only [SOURCE] on the front panel DOES
NOT switch the mode of the remote control. You
MUST select the correct mode on the remote
control.
• You cannot switch to another mode (DVD or VCR)
during in the timer-standby mode.
• Pressing [DVD REC I] or [VCR REC I] on the
remote control switches immediately its respective
mode so that you can start recording directly on the
appropriate media.
SOURCE
VCR DVD
DVD RECORDER
4 HEAD HI-FI STEREO
ONE TOUCH RECORDING • LONG PLAY
DVDR 3435V DVD RECORDER / VCR
STANDBY-ON
REW F.FW D PLAY PLAYRECSTOP/EJECT STOP
REC
CHANNEL
SOURCE
VCR DVD
OPEN
OPEN/CLOSE
TV/VIDEO VCR DVD
SEARCH AUDIO TITLE RAPID PLAY
OPEN/CLOSE
SETUPDISC MENU
DISPLAY
BACK
OK
REW FFW
PLAY
PREV PAUSE NEXT
COMMERCIAL
SKIP
CH
TV
VOL
CLEAR REC MODE
.@/: DEFABC
GHI MNOJKL
PQRS WXYZTUV
VCR Plus
+
TIMER
TIMER
SET
VCR REC DVD REC
DVD RECORDER
DIRECT
DUBBING
STOP
SOURCE button
DVD indicator
VCR indicator
DVD button
VCR button
E9A90UD_EN.indb 10E9A90UD_EN.indb 10 6/12/2006 4:20:59 PM6/12/2006 4:20:59 PM


