WT. (Lbs.)
WT. (Lbs.)
WT. (Lbs.)
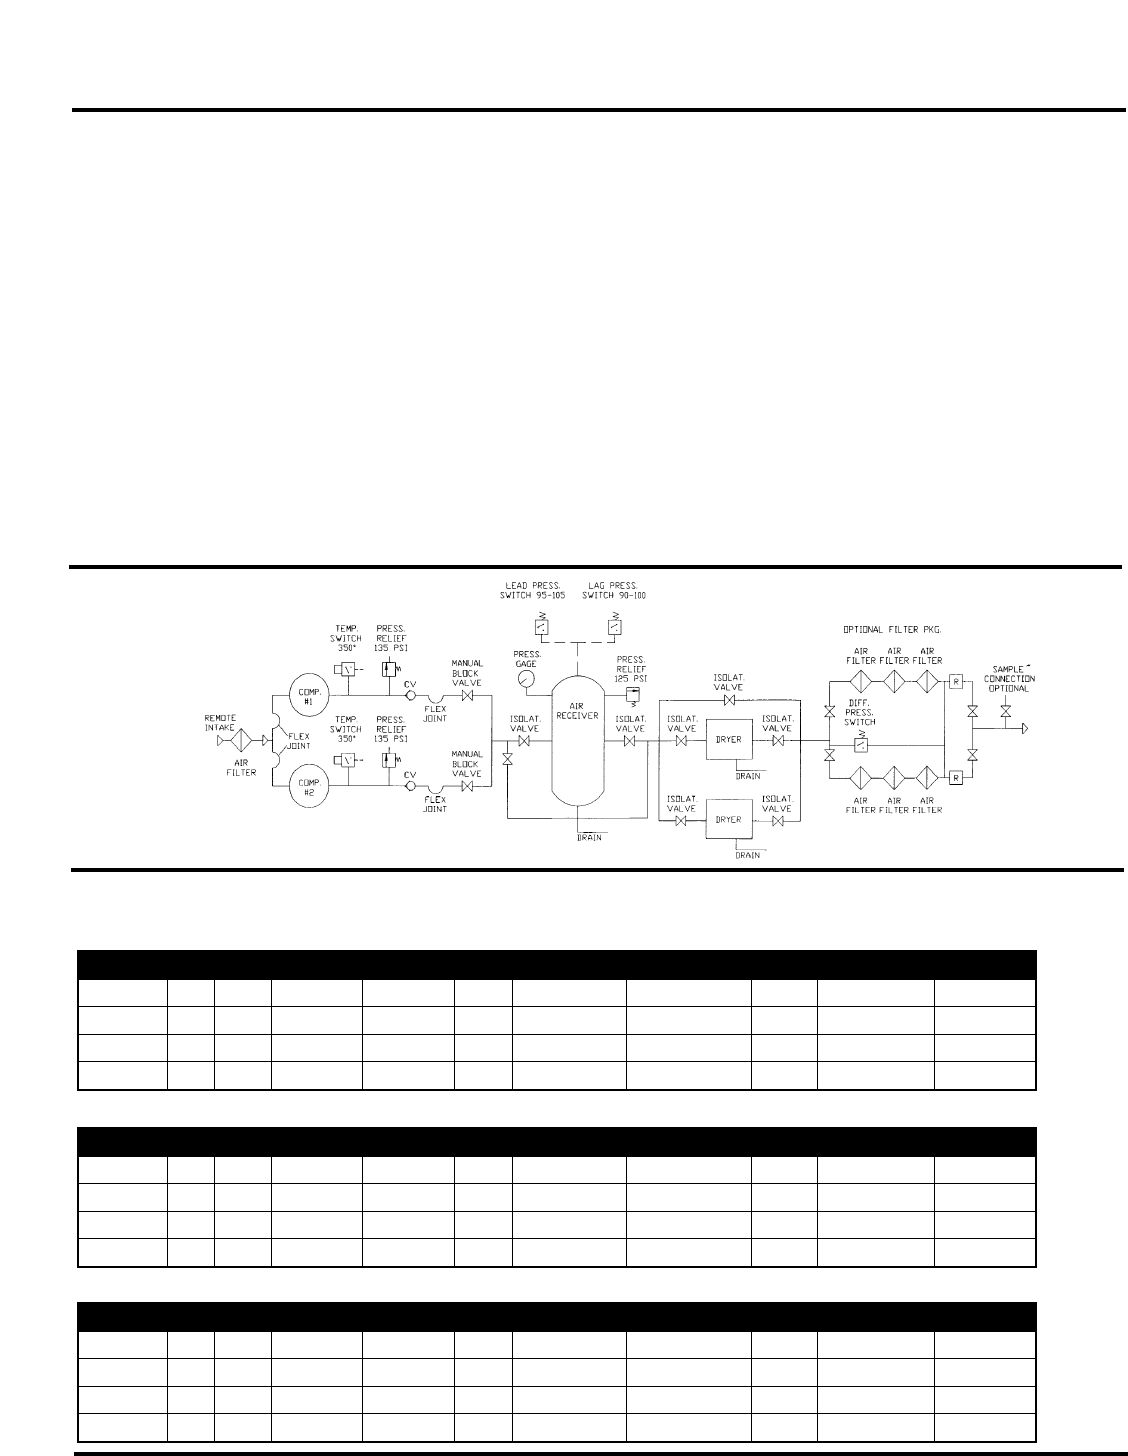
Medical
Air Schematic
BEFORE START UP
1. Make sure all safety warnings, labels
and instructions have been read and
understood before continuing.
2. Remove any shipping materials,
brackets, etc.
3. Confirm that the electric power
source and ground have been firmly
connected.
4. Be sure all pressure connections are
tight.
5. Check to be certain all safety relief
valves, etc., are correctly installed.
6. Check that all fuses, circuit breakers,
etc., are the proper size.
7. Make sure the inlet filter is properly
installed.
8. Confirm that the drain valve is closed.
9. Visually check the rotation of the
compressor pump. If the rotation is
incorrect, have a qualified electrician
correct the motor wiring.
START-UP AND OPERATION
1. Follow all the procedures under
“Before start-up” before attempting
operation of the compressor.
2. Switch the electric source breaker
on.
3. Both dryers should be plugged in
and set at the on position.
4. Dewpoint & CO Monitors should be
on and the sampling valves open.
Calibrate Dewpoint and CO per
enclosed manufacturer’s
instructions.
5. Ensure water lines are properly
installed to water-cooled
aftercoolers. Turn on water.
IMPORTANT: This is not a standard
option. Check to see if water-
cooled aftercoolers were provided.
6. Compressor unit isolation valves are
preset at the factory in the open
position except for tank by-pass
which must remain closed during
normal operation.
7. Dryer and filter isolation valves:
Valves should be open to one dryer
and one filter bank.
8. Close valve leading to the Medical
Air System from receiver on the
compressor unit.
a. Turn both fusible/breaker
disconnects to the on position.
Low pressure alarm will sound.
Silence the alarm by pushing alarm
acknowledge button.
b. Jog each compressor in the manual
position on the selector switch to
check for rotation. (Clockwise if