17
4
Setting the time and date manually
2
3
1
5
7
8
VCR
Preparation:
• Turn ON the TV and set to the AV input mode.
•
Press VCR to select the VCR mode. (The VCR indicator will light.)
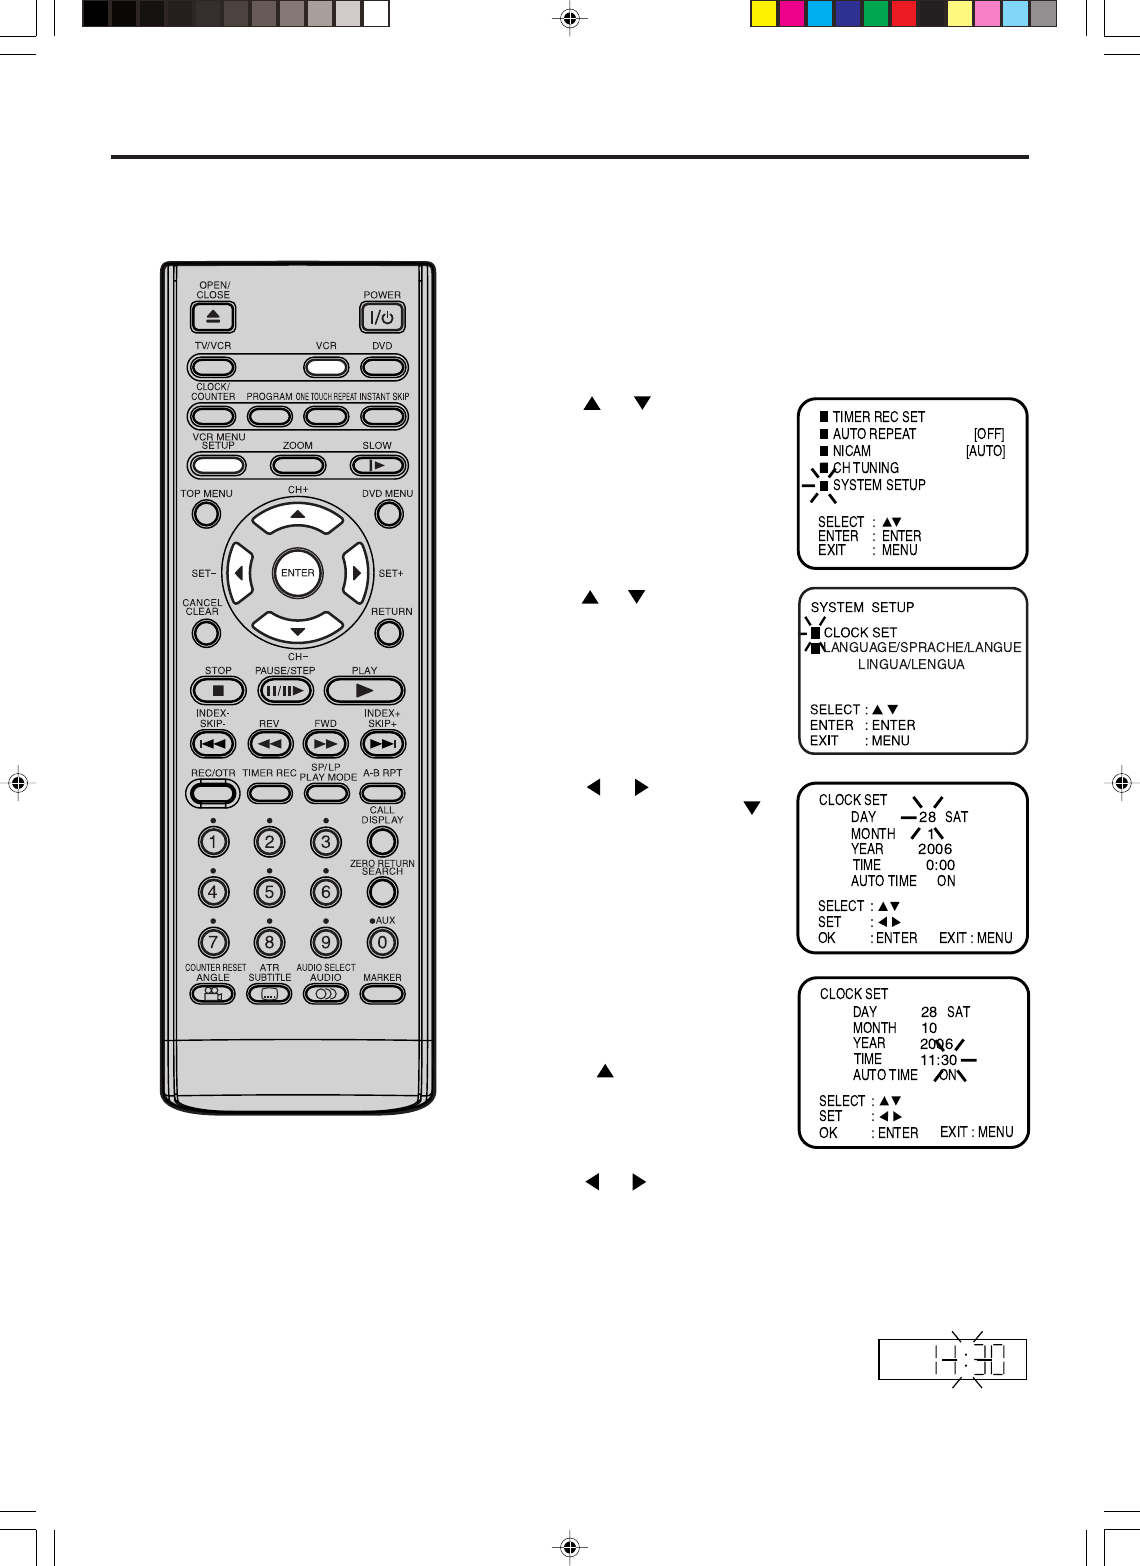
Example: Setting the clock to "11:30" October, 28 (SAT), 2006.
Press VCR MENU. The VCR menu screen will appear.
Press
or to select SYS-
TEM SETUP, then press EN-
TER.
Press
or to select CLOCK
SET, then press ENTER.
Press
or repeatedly until
“28” appears. Then press .
Set the month, year, hour and
minute as in step 4.
Then press ENTER.
• In case of an erroneous input,
press to go back to previ-
ous step and enter again.
The clock will begin operation.
You must set the date and time
manually for timer recordings if
Auto setup process did not set
them correctly.
Notes:
• In case of a power failure, the clock will
continue to operate for another 30 min-
utes with quartz-controlled precision.
To indicate that the power failure has
lasted for an excessive period of time "-
-:--" will appear on the display. In this
case readjust time and date.
• The AUTO TIME function adjusts the
clock only if the error is within 5
minutes.
• The VCR automatically adjusts the
clock setting for Daylight Saving Time
once you set AUTO TIME to ON.
Press VCR MENU repeatedly until the TV picture appears on
the screen.
6
Press or to select AUTO TIME ON or OFF.
The VCR automatically corrects the clock setting every hour
once you set AUTO TIME to ON.
2J50101A [EN] P14-17 27/2/06, 5:39 PM17
