9. Repair
9.1 General
This section describes the repairs that may be per-
formed on the air heater Air Top 2000 S after it has
been removed from the vehicle.
Any further disassembly will void the warranty.
For reassembly, only components of the proper spare
parts and kits are to be used.
9.1.1 Work on Components after Disassembly
CAUTION
All gaskets located between disassembled components
as well as the exhaust outlet seal must always be re-
placed and discarded.
9.1.1.1 Cleaning
All components disassembled must be cleaned with
cleaning spirit and subsequently dried with press-
urized air.
All sealing compound must be carefully removed
from components using a suitable tool.
9.1.1.2 Visual Inspection
Examine all components for damages (cracks, defor-
mation, wear, etc.) and replace as necessary.
Examine connectors and wiring for corrosion, loose
contacts, wrong crimping, etc. and repair as necess-
ary.
Check terminals for corrosion and contacts for
security. Repair as required.
9.1.2 Incorporation of Modifications
NOTE
The continous design improvement of the heaters is in-
tended to optimise their serviceability avoiding failures or
malfunctions.
In general equipment in service may be retrofitted with
available modification kits. In the following that modifica-
tion which may be incorporated easily during maintenace:
installation of an external temperature sensor for
optimising temperature control of the Air Top 2000 S
(see 9.1.2.1).
9.1.2.1 Installation of an External Temperature
Sensor
General
Procedure
1. Select adequate installation location for external
temperature sensor.
IMPORTANT
Temperature sensor should not be in the direct
line of heated air flow or located in the vicinity of
heating sources (e.g. vehicle’s own heater).
The sensor is to be installed at medium height
in the vehicle interior on surfaces that are as
vertical as possible.
The installation location should not be exposed to
direct sun light.
Do not mount temperature sensor behind curtains or
the like.
2. Mount external temperature sensor and route cable
to control unit.
3. Connect connector X9 and install cover.
4. Perform test run and check control behaviour.
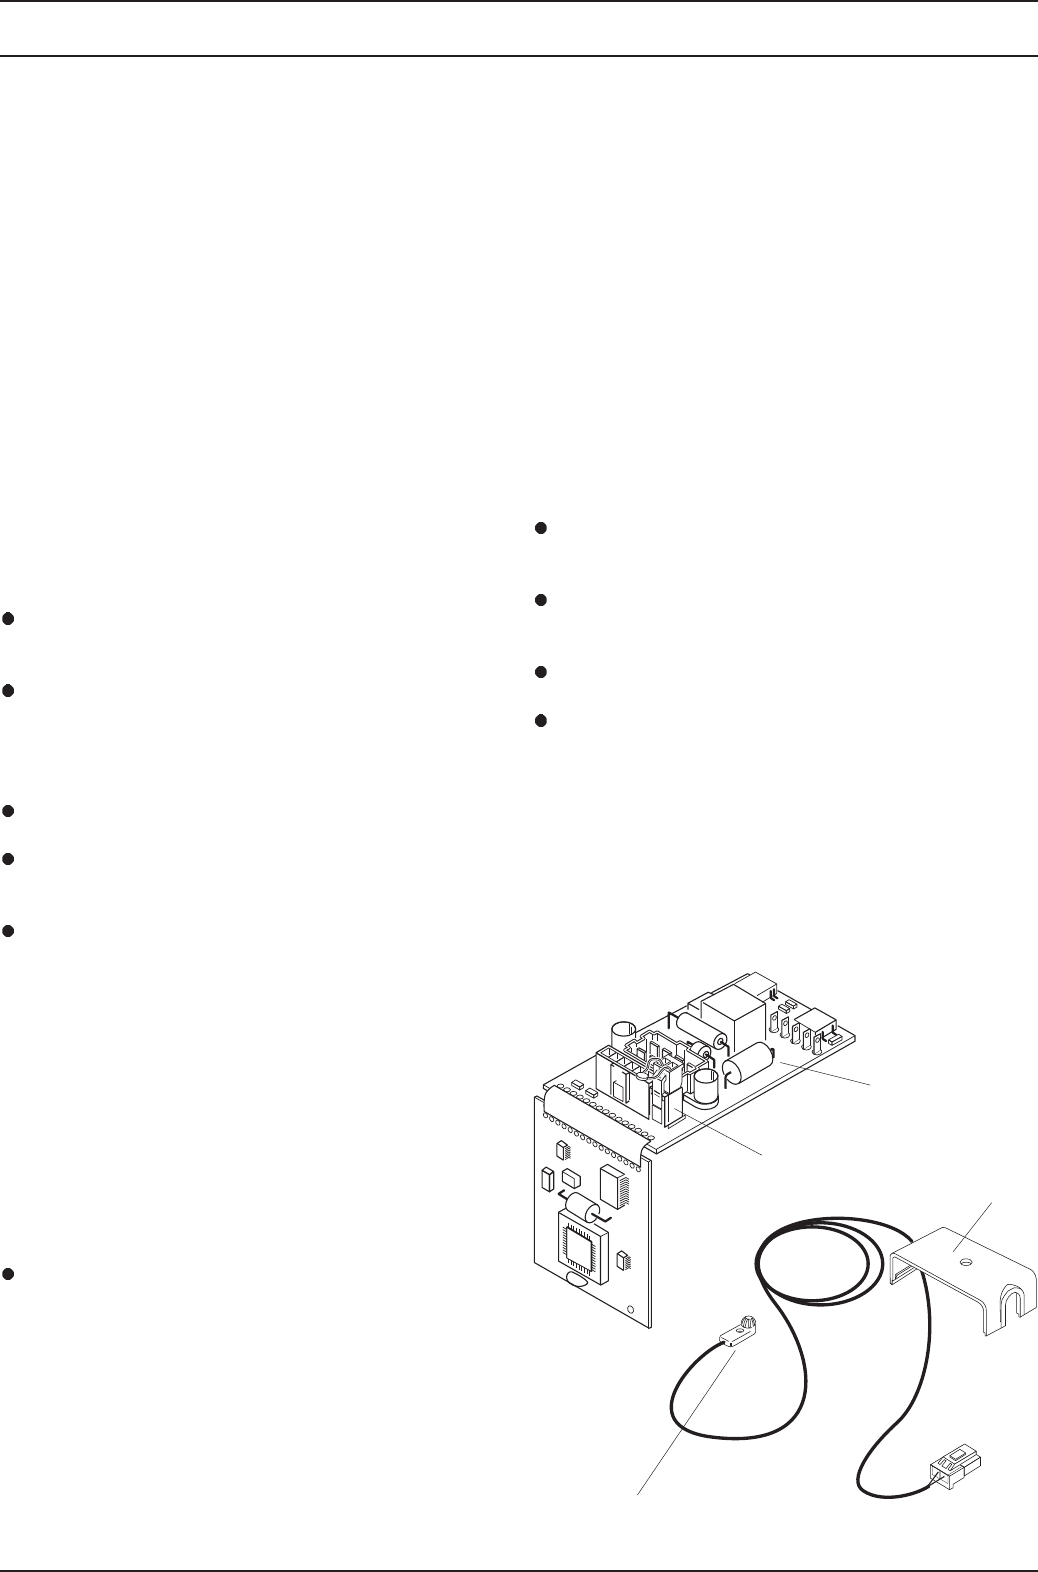
901
External
Temperature Sensor
Connector X9
Control Unit
Cover
X9
Air Top 2000 S
9 Repair
The heater can control the required temperature
perfectly if its temperature sensor is exposed to the air of
the main area of the vehicle. In certain circumstances,
this is not always possible using the temperature sensor
integrated in the control unit due to the installation
circumstances (addition of fresh air). In this case proper
temperature control can be ensured using an external
temperature sensor fitted in the appropriate area.


