8
Universal Adaptor Kit
An accessory adapter kit is provided with BD200MT. The
adapter is
compatible with many manufacturers’ accessories,
but if unsure, confirm
with the specific manufacturer that their
accessory is compatible.
CAUTION: To avoid injury, do not use any accessory
for an application where the adaptor may fail to hold the
accessory.
CAUTION: Read and follow all manufacturers’ safety
warnings for any accessories used with this tool.
CAUTION: To avoid injury, ensure adapter and
accessory are securely tightened.
CAUTION: Do not use this adaptor with Black and
Decker accessories. Attach Black and Decker accessories
with the tool-free release (G) according to the instructions in
this instruction manual.
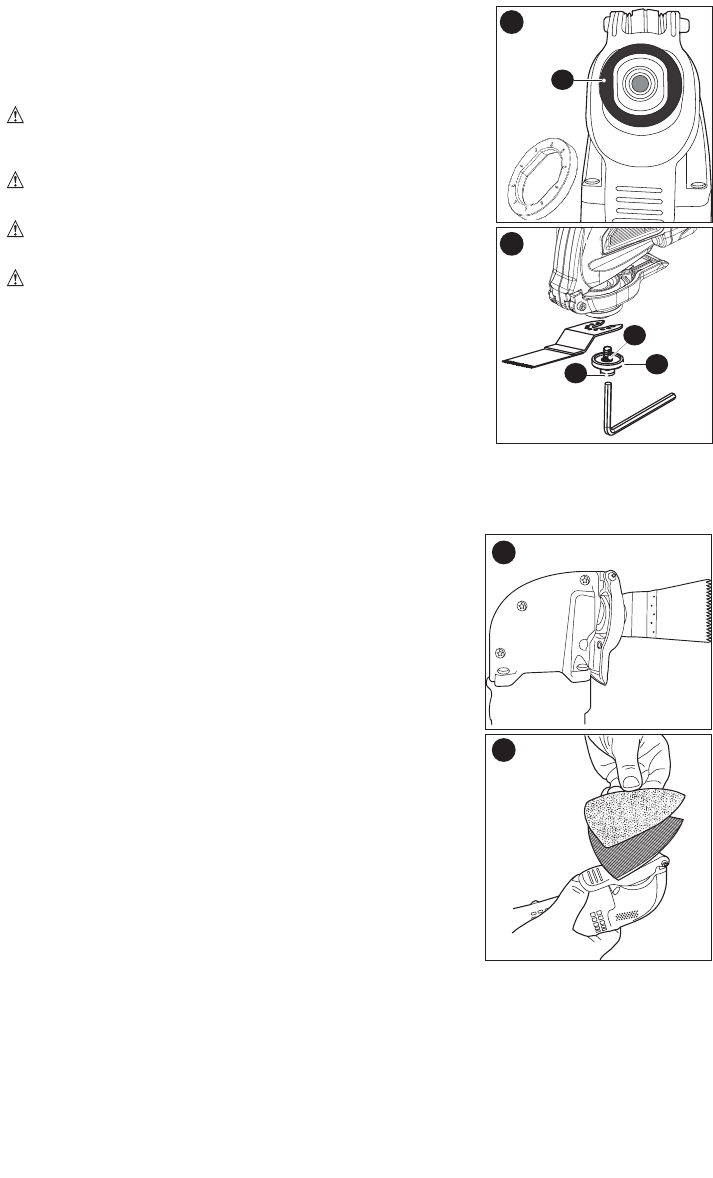
•Toattach,placeadaptorplate(H)ontotheoscillatingtool
attachment with protrusions facing up as shown in Figure 4.
•Placeaccessoryontopofadaptorplateandfastenwiththe
bolt (E), press board (I) and o-ring (J). Then, tighten with the
hexwrenchasshowninFigure 5.
•Toremove,loosentheboltandwasherwiththehexwrench,thenremovethe
accessory and adapter.
Installing/Removing Accessories (BD200TMT
& BD200MT)
•Someaccessories,suchasscrapersandbladescanbe
mounted at an angle if required as shown in Figure 6.
•Atriangleshapedbase,orplaten,usesahookandloop
adhesion system to attach the sanding sheets.
•Cleananyresidualdebrisfromthetoolshaftandthe
accessory holder.
•Positiontheaccessorysotheworkingedgeisaway
from the tool as shown in Figure 7.
•Placethesandingplatenonthefrontofthe
oscillating tool, ensuring the accessory fully engages
the pins as described under “Assembly.”
•Aligntheedgesonthesandingsheet,withtheedge
of the sanding platen and press the sanding sheet
onto the platen as shown in Figure 7.
•Firmlypressthebasewiththesandingsheet
attached against a flat surface and briefly switch the
tool on. This provides for good adhesion between
the platen and the sanding sheet and also helps to
prevent premature wear.
•Whenthetipofthesandingsheetbecomesworn,
detach the sheet from the platen, rotate and reapply
as shown in Figure 7.
6
7
H
Protrusion
4
5
E
I
J


