4
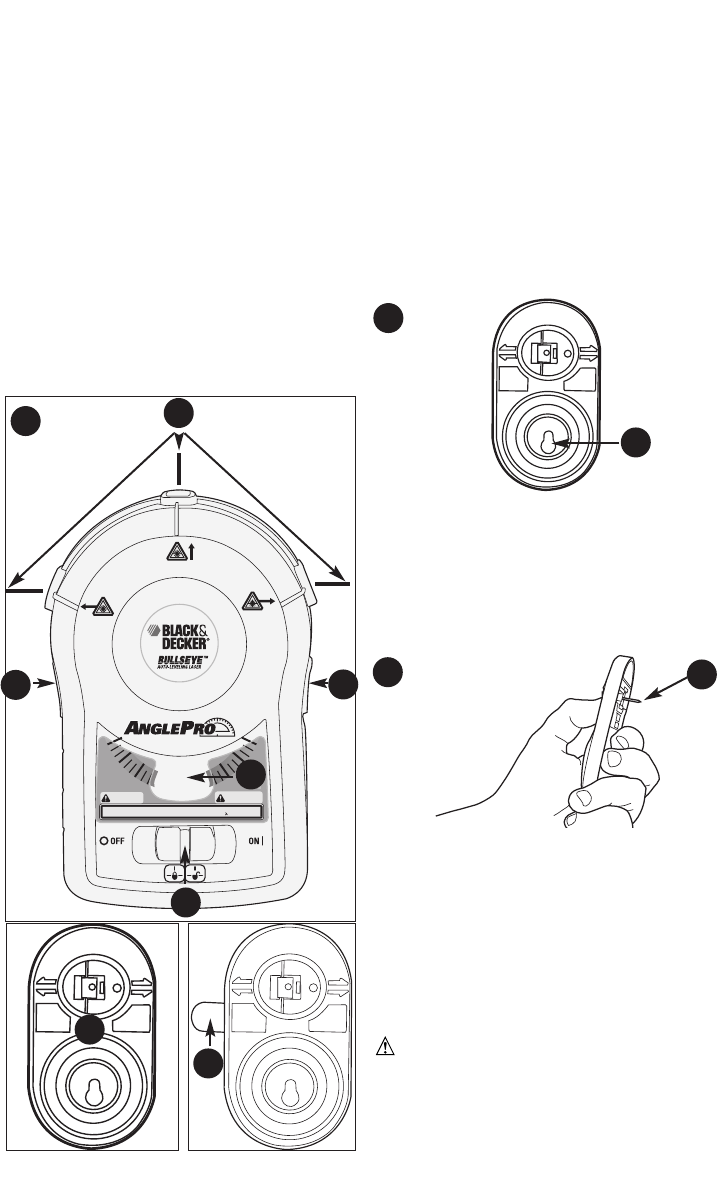
Hanging on a wall using a screw
-figure C
The laser unit can be hung on a wall with a
screw, using the keyhole opening (9) in the
wall mounting attachment.
• Place the keyhole opening over the head
of the screw and make sure that the
attachment is seated into the narrow
opening of the keyhole.
• Tighten the screw.
• Align the circular pocket on the back of the
laser with the magnetic circle on the front
of the wall attachment.
• Make sure that the unit is seated firmly,
and is secure on the wall.
Hanging on drywall surfaces
only - figure D
The laser unit can be hung on drywall,
using the drywall pin (10) in the wall
mounting attachment.
• To press pin into drywall, first expose pin
by rotating pin base from opposite side
(fig D).
• While maintaining pressure on pin base,
insert pin straight and seat firmly against
drywall surface.
• The drywall pin should always be pushed
in by hand and never driven by a hammer.
• To remove drywall pin from the wall, pull
out straight.
• Align the circular pocket on the back of the
laser with the magnetic circle on the front
of the wall attachment.
• Make sure that the unit is seated firmly,
and is secure on the wall.
CAUTION: Pin is sharp and should be
handled with care. Always be sure drywall
pin is closed when not in use.
NOTE: The pin is only for use on drywall
NOT other surfaces including plaster.
C
D
Features - figure B
1.) On / Off Actuator
2.) Protractor
3.) Laser Direction Button - (Left
Projection)
4.) Laser Direction Button - (Right
Projection)
5.) Self-Leveling Laser Lines
6.) Wall Mounting Attachment -(drywall
pin and keyhole)
7.) Self Adhesive Strip
LASER RADIATION. DO NOT STARE INTO BEAM. CLASS 2 LASER
PRODUCT PER IEC60825+A1+A2:2007 Pmax
<
2.2mW, =630-675nm
RADIACIÓN
LÁSER. NO
MIRE FIJAMENTE
HACIA EL RAYO.
PRODUCTO LÁSER DE
CLASE 2.
CAUTION ATENCIÓN
1
4
2
3
5
B
6
7
9
10


