


9
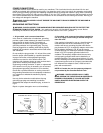
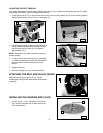
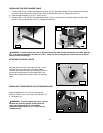
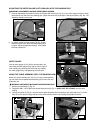
2. Align the flat of the drive shaft with the set screw (A)
Fig. 6 in the hub of the plate (B) and install the
sanding disc plate (B) on the drive shaft. Slide the
plate (B) on the shaft (C) until the plate surface and
the shaft are flush.
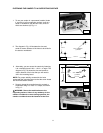
3. Use the supplied 1/8 in. hex wrench (A) Fig. 7 to
tighten the set screw, located in the slot in the back
of belt and pulley guard.
Note: Do not allow the shaft to extend past the surface
of the plate.
Fig. 6
Fig. 7
A
B
C
A
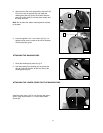
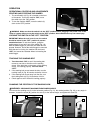
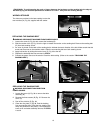
1. Clean the sanding disc plate (A) Fig. 8.
2. Peel the backing from sanding disc and press the
disc (B) firmly into position all the way around the
sanding plate (Fig. 8).
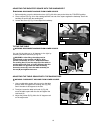
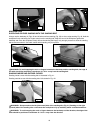
Install the lower cover (A) Fig. 9 on the belt and pulley
guard, using the three M4 x .7 x 12mm sheet metal
screws (B).
ATTACHING THE SANDING DISC
B
A
Fig. 8
ATTACHING THE LOWER COVER FOR THE SANDING DISC
B
A
Fig. 9