


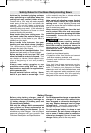
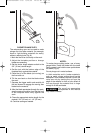
1. Securely clamp the work.
2. Mark the line of cut and grasp the tool with
one hand on the handle and the other
placed on the insulated rubber boot over
the front housing.
Always operate the saw with
the insulated boot on the front
housing. If you saw into a blind area where
live wiring exists, you may be shocked or
electrocuted.
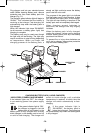
3. Keep the saw footplate firmly against the
work to minimize counter-force (jumping)
and vibration.
4. Squeeze the trigger to start the tool. Let the
saw reach full speed before starting the cut.
Guide the saw so that the blade will move
along the marked line.
SAWING TIPS
Following a few simple tips will reduce the
wear on the workpiece, the tool and the
operator.
1. Blades cut on the draw or back stroke. On
fine work, such as paneling, fiberglass, etc.,
place the good side of workpiece facing
down.
2. Use the correct saw blade for the material
being cut and keep extra blades on hand to
use when others become dull. Replace
cracked or bent blades immediately.
3. Select the appropriate stroke length and
footplate projection settings, as well as the
appropriate cutting speed.
4. To reduce the risk of injury, be sure the
blade always extends beyond the footplate
and work throughout the stroke. Blades
may shatter if the front on the blade hits the
work and/or the footplate.
5. When cutting metal:
- Use the 3/4” (19 mm) stroke length to
achieve (less vibration, less heat, and
longer blade life).
- Apply a lubricant for easier, smoother,
faster cutting and longer blade life.
- For non-ferrous metals, aluminum,
bronze or brass, use a stick wax on the
blade.
- For ferrous metals, iron and steel, use
machine or cutting oil along the surface
to be cut.
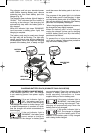
6. When cutting thin metal, "sandwich" the
material between two pieces of scrap wood.
Clamp or put in a bench vise. One piece of
lumber on top of the metal can be used with
adequate clamping. Place your cut lines or
design on the wood. Use the 3/4" (19 mm)
stroke for reduced vibration in the material.
7.
Don’t force the cutting. Let the saw and
blade do the work.
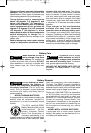
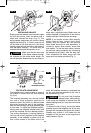
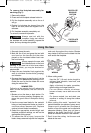
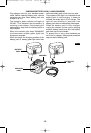
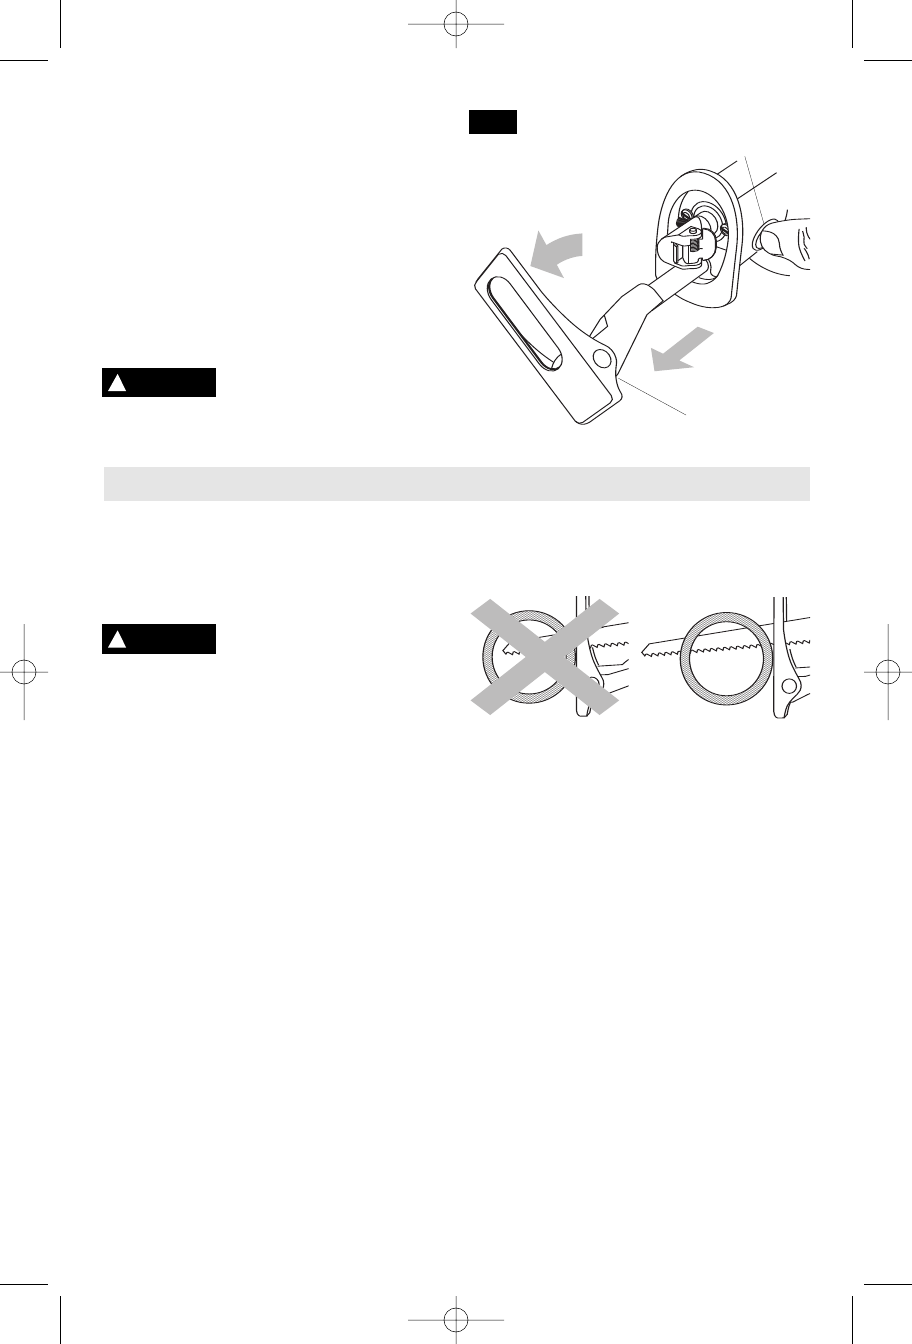
To remove the footplate assembly for
servicing (Fig. 7):
1. Remove the blade.
2. Press and hold footplate release button in.
3. Pull the footplate assembly out as far as it
will go.
4. Rotate it clockwise (as viewed from the
back of the saw) about 90 degrees until it
releases.
5. Pull footplate assembly completely out.
To re-insert, reverse this process.
Always use tool with the
footplate. Using tool without
the footplate will cause instability, expose the
blade, and may damage the spindle.
FIG. 7
!
WARNING
!
WARNING
Using the Saw
WRONG RIGHT
FOOTPLATE
RELEASE
BUTTON
FOOTPLATE
ASSEMBLY
-10-
BM 2610925947 6-05 6/10/05 10:35 AM Page 10