


1. The charger was designed to fast charge
the battery only when the battery temperature
is between 32˚F (0˚C) and 113˚F (45˚C). If the
battery pack is too hot or too cold, the charger
will not fast charge the battery. (This may
happen if the battery pack is hot from heavy
use). When the battery temperature returns to
between 32˚F (0˚C) and 113˚F (45˚C), the
charger will automatically begin charging.
2. A substantial drop in operating time per
charge may mean that the battery pack is
nearing the end of its life and should be replaced.
3. Remember to unplug charger during storage
period.
4. If battery does not charge properly:
a. Check for voltage at outlet by plugging in
some other electrical device.
b. Check to see if outlet is connected to a
light switch which turns power “off” when lights
are turned off.
c. Check battery pack terminals for dirt.
Clean with cotton swab and alcohol if
necessary.
d. If you still do not get proper charging,
take or send tool, battery pack and charger to
your local Bosch Service Center. See “Tools,
Electric” in the Yellow Pages for names and
addresses.
"<A2 Use of chargers or battery packs not
sold by Bosch will void the warranty.
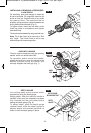
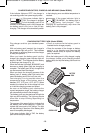
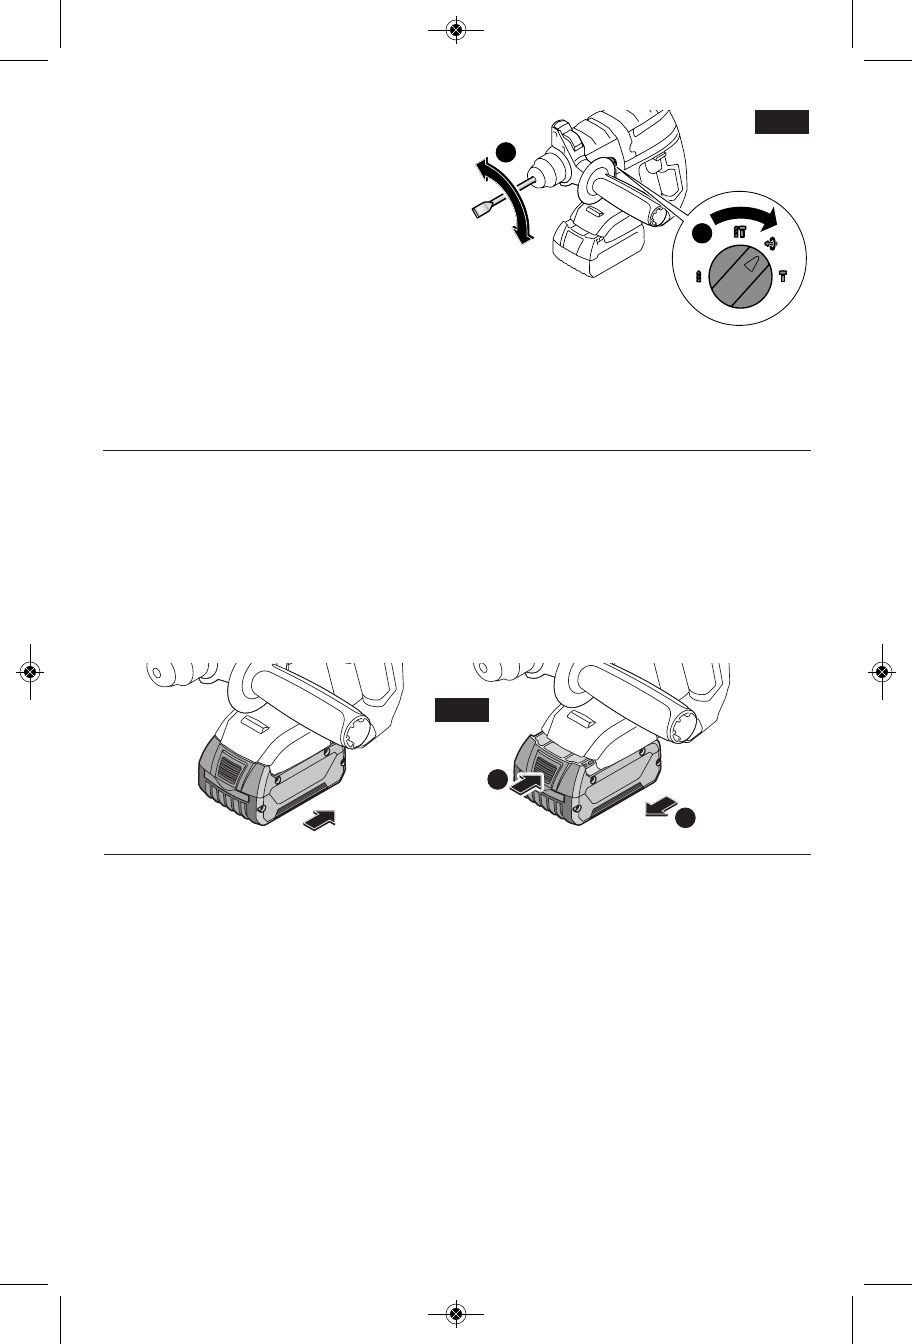
"&%'""% &"''%,$
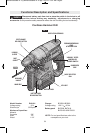
Set Forward/Reversing lever to the center (off
position). Slide charged battery pack into the
housing until the battery pack locks into
position (Fig. 12).
Your tool is equipped with a secondary locking
latch to prevent the battery pack from
completely falling out of the handle, should it
become loose due to vibration.
To remove the battery pack, press the battery
pack release button and slide the battery pack
forward.
Press the battery pack release button again
and slide the battery pack completely out of
tool housing (Fig. 12).
-13-
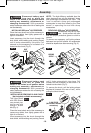
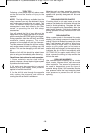
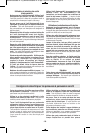
I)%# #J
Choose a position which is best suited for your
operation. The Vario-Lock position is intended
for use with chipping bits such as bull points,
spades, gouges, etc.
Turn the mode selector dial, to the “vario-
lock” setting. Next, rotate the locking sleeve,
along with the accessory, to the desired
position. Then turn the mode selector dial to
the “hammer only” setting and slightly turn
the locking sleeve to have it automatically
lock into a definite position (Fig. 11).
& $ ('
The tool has a internal pre-set slip clutch. The
output spindle will stop rotating if the accessory
binds and overloads the tool.
%
When the trigger is released it activates the
electrical brake to stop the chuck quickly. This
is especially useful in the repetitive driving and
removal of screws.
1
2
FIG. 12
!$#%'"'%""#'&
1
2
FIG. 11
BM 2610028048 12-12_BM 2610028048 12-12.qxp 12/5/12 10:27 AM Page 13