


(like a wooden pallet) a dry mat, or dry
carpet.
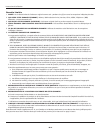
GENERAL SAFETY
• Read all manuals included
with this product carefully.
Be thoroughly familiar
with the controls and the
proper use of the equipment. Follow
all instructions.
• Only persons well acquainted with
these rules of safe operation should
be allowed to use the unit.
Do not
misuse
this product. Excessive exposure to
vibration, work in awkward positions,
and repetitive work motions can cause
injury to hands and arms. Stop using
any tool if discomfort, numbness,
tingling or pain occur, and consult a
physician.
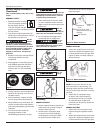
1. Read this instruction manual before
connecting this device to the
compressor.
2. Safety glasses or face shield, gloves
and a NIOSH approved respirator
must be worn during operation.
Always work in a well ventilated
area.
3. During operation, do not expose the
hands or skin directly in the line of
the blast nozzle.
4. After installation, inspect to make
sure all components seal properly.
5. Keep children away at all times. All
visitors must be kept a safe distance
and wear safety glasses, gloves and a
respirator.
6. Do not exceed the maximum
operating pressure of the
sandblasting equipment (125 psi).
MANUAL
Disconnect the sandblaster from the air
supply before changing accessories or
attempting to install, service, relocate
or perform any maintenance.
7. Check hoses and air lines for weak
or worn condition before each use.
Make sure all connections are secure
before use.
Do not
point
the sandblast gun at anyone or objects
other than the intended work object.
8. Do not depress the trigger when
connecting the air supply hose.
Do not
work
around oily rags or flammable liquids.
Sand striking metal can cause a spark
and create a fire or explosion.
Do not
spray
acids or caustics.
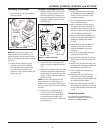
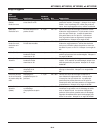
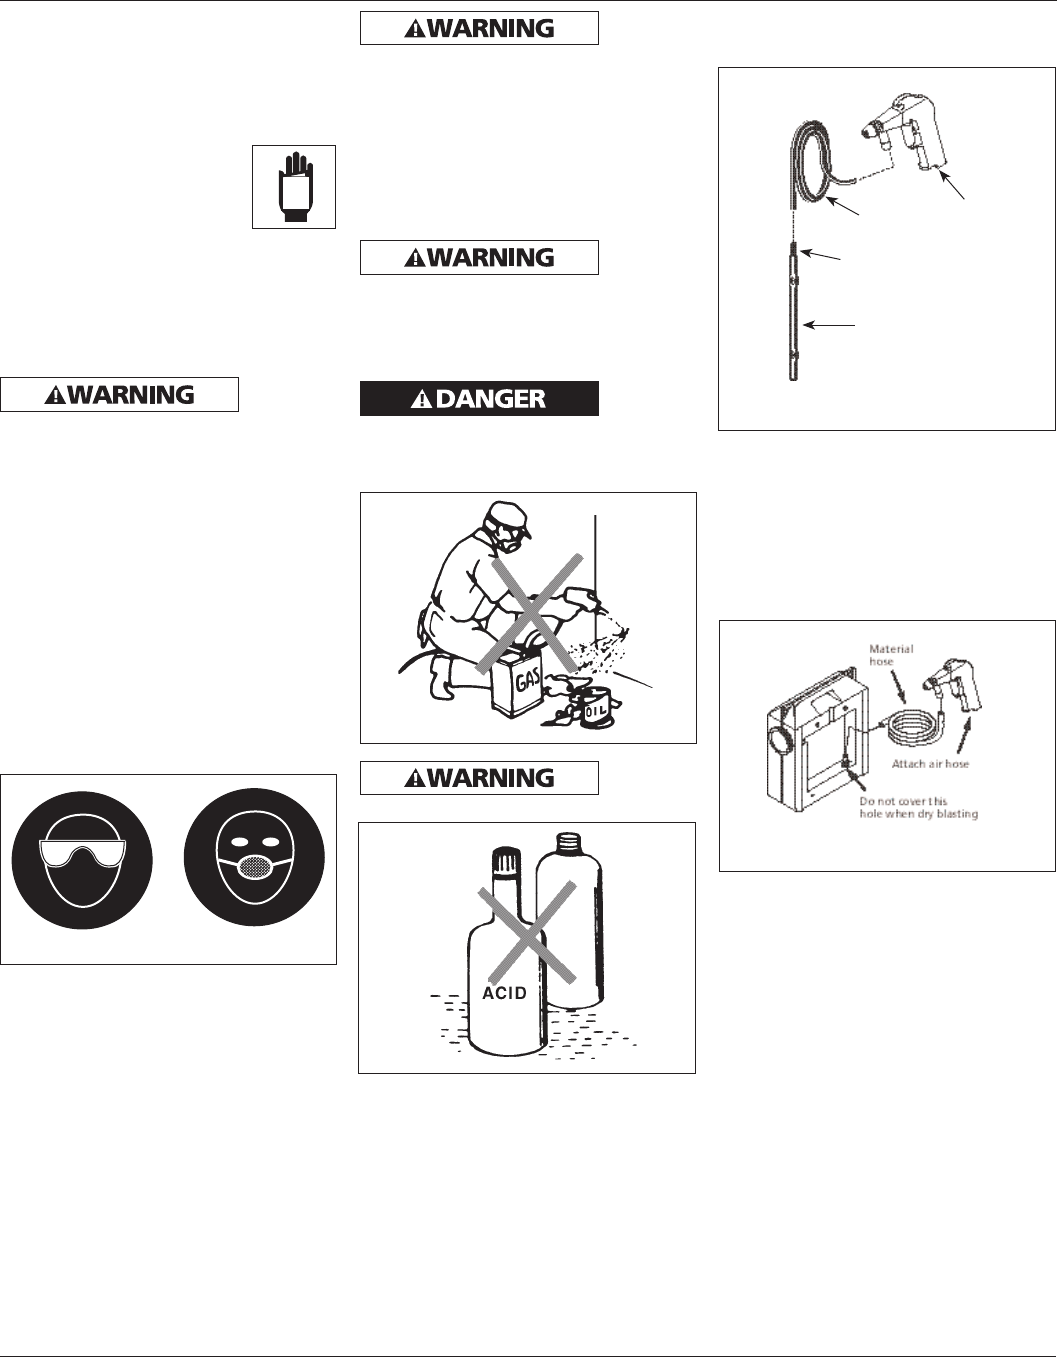
Assembly
MODEL AT122601
1. Attach material hose to the pick-up
tube. Place pick-up tube in bag of
medium. (See FIgure 4).
2. Attach the air compressor hose
to the air inlet (1/4 inch NPT(F))
at the bottom of the gun handle.
An optional quick coupler and
2
Operating Instructions
www.chpower.com
General Safety Information
(Continued)
connector can be used to attach the
hose to the gun.
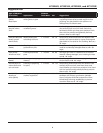
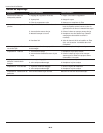
MODEL AT125102
1. Attach the material hose to the hose
connector. Attach the opposite end
of the material hose to the gun (See
Figure 5). Never use hose clamps to
secure the hose.
NOTE: Do not cover the hole in the
hose connector for dry blasting. For
spraying liquids, slip the material hose
fully on to the hose connector covering
the hole.
2. Attach the air compressor hose
to the air inlet (1/4 inch NPT(F))
at the bottom of the gun handle.
An optional quick coupler and
connector can be used to attach the
hose to the gun.
MODEL AT121002
1. Attach the hose connector to the
hopper using the supplied conduit
nut.
2. Attach the material hose to the hose
connector. Attach the opposite end
of the material hose to the gun (See
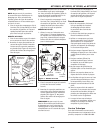
Figure 1
Figure 2
Figure 3
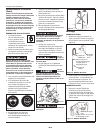
Figure 5 - Model AT125102
Figure 4 - Model AT122601
Attach air
hose
Material
hose
Do not cover outer
tube with hose for dry
blasting
Pick-up tube