


3
AT122601, AT125102, AT121002, and AT121102
www.chpower.com
Assembly (Continued)
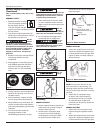
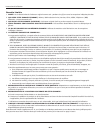
Figure 6). Never use hose clamps to
secure the hose.
NOTE: Do not cover the hole in the
hose connector for dry blasting. For
spraying liquids, slip the material hose
fully on to the hose connector covering
the hole.
3. Attach the air compressor hose
to the air inlet (1/4 inch NPT(F))
at the bottom of the gun handle.
An optional quick coupler and
connector can be used to attach the
hose to the gun.
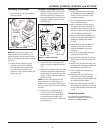
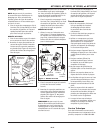
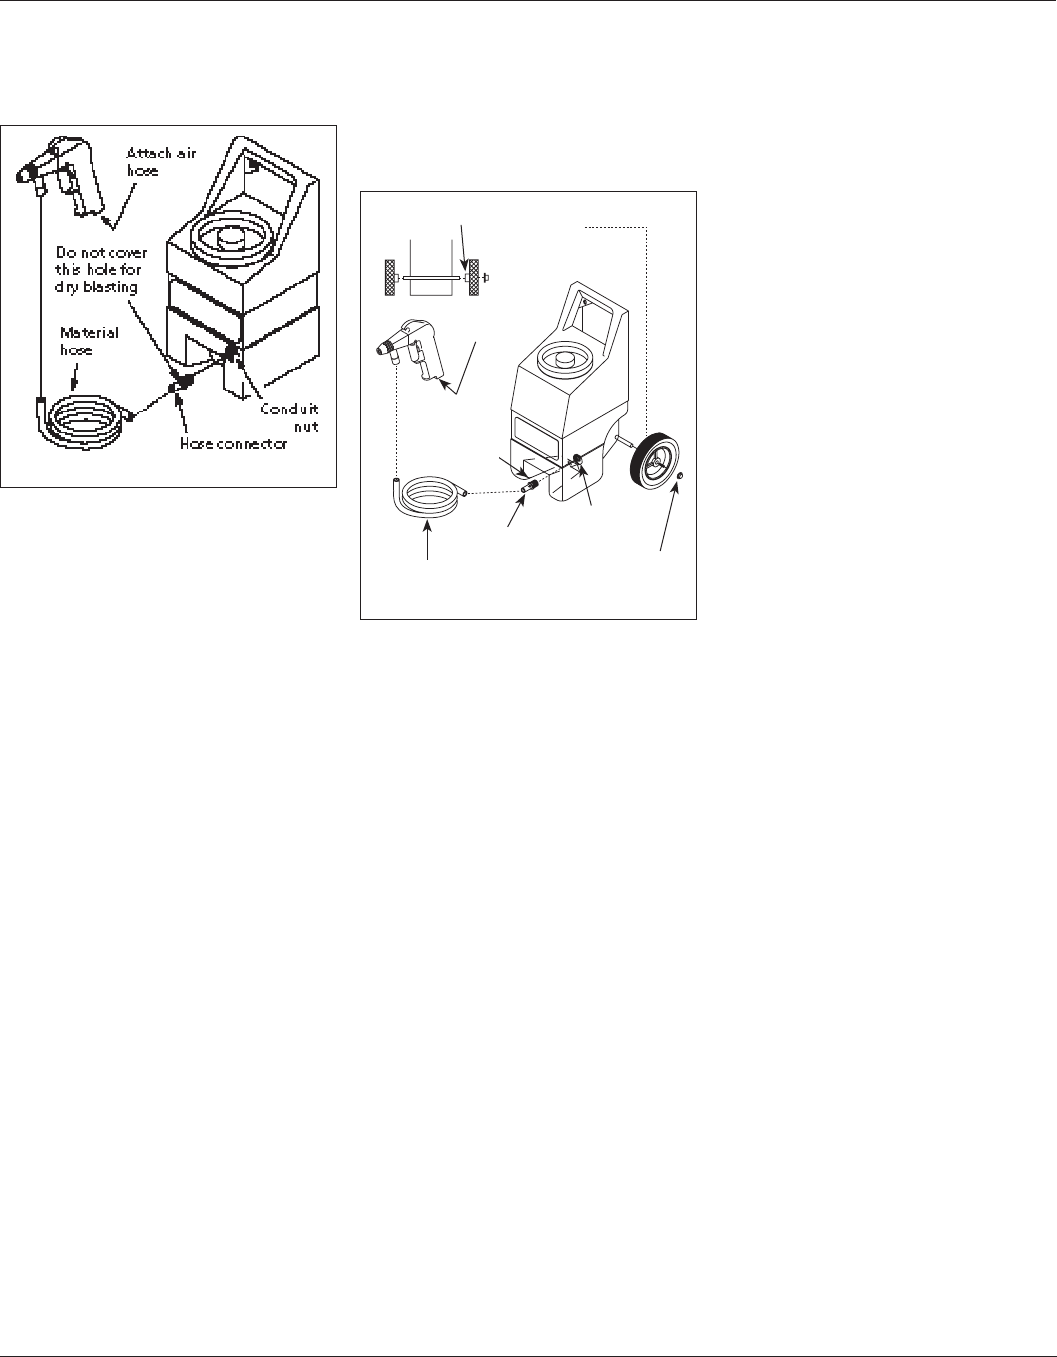
ASSEMBLY FOR MODEL AT121102
1. Slide the wheel onto the axle. (See
Figure 7). Lightly hammer on the
wheel cap to secure, making sure
the protruding hub on the wheel is
facing the hopper. Repeat for the
opposite side.
2. Attach the hose connector to the
hopper using the supplied conduit
nut.
3. Attach the material hose to the hose
connector. Attach the opposite end
of the material hose to the gun (See
Figure 7). Never use hose clamps to
secure the hose.
NOTE: Do not cover the hole in the
hose connector for dry blasting. For
spraying liquids, slip the material hose
fully on to the hose connector covering
the hole.
4. Attach the air compressor hose
to the air inlet (1/4 inch NPT(F))
at the bottom of the gun handle.
An optional quick coupler and
connector can be used to attach the
hose to the gun.
Operation
1. Locate the compressor as far away
as possible from the sandblasting
area to minimize the dust in the
compressor intake.
2. The air supply must be clean and
free of moisture and oil.
3. Use a compressor that can supply
enough air (See Specifications). A
compressor too small will cause air
pressure to drop and the sandblaster
will not operate satisfactorily.
4. Always trial test the sandblaster to
make sure the job is done without
damage by testing on a hidden
surface.
5. Always filter (screen) the abrasive
material to remove any caked
material and debris to prevent
clogging.
6. Do not try to spray thick liquids or
large grain size abrasives.
7. Use the lowest effective pressure on
soft surfaces to prevent pitting the
surface.
8. Liquids, such as soap and water, can
be sprayed for cleaning purposes on
automobiles, lawn chairs, etc.
9. Fill the hopper with abrasive to
about 3/4 full.
10. With air hose and material hose
connected, and wearing proper
safety equipment, aim sandblast gun
at surface and pull trigger.
11. Whenever the nozzle is removed
and cleaned or replaced, use a brush
to clean the threads and replace the
o-ring.
Technical Service
For information regarding the
operation or repair of this product,
please call 1-800-543-6400.
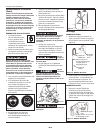
Figure 6 - Model AT121002
Figure 7 - Model AT121102
Protruding Hub
Attach Air
Hose
Material Hose
Hose
Connector
Conduit
Nut
Wheel Cap
Do not
cover this
hole when
dry blasting