


EMBRAGUE AJUSTABLE
Este taladro/destornillador cuenta con
15 configuraciones de embrague. La
torsión de salida aumentará a medida
que el anillo del embrague se rote de 1
a 8. La posición “drill” (taladro) traba
el embrague para permitir una
perforación para trabajos pesados y
para trabajar con el destornillador.
También permite cambiar las brocas
rápida y fácilmente en el portabroca
sin llave.
1 a 1
●
para atornillar tornillos
pequeños.
2 a 2
●
para atornillar tornillos en
materiales blandos o plásticos.
3 a 4 para atornillar tornillos en
maderas blandas.
4
●
a 5
●
para maderas medianas.
6 a 7
●
para atornillar tornillos en
maderas medianas/duras.
8 para atornillar tornillos en metales.
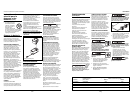
CÓMO INSERTAR LAS BROCAS
Mueva el botón de avance/retroceso
hacia la posición central “off”
(apagado). Retire la batería (Vea la
sección “Carga de la batería”) y gire el
aro del embrague hacia el símbolo de
broca del taladro. Gire el manguito del
portabroca hacia la izquierda
(mirándolo desde el extremo del
portabroca), y abra el portabroca
aproximadamente hasta que alcance el
diámetro de la broca del taladro.
Coloque una broca limpia hasta las
estrías de la broca para brocas
pequeñas, o hasta donde llegue para
brocas grandes. Cierre el portabroca
girando el manguito hacia la derecha y
ajuste a mano en forma segura.
No
use la
corriente del taladro para aflojar ni
ajustar la broca mientras sostiene el
portabroca. Al girar, el portabroca
podrá causar quemaduras por fricción
o lesiones en la mano.
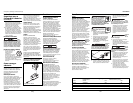
CÓMO QUITAR EL PORTABROCA
Gire el aro del embrague hasta el
símbolo de la broca del taladro y abra
el portabroca por completo. Gire el
tornillo con rosca a la izquierda dentro
del portabroca girando hacia la
derecha y quítelo. Inserte el brazo
corto de una llave hexagonal de 3/8” y
cierre las mordazas sobre las partes
planas de la llave.
Dé un giro enérgico al brazo largo de
la llave hacia la izquierda, retire la
llave y desenrosque el portabroca del
vástago.
CÓMO INSTALAR EL
PORTABROCA
Para instalar el portabroca, haga el
procedimiento detallado en “Cómo
quitar el portabroca” a la inversa.
Siempre mantenga las roscas del
vástago, las roscas del portabroca y el
tornillo sujetador libre de residuos.
PERFORACIÓN GENERAL
El extremo delantero del
taladro/destornillador puede
conducir corriente si la
herramienta perfora cables con
corriente dentro de la pared. PARA
EVITAR CHOQUES ELÉCTRICOS
ACCIDENTALES, SOSTENGA EL
TALADRO/DESTORNILLADOR
ÚNICAMENTE POR EL MANGO DE
SUJECIÓN SUAVE.
Se deberán usar gafas de
seguridad durante la
operación.
1. Ajuste el anillo de torsión para la
operación de perforado y ajuste el
selector de velocidad en la velocidad
adecuada. (Serie DG1500 solamente)
2. Asegúrese de que la broca del
taladro está fijada en el portabroca
en forma segura.
3. Configure el BOTÓN DE
AVANCE/RETROCESO para rotación
hacia la derecha.
Asegúrese de que el trabajo esté sujeto
en forma segura en una prensa de
tornillo o mordaza antes de comenzar
la operación de perforado. El trabajo
que está flojo puede girar y causar
lesiones corporales.
4. Ubique el centro exacto del orificio
a ser perforado y usando un
punzón, haga una pequeña muesca
en el trabajo.
5. Coloque la punta de la broca del
taladro en la muesca hecha con el
punzón, sostenga el taladro en
ángulo recto con respecto al trabajo
y encienda el motor.
El
aplicar
demasiada presión puede causar que la
broca se recaliente o se quiebre, lo cual
podría provocar lesiones personales o
que se dañen las brocas.
Aplique presión pareja y constante para
que la broca continúe cortando.
Demasiada poca presión evitará que la
broca corte. Eventualmente, la fricción
excesiva creada por el deslizamiento
sobre la superficie desafilará los bordes
cortantes.
Siempre
esté
atento y contrarreste la acción
giratoria del taladro.
6. Si el taladro se ahoga o se atasca en
el orificio, suelte el gatillo
inmediatamente, retire del trabajo
la broca de perforación y determine
la causa del ahogo o el atasco.
No
apriete y
suelte el gatillo en un intento por
liberar un taladro ahogado o atascado.
Esto puede dañar el motor.
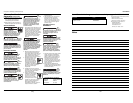
Tamaños sugeridos de orificios para tornillos para madera
Diámetro de la Pilot Drill Diameter
Tamaño broca para Madera Madera
del tornillo orif. de paso blanda dura
#6 5/32 (.156) 1/16 (.062) 5/64 (.078)
#8 11/64 (.172) 5/64 (.078) 3/32 (.093)
#10 13/64 (.203) 3/32 (.093) 7/64 (.109)
#12 15/64 (.234) 7/64 (.109) 1/8 (.125)
29 Sp
DG141900CD
Operating Instructions and Parts Manual
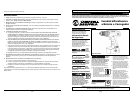
Charging Battery
REMOVING BATTERY PACK
Before charging, remove battery pack
from tool by depressing the battery
release button and pulling the battery
pack out of tool.
GENERAL INSTRUCTIONS
With normal use, as battery pack
approaches the discharged state, you
will notice a sharp drop in tool
performance. When the tool is unable
to perform the task at hand, it is time
to recharge the battery pack.
Recharging the battery pack before
this condition is reached will reduce
the total work life of the pack.
Discharging the pack beyond this point
can damage the pack.
NOTE: Battery temperature will
increase during and shortly after use.
Batteries may not accept a full charge
if they are charged immediately after
use. Do not charge battery pack if it
feels hot to the touch. Wait for it to
cool.
INITIAL CHARGING
Before using the drill for the first time,
charge the battery fully. Depending on
room temperature and line voltage,
the battery should be fully charged in
two (2) to four (4) hours in the charger
(DG029300AV). The charge is complete
when the green light is on.
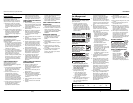
CHARGING
CHARGER & BATTERY
Connect the current carrying prongs
on the power cord to a 120V AC 60Hz
wall outlet. The charger is equipped
with an LED, a red light will light up
while charging. Once the battery is
fully charged, a green light indicates
that the charging is complete.
With normal use, the battery pack will
be fully charged after about one (1) to
two (2) hours. Remove the battery
from the holder and unplug from wall
outlet.
The battery (DG029200AV) will charge
only in charger DG029300AV.
Disconnect charger from power source
when not in use.
IMPORTANT: THE BATTERY PACK
SHOULD NOT BE LEFT ON THE
CHARGER FOR MORE THAN
FORTY-EIGHT (48) HOURS.
Operation
VARIABLE-SPEED TRIGGER
SWITCH (some models)
If your Drill/Driver is equipped with
a variable-speed trigger switch, the
pressure you apply to the trigger
controls the tool speed. Apply more
pressure to increase the speed and
release pressure to decrease speed.
This accurate speed control allows you
to drill without center-punching and
to use the Drill/Driver as a power
screwdriver. Bits are available for
driving screws as well as running bolts
and nuts.
FORWARD/REVERSE BUTTON
This Drill/Driver is equipped with a
forward/reverse lever which is used to
change the rotation of the chuck. Do
not attempt to change the rotation
unless the chuck is completely stopped.
Moving
the
Forward/Reverse Button while chuck is
rotating can damage the tool.
For forward rotation, firmly press in on
the lever marked FWD. For reverse
rotation, firmly press in on the lever
marked REV.
TRIGGER LOCK
To activate trigger lock, move the
forward/reverse lever so it is centered
in the handle.
GEAR SHIFTING
The DG141900CD Drill/Driver is
equipped with two separate gear
ranges, low and high. Low gear
provides high-torque and slower
drilling speeds for heavy duty work or
for driving screws. High gear provides
faster speeds for drilling lighter work.
To change speeds, slide switch to the
high or low position. Actuate trigger
slightly if the gear shift does not fully
engage.
Note: If Drill/Driver is running, but the
chuck will not turn, check to make sure
the gear shifting switch is pushed fully
into desired setting.
ADJUSTABLE CLUTCH
This Drill/Driver features 15 clutch
settings. Output torque will increase as
the clutch ring is rotated from 1 to 8.
1 to 1
●
for driving small screws.
2 to 2
●
for driving screws into soft
materials or plastics.
3 to 4 for driving screws into
softwoods.
4
●
to 5
●
for medium woods.
6 to 7
●
for driving screws into
medium / hard woods.
8 for driving screws into metal.
The “drill” position locks up the clutch
to permit heavy-duty drilling and
driving work. It also allows bits to be
changed quickly and easily in the
keyless chuck.
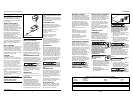
INSERTING BITS
Move Forward/Reverse Button to the
center “Off” position. Remove battery
pack (See “Charging Battery” section)
and rotate the clutch ring to the drill
bit symbol. Rotate the chuck sleeve
counterclockwise (viewing from chuck
end), and open chuck to approximate
drill bit diameter. Insert a clean bit up
to the drill bit flutes for small bits, or
as far as it will go for large bits. Close
chuck by rotating the chuck sleeve
clockwise and securely tighten by
hand.
Do not
use the
power of the drill to loosen or tighten
bit while holding chuck. The spinning
chuck will cause friction burn or hand
injury.
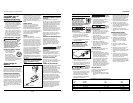
REMOVING CHUCK
Remove battery pack. Rotate clutch
ring to drill bit symbol and open chuck
all the way. Turn left-hand-threaded
screw inside chuck clockwise, and
remove it . Insert the short arm of a
3/8" hex key wrench and close jaws on
flats of wrench.
Strike long arm of wrench sharply
counterclockwise, remove wrench and
unthread chuck from spindle.
INSTALLING CHUCK
To install chuck, reverse “Removing
Chuck” procedure. Always keep the
spindle threads, chuck threads, and
securing screw free of debris.
Charger and Battery
4
www.chpower.com