26 Pg
3
DG111800CD & DG151800CD
www.chpower.com
General Safety
Information (Cont’d.)
• Some wood contains preservatives
which can be toxic. Take extra care
to prevent inhalation and skin
contact when working with these
materials. Request and follow all
safety information available from
your material supplier.
• Store tools out of reach of children
and other untrained persons. Tools
are dangerous in the hands of
untrained users.
• Each drill is equipped with a chuck
capable of handling bits up to a
certain size – see chart titled
“Maximum Size Drill Bits.” Do not
use bits larger than those
recommended.
Safety Instructions
for Charger and
Batteries
• Before using battery charger, read
all instructions on battery charger,
battery pack, and product.
• Do not abuse cord.
❚ Never carry charger by its cord.
❚ Never pull the cord to disconnect
from receptacle. Pull the plug at the
wall rather than the cord when
disconnecting charger.
• Do not operate charger with
damaged cord or plug.
❚ Have a damaged or worn power
cord and/or strain relief replaced
immediately.
❚ Do not attempt to repair power
cord.
• Make sure cord is located so that it
will not be stepped on, tripped
over, or otherwise subjected to
damage or stress.
• Do not operate charger if it has
received a sharp blow, been
dropped, or otherwise damaged.
Take it to a qualified serviceman.
• Do not disassemble charger or
battery pack. Take it to a qualified
!
WARNING
NOTICE
serviceman when service or repair is
required. Incorrect reassembly may
result in a risk of electric shock or
fire.
• Do not use an extension cord unless
absolutely necessary. Use of
improper extension cord could
result in a risk of fire and electric
shock. If an extension cord must be
used, make sure:
❚ That the size of the cord is at least
as specified in chart titled
“Minimum Wire Size (AWG) of
Extension Cord for Battery
Charger.”
❚ That the pins on plug of extension
cord are the same number, size and
shape as those of plug on charger.
❚ That the extension cord is properly
wired and in good electrical
condition.
❚ If an extension cord is to be used
outdoors it must be marked with
the suffix “W-A” or “W” following
the cord type designation to
indicate it is acceptable for outdoor
use. For example – SJTW-A
• Unplug charger from outlet before
attempting any maintenance or
cleaning.
• Charge the battery pack in a well-
ventilated area. Do not allow any
object to cover the charger and/or
battery pack while charging.
• Do not store the charger or battery
pack in locations where the
temperature may reach or exceed
120°F (49°C), such as a metal tool
shed, or a car in the summer. This
can lead to deterioration of the
storage battery.
• For optimal charging of the battery
pack, charge it in temperatures
between 32° – 86°F (0 – 30°C).
Charging the battery outside of this
range can adversely affect battery
performance.
• Do not charge battery in damp or
wet locations.
• Do not charge battery pack if it
feels hot to the touch. Wait for it to
cool.
• Do not expose charger to rain, snow
or frost.
• Do not incinerate battery pack. It
can explode in a fire.
BATTERY DISPOSAL
attempt to
Do not
disassemble the battery or
remove any component
projecting from the battery terminals.
Fire or injury may result. Prior to
disposal, protect exposed terminals
with heavy insulating tape to prevent
shorting.
NICKEL-CADMIUM BATTERY
• If equipped with a nickel-cadmium
battery, the battery must be
recycled or disposed of in an
environmentally sound manner.
Check with your county’s Public
Works Department for information
on recycling batteries.
Charging Battery
REMOVING BATTERY PACK
Before charging, remove battery pack
from Drill/Driver by depressing the
battery release button and pulling the
battery pack out of tool.
GENERAL INSTRUCTIONS
With normal use, as battery pack
approaches the discharged state, you
will notice a sharp drop in tool
performance. When the tool is unable
to perform the task at hand, it is time
to recharge the battery pack.
Recharging the battery pack before
this condition is reached will reduce
the total work life of the pack.
Discharging the pack beyond this point
can damage the pack.
NOTE: Battery temperature will
increase during and shortly after use.
Batteries may not accept a full charge
if they are charged immediately after
use. Do not charge battery pack if it
feels hot to the touch. Wait for it to
cool.
INITIAL CHARGING
Before using the cordless Drill/Driver
for the first time, charge the battery
fully. Depending on room temperature
and line voltage, the battery should be
fully charged in six (6) to ten (10) hours
in charger DG111800CH and two (2) to
(4) hours in the fast charger
DG151800CH.
CHARGING
Connect the current carrying prongs
on the power cord to a 120V AC 60Hz
wall outlet. Connect the other end of
the power cord to the battery pack. If
the charger is equipped with an LED, a
red light will light up as long as the
!
WARNING
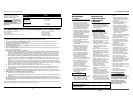
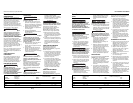
Length of Cord in Feet 25 50 100 150
AWG Size of Cord 18 18 18 16
Minimum Wire Size (AWG) of Extension Cord for Battery Charger
Instruções de Utilização e Manual de Peças
Funcionamento
(Continuação)
3. Ao perfurar um orifício grande, é
mais fácil perfurar primeiro um
orifício pequeno e depois aumentar
até o tamanho necessário.
4. O uso de lubrificante, como óleo, na
ponta da furadeira ajuda a manter
a broca fria, aumenta a ação de
perfuração e prolonga a vida útil da
broca.
5. Se possível, fure inicialmente para
marcar a posição da perfuração e
evitar que a broca da furadeira saia
do lugar.
COLOCAÇÃO DE PARAFUSOS NA
MADEIRA
1. Perfure o orifício piloto e os
orifícios de passagem. Consulte a
tabela denominada “Tamanho
sugerido de orifícios para parafusos
para madeira.”
2. Instale a ponta adequada para a
chave de fendas.
3. Determine a pressão ajustando o
anel para o torque desejado e
ajuste o seletor de velocidade para
“1”, a configuração de baixa
velocidade.
4. Ajuste a ponta para a rotação
correta.
5. Use os dedos para colocar o
parafuso em linha reta no orifício.
6. Coloque a ponta sobre o parafuso,
acione a furadeira e aplique pressão
para parafusar o parafuso.
7. Assim que o parafuso estiver
assentado, solte o gatilho e levante
a parafusadeira do parafuso.
8. Um lubrificante, como sabão ou
cera, pode ser usado nas roscas dos
parafusos para parafusar com maior
facilidade. Isso é particularmente
importante em madeiras duras.
9. A combinação de brocas para
orifícios-piloto, broca de haste e
brocas de escareamento estão
disponíveis nas lojas especializadas
locais para a perfuração de orifícios
em uma simples operação.
COLOCAÇÃO DE PARAFUSOS
AUTO-ATARRAXADORES
1. Perfure um orifício-piloto de
tamanho correto segundo as
recomendações do fabricante do
parafuso para a fixação que está
sendo usada.
2. Instale a ponta adequada para a
parafusadeira.
3. Determine a pressão ajustando o
anel para o torque desejado e
coloque o seletor de velocidade na
posição “1”, a configuração de
baixa velocidade.
4. Ajuste a furadeira para a rotação
correta.
5. Coloque a ponta na cabeça do
parafuso.
6. Coloque a extremidade do parafuso
no orifício perfurado previamente,
solte o parafuso, ligue a furadeira e
parafuse o parafuso.
7. Assim que o parafuso estiver
assentado, solte o gatilho e levante
a parafusadeira do parafuso.
COLOCAÇÃO DE PARAFUSOS EM
METAIS
1. Perfure orifícios de tamanho
correto para o fixador que será
utilizado.
2. Use os dedos para colocar os
parafusos nos orifícios e termine de
atarraxar com a ferramenta
conforme indicado na seção
COLOCAÇÃO DE PARAFUSOS NA
REMOÇÃO DE PARAFUSOS
1. Ajuste o anel de pressão para o
torque máximo e o seletor de
velocidade para BAIXA (LOW).
2. Instale a ponta adequada para a
parafusadeira.
3. Ajuste a parafusadeira na rotação
inversa.
4. Coloque a ponta no parafuso e
ligue a furadeira para remover o
parafuso.
Manutenção
MANTENHA A FERRAMENTA
LIMPA
Todas as peças de plástico devem ser
limpas com um pano úmido macio.
NUNCA use solventes para limpar as
peças de plástico. Essas poderiam se
dissolver ou poderiam ocorrer danos
de alguma outra maneira ao material.
A FERRAMENTA NÃO FUNCIONA
Caso a ferramenta não funcione,
verifique se a bateria está carregada e
instalada na furadeira.
BATERIA
A bateria se descarrega por si só sem
sofrer danos quando guardada por
longos períodos de tempo e é possível
que seja necessário recarregá-la antes
do uso.
LUBRICAÇÃO
Para a sua segurança e proteção
elétrica contínua, a lubrificação e a
manutenção dessa ferramenta deve ser
realizada SOMENTE por um CENTRO
DE SERVIÇO AUTORIZADO CAMPBELL
HAUSFELD.


