


5-Sp
Modelo IFN03000
Manual de Instrucciones
Mecanismo de Seguridad del
Disparo Secuencial (Cont.)
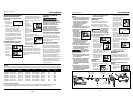
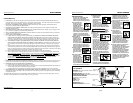
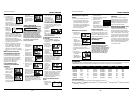
PARA AJUSTAR LA PENETRACION DE
LOS CLAVOS
1. Regule la pre-
sión de aire en
la clavadora a
4,14 bar.
2. Conecte las mangueras de aire y
pruebe la penetración clavando
unos clavos en un pedazo de
madera. Si éstos no penetran hasta
el nivel deseado, aumente la pre-
sión de aire y pruebe una vez más,
conmtinue haciendolo hasta lograr
los resultados deseados. La presión
de la clavadora no debe exceder 6,9
bar ya que ésto reduciría la durabili-
dad de la clavadora.
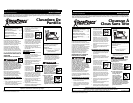
QUE HACER CUANDO LA CLAVADO-
RA TENGA UN CLAVO ATASCADO
1.
Desconecte la
clavadora de
la fuente de
suministro de
aire.
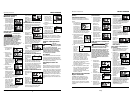
2. Remueva
todos los
clavos del
depósito (vea
Para Cargar /Descargar la
Clavadora). De lo contrario, hará
que los clavos se expulsen desde la
parte delantera de la clavadora
cuando se remueve el conjunto de
la boca.
3. Hale hacía
adelante la
lengüeta roja de
la boquilla de
desatasco
rápido. Aleje la
portezuela para
exponer y desatascar el sujetador
atascado.
4. Vuelva a colocar la boquilla
revertiendo la secuencia del paso 3.
5. Asegúrese que el
gatillo funciona y
que el Elemento de
Contacto de
Trabajo se mueve
libremente hacia arriba y hacia
abajo sin atascarse o pegarse.
Servicio Técnico
Si desea hacer alguna pregunta refe-
rente a la reparación u operación de las
herramientas, o para solicitar copias
adicionales de este manual, sírvase lla-
mar a nuestro número especial, 1-800-
543-6400.
Sujetadores y Piezas de
Repuesto
Use solamente sujetadores Campbell
Hausfeld originales calibre 16 (o su
equivalente) - (vea la información sobre
intercambio de sujetadores). El
desempeño de las herramientas, la
seguridad y la duración pueden
disminuir si no se utilizan los
sujetadores adecuados. Cuando ordene
piezas de repuesto o sujetadores,
especifique el número de la pieza.
Para reparar la herramienta
La herramienta debe ser reparada úni-
camente por personal calificado, y
deben usar piezas de repuesto y acce-
sorios originales Campbell Hausfeld, o
piezas y accesorios que funcionen de
manera equivalente.
Para colocarle los sellos
Cada vez que repare una clavadora
deberá limpiarle y lubricarle las partes
internas. Le recomendamos que use
Parker O-lube o un lubricante equiva-
lente en todos los anillos en O. A cada
anillo en O se le debe dar un baño de
lubricante para anillos antes de instalar-
los. Igualmente, deberá ponerle un
poco de aceite a todas las piezas que se
mueven y muñones. Finalmente,
después de haberla ensamblado y antes
de probar la herramienta deberá poner-
le unas cuantas gotas de aceite sin
detergente 30W u otro aceite similar,
en las líneas de aire.
!
ADVERTENCIA
movemiento
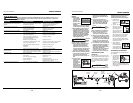
Clavos
Estos clavos para acabado de Campbell Hausfeld los puede comprar en su tienda más cercana. Si necesita ayuda para encon-
trar un artículo, comuníquese al 1-800-543-6400. Los clavos de Campbell Hausfeld cumplen o exceden el estándar ASTM F1667
Calibre Clavos por Clavos por
Modelo # Longitud
del cuerpo
Acabado Cabeza Unión
línea Caja
FB001600 15,9mm (5/8”) Calibre 18 Galvanizado De puntilla/Café Adhesivo 100 5000
FB002000 19,1mm (3/4”) Calibre 18 Galvanizado De puntilla/Café Adhesivo 100 5000
FB002500 25,4mm (1”) Calibre 18 Galvanizado De puntilla/Café Adhesivo 100 5000
FB003000 31,8mm (1
1
⁄
4”) Calibre 18 Galvanizado De puntilla/Café Adhesivo 100 5000
FB180016 15,9mm (5/8”) Calibre 18 Galvanizado De puntilla/Café Adhesivo 100 1000
FB180025 25,4mm (1”) Calibre 18 Galvanizado De puntilla/Café Adhesivo 100 1000
FB180030 31,8mm (1
1
⁄
4”) Calibre 18 Galvanizado De puntilla/Café Adhesivo 100 1000
Información de intercambio
Puede usar clavos de las siguientes marcas de clavadoras para acabado neumáticas: Bostitch® BT125SK-2, Campbell
Hausfeld® NB0030, DeWalt® D51238K, Paslode® T125-F18, Porter Cable® BN125, y Senco Finish Pro® 15.
3
General Safety Information
(Cont.)
● Do not make any modifications to the
tool without first obtaining written
approval from Campbell Hausfeld. Do
not use the tool if any shields or
guards are removed or altered. Do
not use the tool as a hammer.
Personal injury or tool
damage may occur.
● Avoid long extended periods of work
with the tool. Stop using the tool if
you feel pain in hands or arms.
● Always check
that the Work
Contact Element
(WCE) is operat-
ing properly. A
fastener could
accidentally be
driven if the
WCE is not work-
ing properly. Personal injury may
occur (See "Checking the Work
Contact Element" Section).
● Disconnect air supply and release ten-
sion from the pusher before attempt-
ing to clear jams because tools can be
ejected from the front of the tool.
Personal injury may occur.
Notice indicates
important infor
ma-
tion, that if not followed, MAY cause
damage to equipment.
● Avoid using the tool when the maga-
zine is empty. Accelerated wear on
the tool may occur.
● Clean and check all air supply hoses
and fittings before connecting the
tool to an air supply. Replace any
damaged or worn hoses or fittings.
Tool performance or durability may
be reduced.
● Air compressors providing air to the
tool should follow the requirements
established by the American National
Standards Institute Standard B19.3-
1991; Safety Standard for
NOTICE
the tool is being used. An inadequate
air supply can cause a loss of power
and inconsistent driving.
2. An oiler can be used
to provide oil circula-
tion through the tool.
A filter can be used to
remove liquid and
solid impurities which
can rust or “gum up” internal parts
of the tool.
3. Use 3/8” air
hoses with a
minimum
working pres-
sure of 150 psi. Use 1/2” air hoses for
50’ run or longer. For better perfor-
mance, install a 3/8” quick plug (1/4”
NPT threads) with an inside diameter
of .315" (8mm) on the tool and a
3/8” quick coupler on the air hose.
4. Use a pressure
regulator on the
compressor, with
an operating
pressure of 0 -125
psi. A pressure
regulator is required to control the
operating pressure of the tool
between 60 and 100 psi.
Sequential Trip Safety
Mechanism
The NB0030 is equipped with a sequen-
tial trip safety mechanism. When the
operator depresses the Work Contact
Element (WCE) against the work surface
and then pulls the trigger, a fastener will
be driven.
OPERATING A SEQUENTIAL TRIP
NAILER
1. Release trigger
and place nose of
tool against work
surface.
Compressors for Process Industries.
Contact your air compressor manu-
facturer for information.
Operating The Tool
LUBRICATION
This tool requires lubrication before
using the tool for the first time and
before each use. If an inline oiler is
used, manual lubrication through the
air inlet is not required on a daily basis.
The work surface
can become dam-
aged by excessive lubrication. Proper
lubrication is the owner’s responsibil-
ity. Failure to lubricate the tool properly
will dramatically shorten the life of the
tool and void the warranty.
1. Disconnect the
air supply from
the tool to add
lubricant.
2. Turn the tool so
the air inlet is facing
up. Place 4-5 drops of
30 W non-detergent
oil into air inlet. Do
not use detergent
oils, oil additives, or
air tool oils. Air tool oils contain sol-
vents which will damage the tool's
internal components.
3. After adding oil, run
tool briefly. Wipe off
any excess oil from
the cap exhaust.
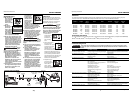
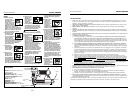
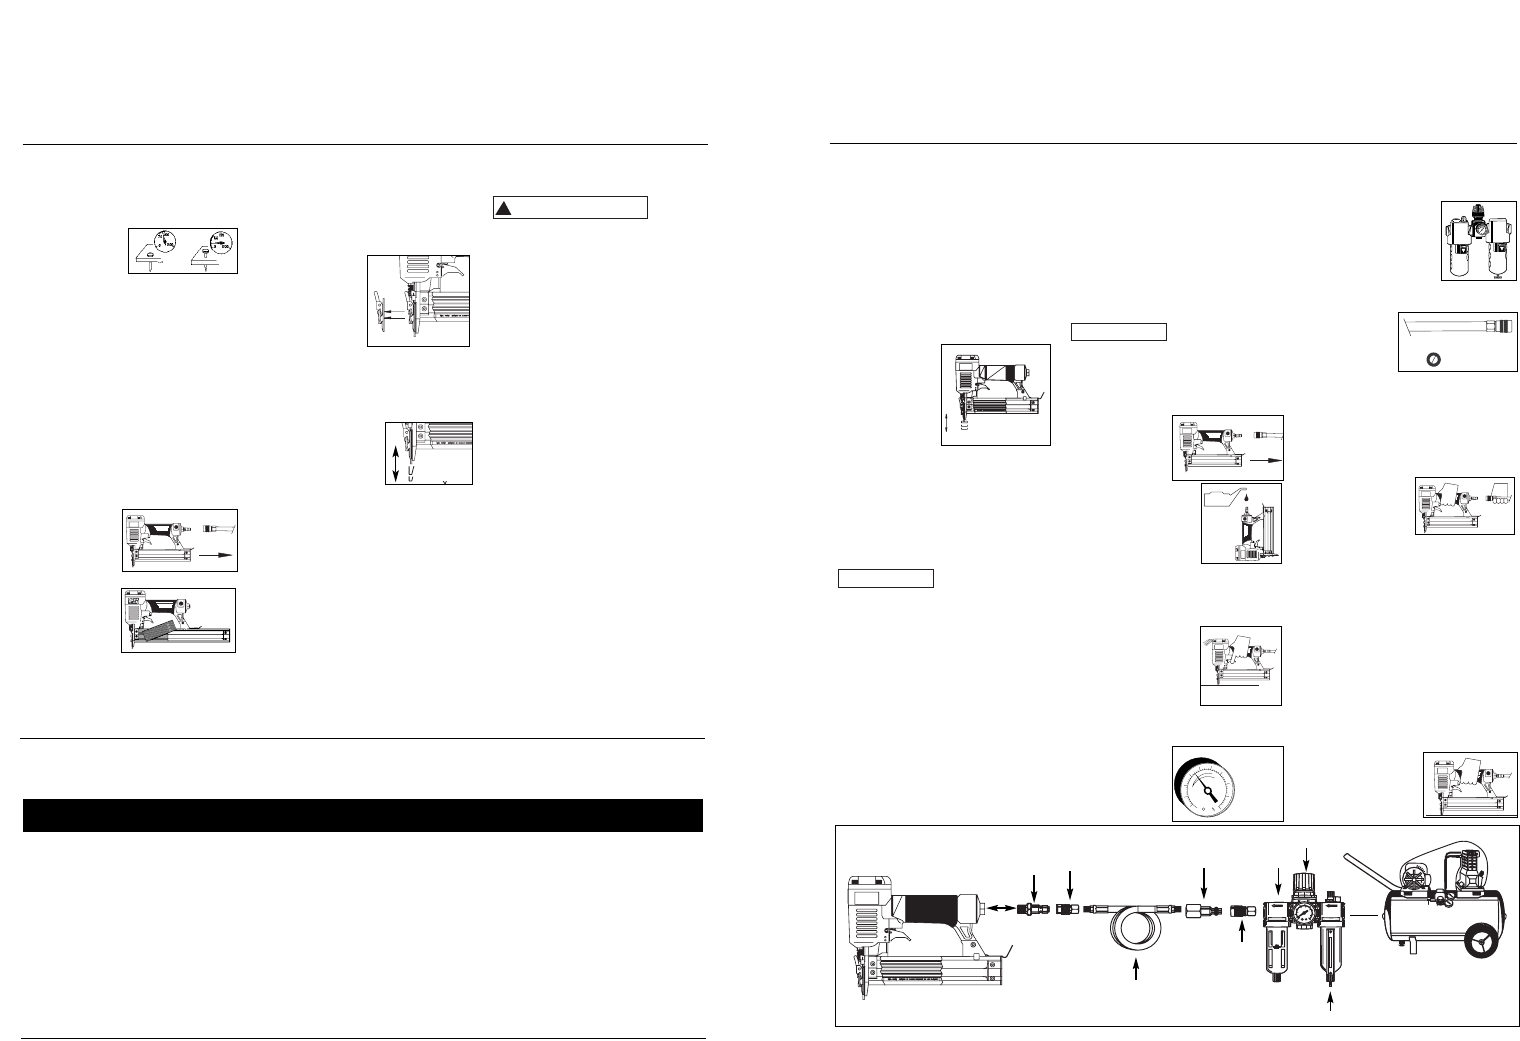
RECOMMENDED
HOOKUP
The illustration below shows the
recommended hookup for the tool.
1. The air com-
pressor must be
able to main-
tain a minimum
of 60 psi when
NOTICE
Recommended Hookup
Quick
Plug
Quick
Coupler
Air
Hose
Quick Plug
(Optional)
Quick
Coupler
(Optional)
Oiler
Regulator
Filter
Model IFN03000
Operating Instructions
OIL
OIL
150 PSI WP
3/8” I.D.
60 psi
Min.
100 psi
Max.
www.chpower.com