Operating Instructions
3
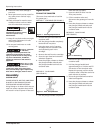
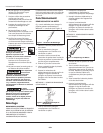
REMOVING AIR POCKETS FROM
GREASE GUN
There are air pockets in the container
tube if the tool operates but grease will
not eject from spout. To remove air
pockets from the grease gun, follow
the outlined procedures.
1. Unscrew the gun head 1 to 1-1/2
turns.
NOTE: Warming the grease aids in
removing air pockets. Stand the gun in
an upright position to prevent air
pockets from forming in the middle of
the cartridge.
2. Pull the plunger handle back and
release quickly. Repeat this step
several times.
3. Push the plunger handle back into
the container tube and screw the
gun head and container tube back
together.
4. Press the air vent several times to
relieve any air pockets near the top
of the container tube. When all of
the air is gone, grease will start to
seep out of the air vent valve.
Release all pres-
sure from the
system before attempting to install,
service, relocate or perform any
maintenance.
Disconnect the
grease gun from
the air supply before lubricating.
The piston must be lubricated
periodically. Proper lubrication extends
the life of the tool and creates a better
sealing action for the piston. Under
heavy usage, the piston should be
greased with bearing grease every four
months and for light usage only once a
year. To grease the piston, follow the
outlined procedures.
1. Disconnect the air grease gun from
the air supply.
2. Remove the four slotted screws on
the gun head and remove the
spring and the piston.
3. Apply a film of bearing grease
around the exterior of the rubber
skirt of the piston and a thin film of
grease on the inside of the cylinder.
4. Install the spring, piston and the
four slotted screws.
Technical Service
For information regarding the
operation or repair of this product,
please call 1-800-543-6400.
Replacement Parts
Information
For information regarding where to
order replacement parts, call toll free
1-800-543-6400. Please provide the
following information:
•Modelnumber
•Stampedcode
•Partnumberanddescription
Address parts correspondence to:
Campbell Hausfeld
100 Production Drive
Harrison, Ohio 45030 U.S.A.
www.chpower.com
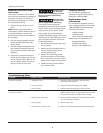
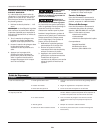
Troubleshooting Chart
Symptom Possible Cause(s) Corrective Action
Tool will not operate 1. No grease in tool
2. Low air pressure
3. Air hose leaks
1. Lubricate the tool according to the lubrication
instructions in this manual
2. Adjust the compressor regulator as needed
3. Tighten and seal hose fittings if leaks are found
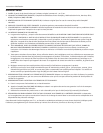
Tool operates, but grease will
not eject from spout
1. Cold, thick grease
2. Spring is still compressed
3. Out of grease
4. Air pockets in container tube
1. Bring tool inside and warm to room temperature of
70-85°F. Stand the gun in an upright position to prevent
air pockets forming in the middle of the cartridge
2. Pull the plunger handle back and release quickly. Make
sure the catch plate is released
3. Refill container tube
4. Remove air pockets (See Removing Air Pockets section)


