


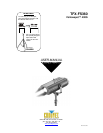

TFX-FS360 User Manual 5 2010-07-20/14:53
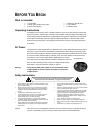
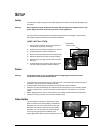
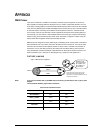
Remove screw
Lamp Installation
Lamp exposed
SETUP
Lamp
You will need to install a lamp prior to the initial operation of the fixture. An ENX, 360 W halogen lamp
is included.
Warning! When replacing the lamp, please wait 15 minutes after powering down to allow the unit to cool
down! Always disconnect from main power prior to lamp replacement.
Do not touch the envelope (glass area) of the bulb with bare hands. If this happens, clean the lamp
with alcohol and wipe it with a lint free cloth before installation.
LAMP INSTALLATION
1) Remove screw located on the top and to the rear of
the followspot as pictured on the right.
2) Open lamp cover until lamp compartment is exposed.
3) If replacing the lamp, remove old lamp first.
4) Reach in and slide the lamp out of the retaining cage.
5) Detach the lamp from the lamp socket and replace.
6) Replace lamp cover, align the screw hole and fasten
the screw.
7) No lamp alignment is necessary for this fixture since
the lamp is already optimized inside the reflector.
Power
Warning! Verify that the power on your unit matches the line voltage applied. All fixtures must be
connected to circuits with a suitable Ground.
To determine the power requirements for a particular fixture, see the label affixed to the back plate of
the fixture or refer to the fixture’s specifications chart.
A fixture’s listed current rating is its average current draw under normal conditions.
All fixtures must be powered directly off a switched circuit and cannot be run off a rheostat (variable
resistor) or dimmer circuit, even if the rheostat or dimmer channel is used solely for a 0% to 100%
switch.
Before applying power to a fixture, check that the source voltage matches the fixture’s requirement.
All fixtures must be connected to circuits with a suitable Ground.
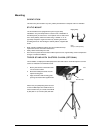
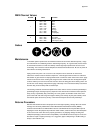
Gobo Holder
The TFX-FS360 can project one gobo image. A gobo-
holder is included and is located directly underneath the
followspot next to the fan as pictured here on the right.
Remove the two bottom screws from the gobo-holder
and slide it out. You can remove the gobo by sliding it
out the top and replacing it with a different one or
replace gobo-holder without a gobo for followspot only use.