


Page 11For technical questions, please call 1-800-444-3353.SKU 91938
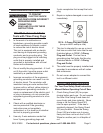
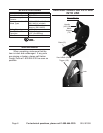
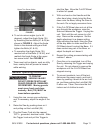
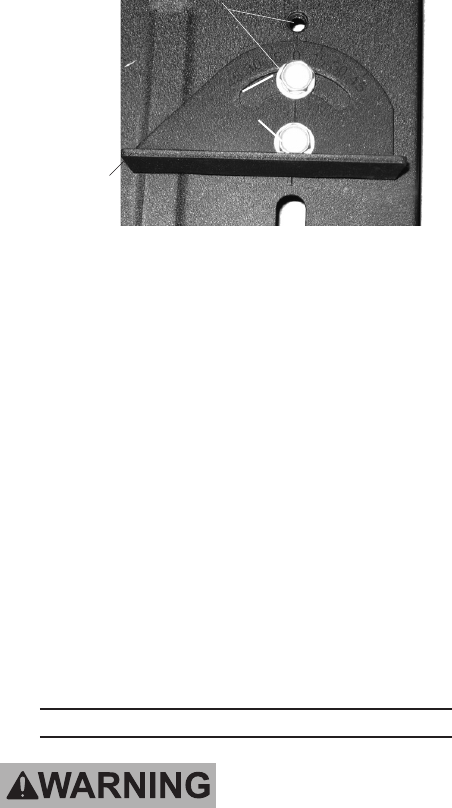
FIGURE 5
Bolts (41 & 44)
Angle
Scale
(35)
Upper Two Screw Holes
b. To cut at various angles (up to 45
degrees), adjust the Angle Scale (35)
by loosening the two Bolts (41 & 44) as
shown in FIGURE 5. Adjust the Angle
Scale to the desired setting and then
tighten the Bolts (41 & 44).
To reposition the Angle Scale (35), c.
remove both of the Bolts (41 & 44), and
reattach the Angle Scale at the upper
two screw holes. See FIGURE 4.
There must not be objects, such as utility 4.
lines, nearby that will present a hazard
while working.
General Operating Instructions
TO PREVENT
SERIOUS INJURY:
DO NOT OPERATE WITH ANY
GUARD DISABLED, DAMAGED,
OR REMOVED. Moving guards
must move freely and close
instantly. Bolt (112) MUST be
loose before operation.
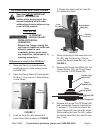
Using the vise, secure your workpiece 1.
and, if necessary, adjust the angle of the
cut.
Raise the Saw by pushing down on it 2.
and pulling out the Lock Ball (25).
Plug the Power Cord into the nearest 3.
120 V~, grounded, electrical outlet. Slide
the Trigger Lock and pull the Trigger to
start the Saw. Allow the Cut-Off Wheel
to attain full speed.
With one hand on the Handle and the 4.
other hand clear, slowly bring the Saw
down onto the Base, letting the Saw do
the work. Do not apply excessive force.
If the Cut-Off Wheel does not cut all the 5.
way through the workpiece, raise the
Saw and release the Trigger. Unplug the
unit. Wait until the unit comes to a full
stop. Remove the workpiece. Set the
depth adjustment to a deeper setting.
After adjusting the depth, bring the Saw
all the way down to make sure the Cut-
Off Wheel doesn’t contact the Base. If it
does contact any part of the Base, re-
adjust the depth so it doesn’t.
Repeat the cutting process starting with 6.
number 1 above.
Once the cut is completed, turn off the 7.
Saw by releasing the Trigger and unplug
the unit. Do not attempt to remove the
workpiece until the Cut-Off Wheel has
stopped moving.
To prevent accidents, turn off the tool, 8.
disconnect its power supply, and lock it
down by pushing it down as far as it will
go, and then pushing the Lock Ball (25)
in after use. Clean, then store the tool
indoors out of children’s reach.