


Page 13SKU 94362 For technical questions, please call 1-800-444-3353.
ASSEMBLY INSTRUCTIONS
NOTE: For additional information regarding the parts mentioned in the following pages,
refer to the
Assembly Diagram on page 22.
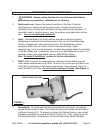
To Attach The Rip Guide, And Adjust The Width Of A Cut:
1. WARNING! Prior to performing this procedure, make sure the Trigger Switch
(66) of the Saw is in its’ “OFF” position and the Power Cord (71) is unplugged
from its electrical outlet.
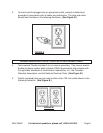
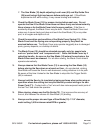
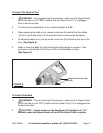
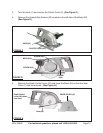
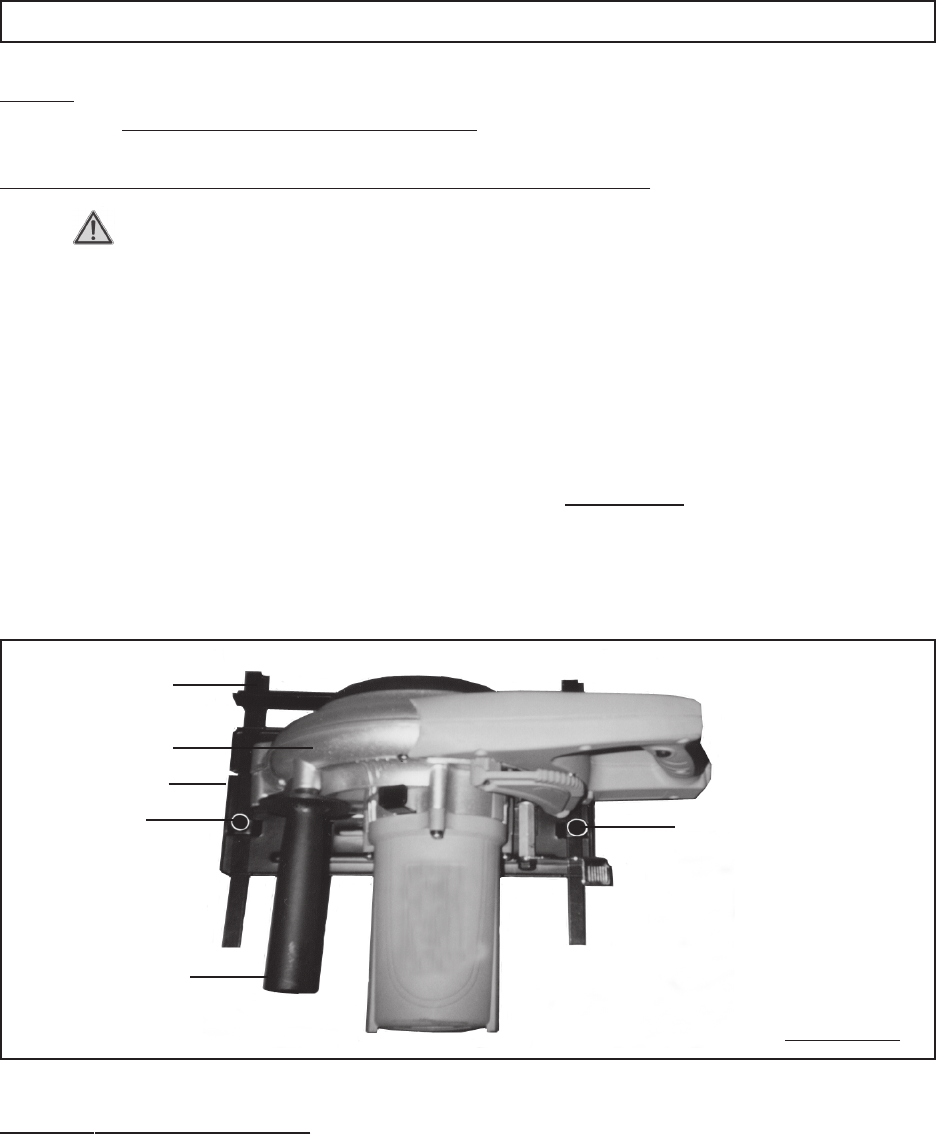
2. Slightly loosen the two Pins (29). (See Figure D.)
3. Slide the
arms
of the Rip Guide (73) through the slots in the Base (24).
(See Figure D.)
4. Featured on the
arm
of the Rip Guide (73) is a width scale, divided in increments
of 1/16”. To adjust the width of the cut, slide the arm of the Rip Guide to the right
or left until the desired width is acquired. Then, retighten the Pins (29) to hold the
Rip Guide in place. (See Figure D.)
FIGURE D
PIN (#29)
PIN (#29)
RIP GUIDE (#73)
BASE (#24)
SIDE HANDLE
(#72)
TOP
VIEW
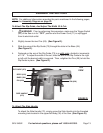
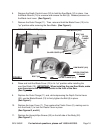
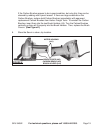
To Attach The Side Handle:
To attach the Side Handle (72), simply screw the Side Handle into the threaded
mounting hole located in the upper/left Body (32) of the Saw. (See Figure D.)
BODY (#32)