


Page 10SKU 97750 For technical questions, please call 1-800-444-3353.
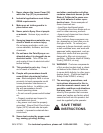
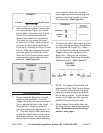
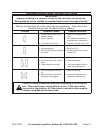
FIGURE C
FLAT/OPEN
ROUND/CLOSED
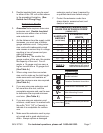
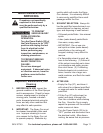
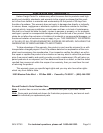
9. After setting up a piece of scrap mate-
rial, squeeze the Trigger (6) in short
bursts while turning the Fluid Control
Screw (19) counterclockwise and
observe the pattern for consistency.
Too much air may cause the spray
to come out too ne. Reduce the air
pressure or allow more paint/uid to
come out by opening the Fluid Control
Screw. If the spray appears too thick
(you see globs of paint/uid), close
down the Fluid Control Screw slowly,
checking the mixture after each ad-
justment. (See Figure D.)
FIGURE D
TOO COURSE
(TIGHTEN)
CORRECT
TOO FINE
(LOOSEN)
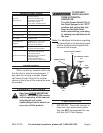
TECHNIQUES
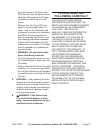
Always keep the Spray Gun at right 1.
angles to the workpiece. Pull the
Trigger (6) slowly and move the Spray
Gun in parallel strokes to the object
being painted. Keep the distance
from the object being painted at 6” to
9”. This may slightly differ depending
on the ow adjustment and the paint/
uid being sprayed. Do not stop the
Spray Gun movement while spraying.
If you stop the Spray Gun for even
just a slight pause while spraying, the
paint/uid will build up and run down
the workpiece. (See Figure E.)
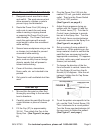
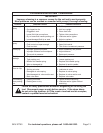
To ensure you don’t allow paint to build 2.
up, start moving the Spray Gun before
you squeeze the Trigger (6). When
you are nished spraying, release the
Trigger before you stop moving the
Spray Gun. Doing so will eliminate
distinct overlaps, producing a blended
(feathered) affect. (See Figure F.)
NOTE: The speed of the stroke, the 3.
adjustment of the Fluid Control Screw
(19), and the distance from the work-
piece will determine how much paint/
uid is being applied. To get the best
results, try to apply two thin coats of
paint/uid versus one thick coat.
When nished, thoroughly clean out 4.
the Paint Sprayer and its accessories.
(See “Maintenance and Servicing”
section, next page.)
FIGURE E
INCORRECT
CORRECT
(90°)
(HEAVIER COAT
ON ONE SIDE,
UNEVEN COVERAGE)
(EVEN COVERAGE)
FIGURE F
(TOP VIEW)
BEGIN
STROKE
SQUEEZE
TRIGGER
(6)
RELEASE
TRIGGER
(6)
END
STROKE