


Chapter 3 - Network Installation 9
Chapter 3 - Network Installation
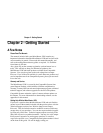
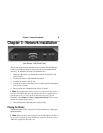
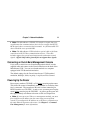
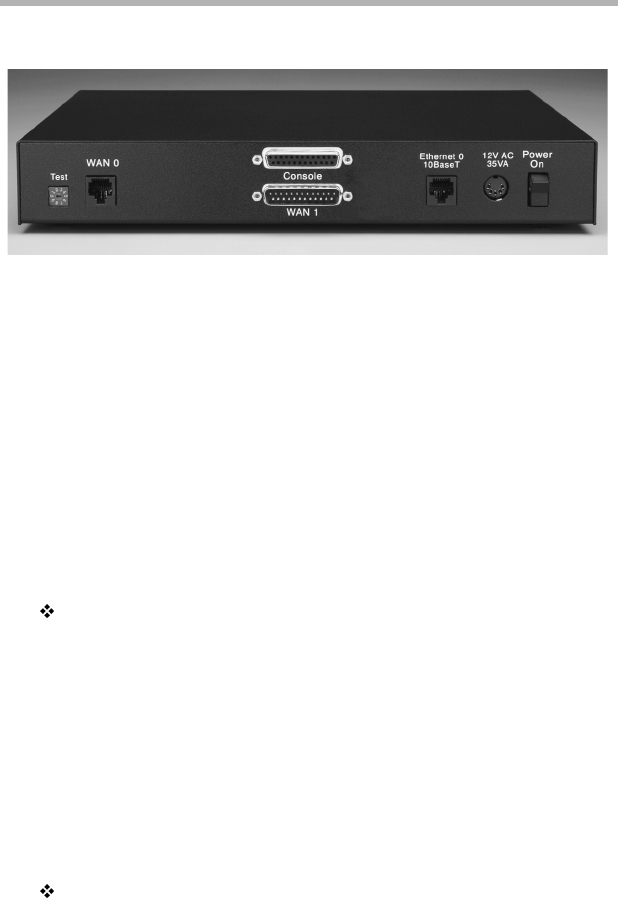
MicroRouter 1250i Back Panel
This section of the manual describes how to connect the MicroRouter
1250i to your Ethernet network and your wide area communications
device(s). In summary, the steps for installation are:
1. Make sure the router is powered down and not connected to any
power source.
2. Connect the router to the Ethernet network(s).
3. Connect the router to the T1 line.
4. Connect the router’s secondary port to a wide area line communica-
tions device (if used).
5. Power up the line communications device (if used).
Note: You should either wait to connect a synchronous line device
such as a CSU/DSU until after the interface has been configured as a
synchronous port, or power up the router before powering up the
CSU/DSU. (See Chapter 6 - Basic Configuration Guide for more infor-
mation on configuring the router.)
6. Plug in the power cable and power up the router.
Placing the Router
The MicroRouter 1250i is meant to be left stand-alone on a desktop or
equipment table.
Note: When stacking other equipment on the MicroRouter 1250i, do
not exceed 25 pounds of evenly distributed weight on top of the router.
Additional weight may bend the case.