


and place it upright on the ground. Loosen the wing nuts holding the
tab handles and raise the handles to an upright posi-
tion. Open the door on the other side of the cage
using the same procedure as above. Stabilizing legs
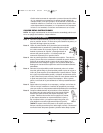
on both doors must be lowered down to stabilize
and level cage/stand prior to attaching portable fix-
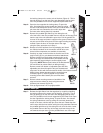
ture to the pole. Lower the stabilizing legs by loosen-
ing the oval knobs and pulling down on the legs until
the desired length has been achieved. Lock legs in the desired posi-
tion by tightening the oval knobs (Figure E).
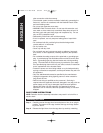
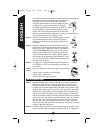
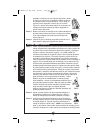
Step 2: Adjust the vertical pole to the desired height by loosen-
ing and tightening the collars on the pole (Figure F).
Lower the travel handle by pushing out and down on
the handle.
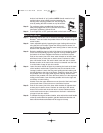
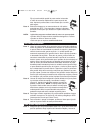
Step 3: Lift center handle of fixture by loosening the knob on
the back of the handle’s vertical tube and raising the
handle. (Figure G) Tighten the knob to hold handle in
“up” position. NOTE: Handle must be in “up” position
before using handle to avoid contacting the housing
when carrying portable unit. Attach portable fixture to
the vertical pole by placing the Quick-Release
TM
collar
over the top of the tube. Tighten the knob on the collar
until the screw is secure.
Step 4: Plug light into a GFCI protected 120-volt receptacle. To
turn light ON, or OFF, push red switch on the back of
each fixture.
NOTE: Cage must be secured with sand bags or other suitable
weight:
• When used on uneven or rocky surfaces
• When used in windy areas
• Anytime extra stability is required.
Use as a portable light
Step 1: Release the light fixture from the cage door by carefully unlatching
the locking clamp on the center pole of the door. This is done by
pulling out on the lock lever and disengaging the top hook end. The
portable unit will remain supported by the lower hook. Open the door
opposite the locking clamp. To open the door, first release the spring
loaded door locks by pulling the lock knob towards the center of the
door until the latch pin clears the hole. Rotate the door until it stops
with the knee action locking bars fully extended. Remove the portable
light fixture by first raising the unit off of the hook. Lower the portable
fixture to the floor of the cage, and lean the top of the unit towards
the open door. Pull the portable fixture out of the cage. Loosen the
wing nuts holding the tab handles and raise the handles to an upright
position. Tighten the wing nuts.
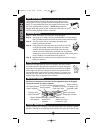
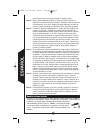
Step 2: Lift center handle of fixture by loosening the knob on the back of the
handle’s vertical tube and raising the handle. (Figure H) Tighten the
6
ENGLISH
FIG. E
FIG. F
FIG. G
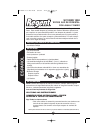
FIG. A
SC1000R I.S 325-1439 6/4/04 4:12 PM Page 6