


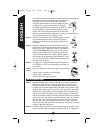

knob to hold handle in “up” position. NOTE: Handle must be in “up”
position before using handle to avoid contacting the
housing when carrying portable unit. Use the light fix-
tures by setting the built-in stand on any flat surface.
Step 3: For maximum safety, portable light fixtures should
always be plugged into a GFCI (Ground Fault Circuit
Interrupter) protected, 120-volt circuit.
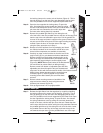
Step 4: To turn light ON, or OFF, push red switch on the back of each fixture.
How to store after use
Step 1: Make sure fixtures are cool. If used as a standlight, loosen the Quick-
Release
TM
knob and raise the portable fixture off of the pole using the
center handle.
Step 2: Lower adjustable pole by loosening the upper locking collar and low-
ering the pole until it stops. Tighten the locking collar to secure it in
place. Repeat this step using the lower locking collar to lower the next
section of the adjustable pole.
Step 3: Raise the stabilizing legs on both of the doors by loosening the knobs
on the door and pushing up on the leg until it is fully seated against
the bottom of the door. Retighten the knobs to hold them in place.
Push on the center joint of the knee action bracket on left door (door
with fixture hook) to allow door to start to close. Continue to rotate
door until almost closed. Pull out the latch knob until door is closed.
Release tension on the latch knob once pin is centered over the hole
in vertical tube of cage to lock door closed.
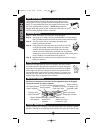
Step 4: Lower the center handle of fixture by loosening the knob on the back
of the handle’s vertical tube. Tighten the knob to hold handle in the
“storage” position. Loosen the wing nuts holding the tab handles and
fold the handles to the side of the fixture. Tighten the wing nuts. Place
the portable unit in the cage stand legs first, starting with the lower
section of the portable unit. Once the lower section is in the cage and
resting on the bottom, lean the entire portable unit into the cage and
rest fixture on lower locking
bracket. Place the upper bracket arm over the end of the lower brack-
et and push down on the outer arm to lock fixture in place.
Step 5: Push on the center joint of the knee action bracket on opposite door
to allow door to start to close. Continue to rotate door until almost
closed. Pull out the latch knob until door is closed. Release tension
on the latch knob once pin is centered over the hole in vertical tube
of cage to lock door closed.
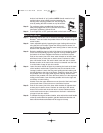
Step 6: To transport the cage to another location, raise and lock the travel handle
on the top vertical tube into position, grab the handle and lean the unit
back onto the wheels at the bottom of the cage to roll away.
7
ENGLISH
FIG. H
SC1000R I.S 325-1439 6/4/04 4:12 PM Page 7