INSTALLING THE FRONT RAIL
• Locate the front rail and the following hardware:
Right and left end caps for front rail
2 screws (5/32-32 x 1/2 in.) for end caps
• Set aside the end caps and two screws until the
switch has been installed.
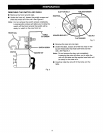
Note: The square head bolts, washers, and hex nuts
shown at the bottom of figure 6 should still be
on the table saw. If you mistakenly removed
them, put them back on the table. Do not
tighten.
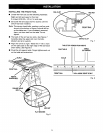
• The back of the rail has two slots. See Figure
Carefully slide the upper slot over the bolts.
(Bottom slot is for switch.)
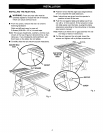
• Align the rail left to right - Match the 7-1/8 in. mark
on the right scale to the right edge of the saw base
(main table). See Figure 8.
• Snug the rail against table. Finger-tighten each nut
on the table and extensions.
SCALE
FRONTRAIL
HEIGHT
HANDWHEEL
RAILSLOT
HEXNUT
SWITCHSLOT
Fig. 7
TABLETOP VIEWEDFROMABOVE
SAWTABLE
TABLE
EXTENSION
SCALE
\.
FRONTRAIL 7-1/8 in,MARKRIGHTSCALE
Fig. 8
SQUAREHEAD
HEXNUT
FLATWASHER
Fig. 6


