,_k WARNING J
Have you read "pOWER TOOL SAFETY",
"CUI-rING TOOL SAFETY" and "ELECTRICAL
SAFETY" on pages 3, 4 and 5 of this Manual? If
not, please do it now before you operate this
cutting tool. Your safety depends on ttl
Every time you use the cutting tool you should
verify the following:
1. Cutting tool cord is not damaged.
2. Bit is correct type for the material being cut.
3. Bit is sharp, in good condition, properly
installed and securely tightened.
4. Safety glasses and dust mask are being worn.
Failure toadhere tothese safety rules cangreatly
increaseyourchancesof injury.
PRACTICE CUTS USING FREEHAND SOLE PLATE
Before attempting to work onan actual project, take the
time to make a few precise cuts with your cuttingtool.
Use some scraps of moledal that are the same material as
used in your actual project.
1. Draw a pattern similarto your first project on a scrap
piece of material.
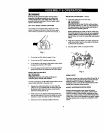
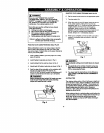
2. Install freehand sole plate as shown in Fig. 4.
3. Installcuttingbitinthe collolas shownin Fig.2.
4. Adjust depth of freehand sole plate as shown in Rg. 5.
5, Rest the edge of the sole plate on the workpiece with
the bitat an angle of about 45° (see Rg. 6),
NOTE: DO NOT letthe bit contact the workplece until
switch isturned ON and the tool is up to fullspeed.
JA WARNINGI
Before turning the tool switch ON, make sure you
hold the tool firmly with both hands. Starting
torque will cause the tool to twtaL
Fig. 6
PRACTICE CUTS USING FREEHAND SOLE PLATE
6. Set the speed control switch tothe appropriate speed.
7. Turn the switch ON.
8,
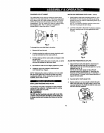
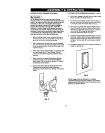
When the motor is up to full speed, slowlytipthe tool
to an upright position, le_ng the bitcut intothe
work.piece (see Fig. 7). Once the toolhas roached the
updght positionand the bit has cut throughthe
workpiece, slowly move the tod in a clockwise
direction using slow steady pressure to make the cut.
NOTE: Except forcutting around outlet boxes in
drywall, always cut in a clockwise direction.
9. When cut is complete, turn thetool OFF, wait untilit
comes to a complete stop and remove it from the
workpiece,
Fig. 7
IA O ( ER]
Do not attempt cutting around outlet boxes in drywall
until:
1. All electricity in the vicinity of electric wires has
been dtaconns_ted by either turning the breaker
OFF or removing the fuses.
2. You have read the instructions on the following
page entitled "CUTTING OUTLET OPENINGS IN
DRYWALL".
cUTrlNG TIPS
The rotating cutting action of the bit willcause a slightpull
to the left when cutting. Natural variationsin the structure
of wood will cause the bitto "wander'. This tendency will
be magnified when applying too much pressure to the bit,
_ower cutting givoa you better control. Excessive
pressure or fast cuffing will increase bittemperature and
shorten _ life ofthebit.
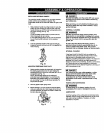
When cutting a hole in e vertical surface, avoid ending the
cut at the bottom Ofthe hole. Always startand end the cut
at the "top" so the cut.out partwill not droponto the
rotating bit.Always turn the tool OFF before removing it
from the workpiece.
11


