


9
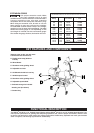
UNPACKING
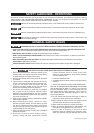
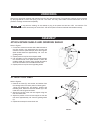
ATTACH SPARK SHIELD AND GRINDING SHIELD
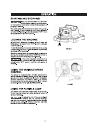
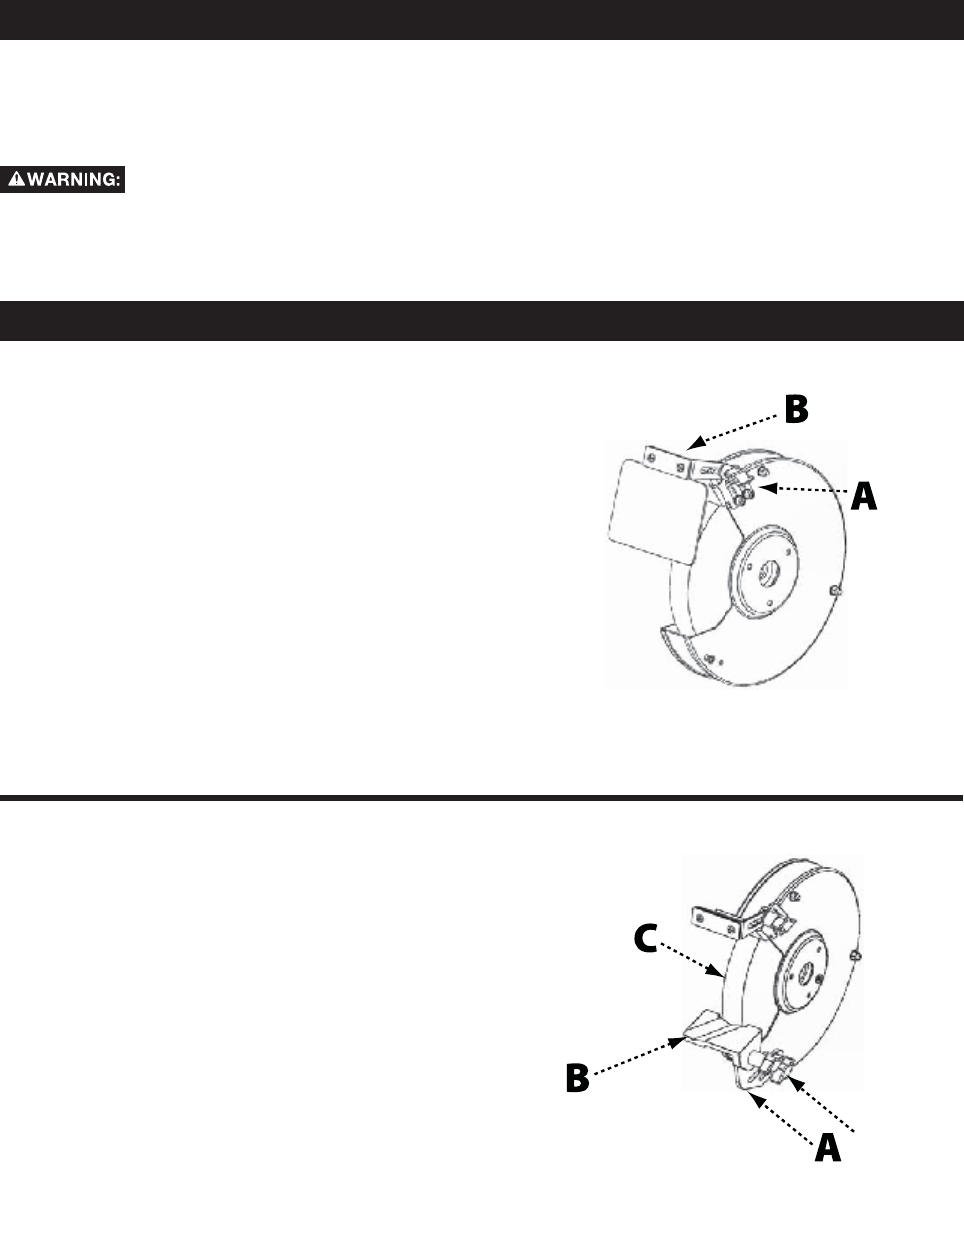
Refer to Figure 1.
1. Fit two M5 x 10mm hex screws with a M5 lock washer
and flat washer. Use assembled hex screws and
washers to secure spark shield (A) to the wheel guard.
Spark shield should be approximately 1/8" from the
grinding wheel.
2. Repeat previous step for second spark shield.
3. Use one M6 x 16 mm carriage bolt, inserted through
the outermost hole in the spark shield, to attach the
grinding shield (B). Secure using one M6 flat washer
and one lock washer and a threaded thumb knob.
4. Repeat previous step for second grinding shield.
FIGURE 1
ASSEMBLY
Remove any protective materials and coatings from all of the parts and the tool. The protective coatings can be removed
by spraying WD-40 on them and wiping it off with a soft cloth. This may need redone several times before all of the
protective coatings are removed completely.
If any parts are missing, do not attempt to plug in the power cord and turn ON" the machine. The
machine should only be turned ON" after all the parts have been obtained and installed correctly.
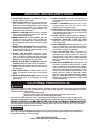
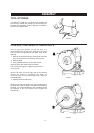
ATTACH TOOL REST
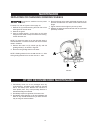
Refer to Figure 2.
1. Remove the knob (D), star washer, and washer from
the carriage bolt on the lower portion of wheel guard.
Using the carriage bolt, star washer, washer and
fastening knob, attach the work rest bracket (A) to the
inside of the wheel guard as shown.
2. Attach tool rest (B) to the tool rest support using one
tool rest fasten knob.
3. Adjust the position of the tool rest support so that the
tool rest is approximately 1/8" from the grinding wheel
(C).
4. Repeat above steps for second tool rest.
FIGURE 2
D