Getting Started Setup Playback Remote Control Multi-zone Information Troubleshooting Specifications
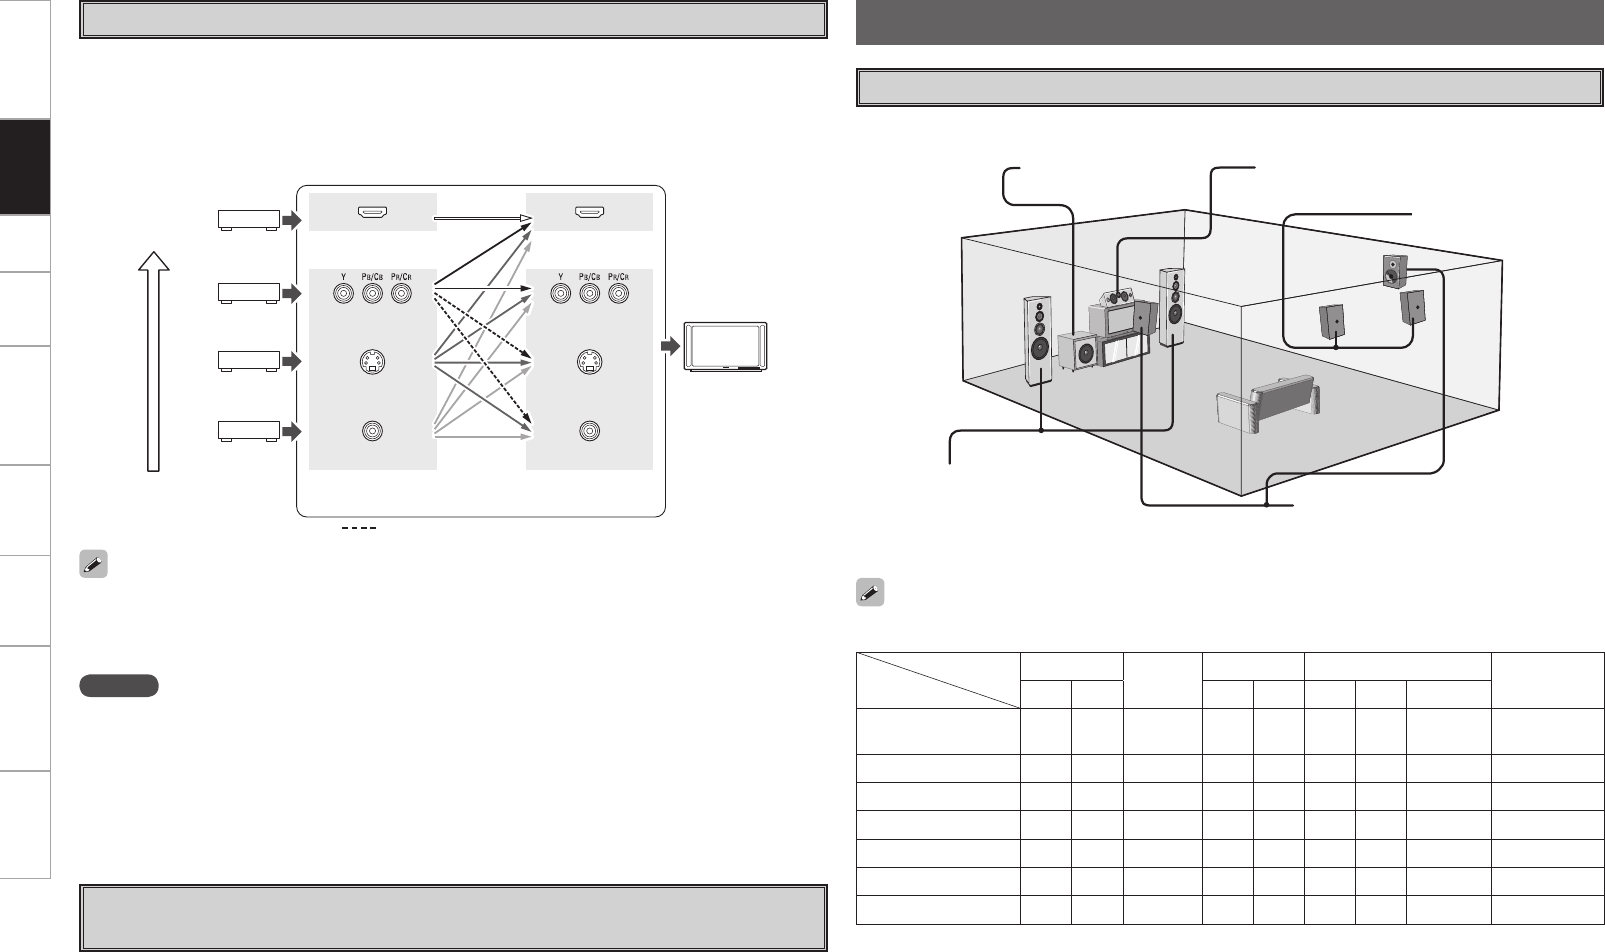
• This function automatically converts various formats of video signals input to the AVR-989 into the format
used to output the video signals from the AVR-989 to a monitor.
• The AVR-989’s video input/output circuitry is compatible with the following four types of video signals:
Digital video signals: HDMI
Analog video signals: Component video, S-Video and Video
Video Conversion Function
GFlow of video signals inside the AVR-989H
High picture
quality playback
HDMI connector
Component video
connectors
S-Video connector
Video connector
Monitor
HDMI connector
Component video
connectors
S-Video connector
Video connector
Video input
terminals
Monitor output
terminals
: When 480i/576i signals are input
NOTE
• HDMI signals cannot be converted into analog signals.
• 1080p component input video signals cannot be output to anything other than component video
connectors.
• 480p/576p, 1080i and 720p component input video signals cannot be converted into S-Video or Video
format.
• When a non-standard video signal from a game machine or some other source is input, the video
conversion function might not operate.
• When not using this function, connect a monitor output with the same type of connector as the video
input connector.
• The resolution of the HDMI input-compatible monitor connected to the AVR-989 can be checked at menu
“Information” – “HDMI Information” (vpage 49).
• When viewing HDMI or component video signals via the AVR-989, the on-screen display appears when
the MENU button on the main unit or the A.MENU button on the main remote control unit is operated.
• When only HDMI or component video signals are input to the AVR-989, the characters of the on-screen
display are not displayed over the picture.
On-Screen Display for Component Video Outputs and HDMI
Output
Speaker Connections
The illustration below shows a basic example of installation of the amplifier combined with 8 speakers and
a monitor.
Speaker Installation
Subwoofer Center speaker
Surround speakers
Front speakers
Place the front speakers to the
sides of the monitor or screen and
as flush with the screen surface as
possible.
The table below shows a typical speaker configuration for the AVR-989.
Surround back speakers
FRONT
CENTER
SURROUND SURROUND BACK
SUBWOOFER
L R L R L R 1 speaker
7.1-channels
(FRONT A+B)
S S S S S S S
–
S
7.1-channels
S S S S S S S
–
S
6.1-channels
S S S S S
– –
S S
5.1-channels
S S S S S
– – –
S
3.1-channels
S S S
– – – – –
S
2.1-channels
S S
– – – – – –
S
2-channels
S S
– – – – – – –
Connections


