


5
English
INTENDED USE
These heavy-duty V.S.R. drills are designed for professional drill-
ing.
DO NOT use under wet conditions or in presence of flammable
liquids or gases.
These heavy-duty drills are professional power tools.
DO NOT let children come into contact with the tool. Supervision is
required when inexperienced operators use this tool.
ASSEMBLY AND ADJUSTMENTS
WARNING: Prior to assembly and adjustment, ALWAYS unplug
tool.
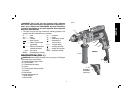
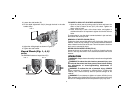
Side Handle (Fig. 1)
WARNING: To reduce the risk of personal injury, ALWAYS
operate the tool with the side handle properly installed. Failure to do
so may result in the side handle slipping during tool operation and
subsequent loss of control. Hold tool with both hands to maximize
control.
A side handle comes assembled with the DWD024. The side handle
(G) can be fitted to suit both right-hand and left-hand users.
TO ADJUST THE SIDE HANDLE
1. Loosen the side handle (G) by turning it counterclockwise.
2. Rotate the side handle to the desired position.
3. Tighten the side handle by turning it clockwise.
TO CHANGE SIDES
For right-hand users: slide the side handle clamp over the
chuck, handle at the left.
For left-hand users: slide the side handle clamp over the chuck,
handle at the right.
Forward/Reverse Lever (Fig. 1)
The forward/reverse lever (C) is used for withdrawing bits from tight
holes and removing screws. It is located above the trigger switch.
To reverse the motor, release the trigger switch FIRST and then
push the lever to the right (viewed when holding the drill in the
operating position).
After any reversing operations, return lever to forward position.
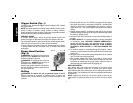
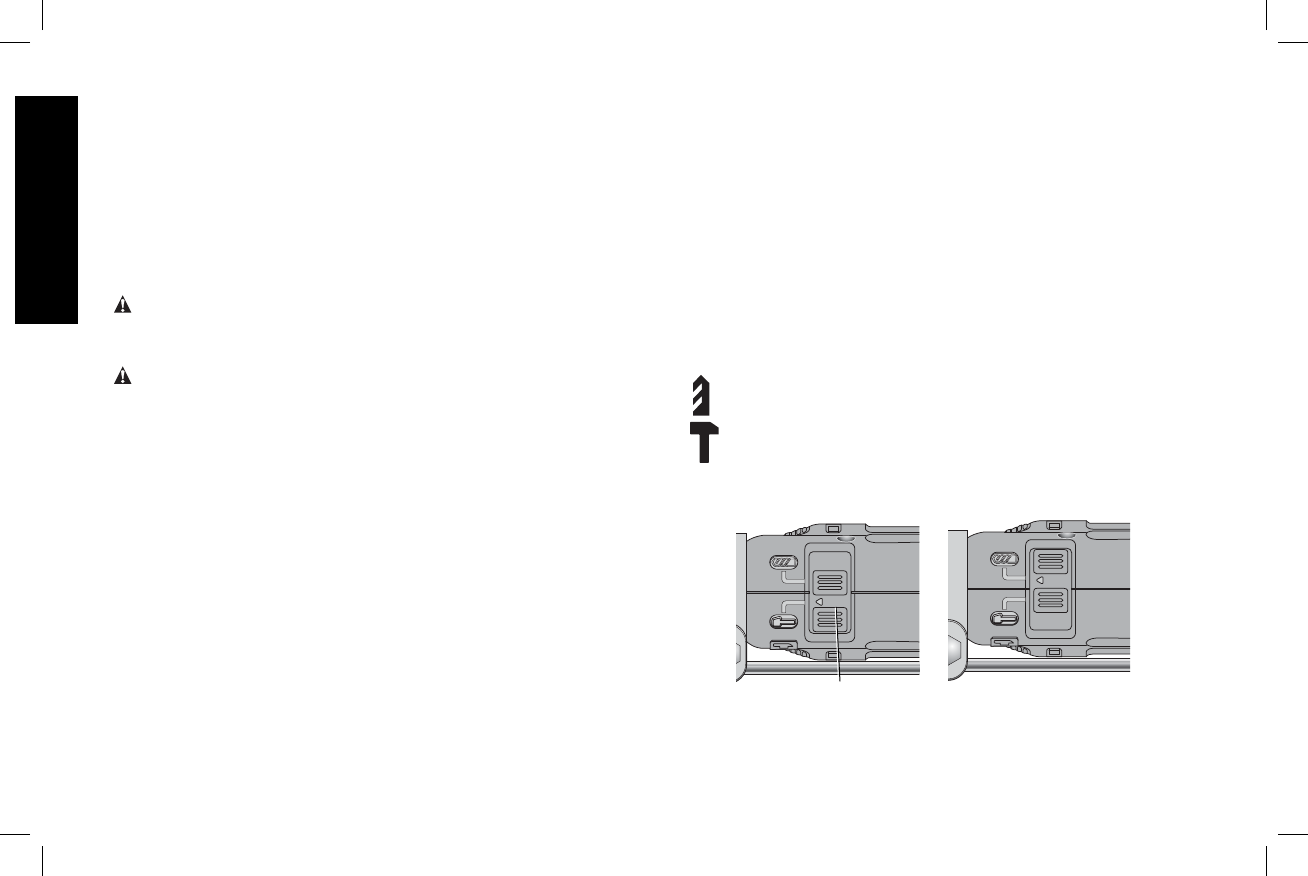
Mode Selector (Fig. 2)
NOTICE: Tool must come to a complete stop before activating the
mode selector button or damage to the tool may result.
Select the required operating mode by sliding the mode selector (I)
to the corresponding symbol.
DRILL-ONLY MODE
Use drill-only mode for wood, metal, and plastics.
HAMMER-ONLY MODE
Use hammer-only mode for simultaneous rotating and
impacting for masonry, brick and concrete.
I
FIG. 2
Setting the Drilling Depth (Fig. 3)
1. Insert the required drill bit into the chuck.