


"#%'"!
Before starting work it is advisable to test the
work surface for the ideal temperature to use.
The table below gives an indication of the likely
heat settings required but always start with the
low heat setting. All applications, with the
exception of removing paint from window
frames, can be performed without using a
nozzle, however for best results nozzles are
recommended.
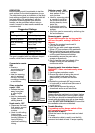
!9DD60=
The gun is supplied with four different shaped
nozzles, which can be used as follows:
98.08><,>9<89DD60
●
Directs a
concentrated heat
flow to the work
surface.
●
Ideal for removing
paint in awkward
corners, crevices,
mouldings, beading
or architraves.
6,==:<9>0.>498
89DD60
●
Deflects the heat
away from glass
or other fragile
areas.
●
Ideal for windowsills,
ledges, frames and
skirting boards.
99589DD60
●
Disperses the heat
flow evenly around
the whole work
surface.
●
Ideal for defrosting
frozen pipes,
soldering pipe work,
bending plastics or
heat shrinking
electrical insulating
tubing.
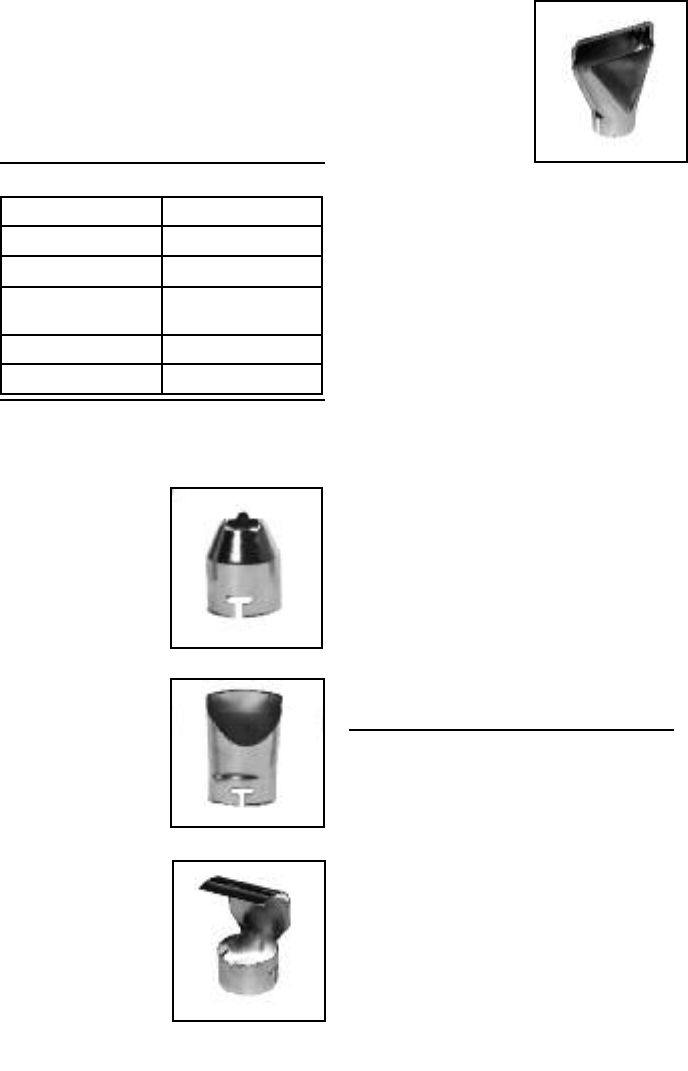
0160.>9<89DD60
●
Directs a long, narrow
heat pattern to the
work surface.
●
Ideal for removing paint
or varnish from large,
flat surfaces such as
skirting boards, doors,
stairs etc.
●
It should be used in
conjunction with a flat
scraper.
●
Vinyl tiles can be removed by softening the
tile and adhesive.
%079@482:,48>2080<,6
989>30,>>30:,48>19<>996982,=>34=
A466-?<8>30:,48>7,54824>/4114.?6>>9
<079@0
1.Choose the required nozzle and fit
onto the heat outlet.
2.Hold the gun with nozzle approximately
50mm (2”) from surface of the paintwork.
3.Starting with the low heat setting, move
the gun slowly backwards and forwards
until the paint blisters and bubbles.
4.Immediately remove the paint with a
scraper or shavehook.
5.Aim to heat the paint just ahead of the
scraper so that you can develop a
continuous action.
%079@482:,48>1<97A48/9A1<,70=
*%!!E6,==.,8-<0,50,=46CA308
30,>0/
1.Use the glass protection nozzle.
2.Ensure the nozzle is facing the correct
way to deflect heat away from the
glass before you switch on the heat
gun.
3.Rotate the gun/nozzle 90º as you move
to horizontal or vertical bead (take care it
could be hot!).
4.Paint can be removed by using a
shavehook and/or a soft wire brush.
,48>08,8.0
Always allow the machine to cool down (before
storing) and disconnect from the power supply.
The heat gun should be cleaned before being
stored away by wiping over with a clean damp
cloth. "!"'(& & Ensure that
the ventilation slots are not blocked.
'<9?-60&399>482
1,:<9-6079..?<=,6A,C==A4>.3911>30
?84>4770/4,>06C,>>307,48=
C?84>1,46=>9A9<5
Check the fuse in the plug is sound and rated
13 amps.
If an extension cable is used it must be fully
unwound and rated at least 10 amps capacity.
3
98.08><,>9<89DD60
6,==
:<9>0.>49889DD60
G84
G89
G87
G88
99589DD60
0160.>9<89DD60
9A 423
Welding plastic Paint stripping
Bending plastic Defrosting pipes
Heat shrinking
plastic
Removing vinyl
floor tiles
Soldering
Lighting BBQs
&?220=>0/%,>482=