


22
ENGLISH
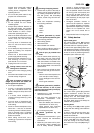
8.1 Sawing
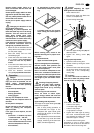
1. Choose and install a table insert
extrusion suitable for the type of cut
to be performed:
− table insert extrusion with a nar-
row slot for standard cross cuts
only;
− table insert extrusion with bevel-
led slot for bevel cuts also.
2. Adjust the band saw blade speed.
3. If necessary, adjust the table tilt.
4. Select rip fence and table tilt for the
type of cutting operation to be car-
ried out.
5. Set upper blade guide 3 mm above
the workpiece.
3
Note:
Always make a trial cut in a piece
of scrap to verify settings; correct if nec-
essary before cutting the workpiece.
6. Place workpiece on the saw table.
7. Plug in.
8. Start saw.
9. Cut workpiece in a single pass.
10. Switch off if no further cutting is to
be done immediately afterwards.
A
Danger!
Prior to all servicing:
− switch machine OFF.
− wait until the saw has come to a
complete stop.
− unplug power cable.
• Check that all safety devices are
operational again after each service.
• Replace defective parts, especially
of safety devices, only with genuine
replacement parts. Parts not tested
and approved by the equipment
manufacturer can cause unforeseen
damage.
• Repair and maintenance work other
than described in this section should
only be carried out by qualified spe-
cialists.
9.1 Band saw blade change
A
Danger!
Risk of injury, even with the
band saw blade at standstill. Wear
gloves when changing blades. Use
only suitable band saw blades (see
“Technical specifications”).
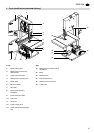
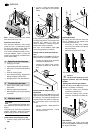
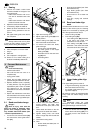
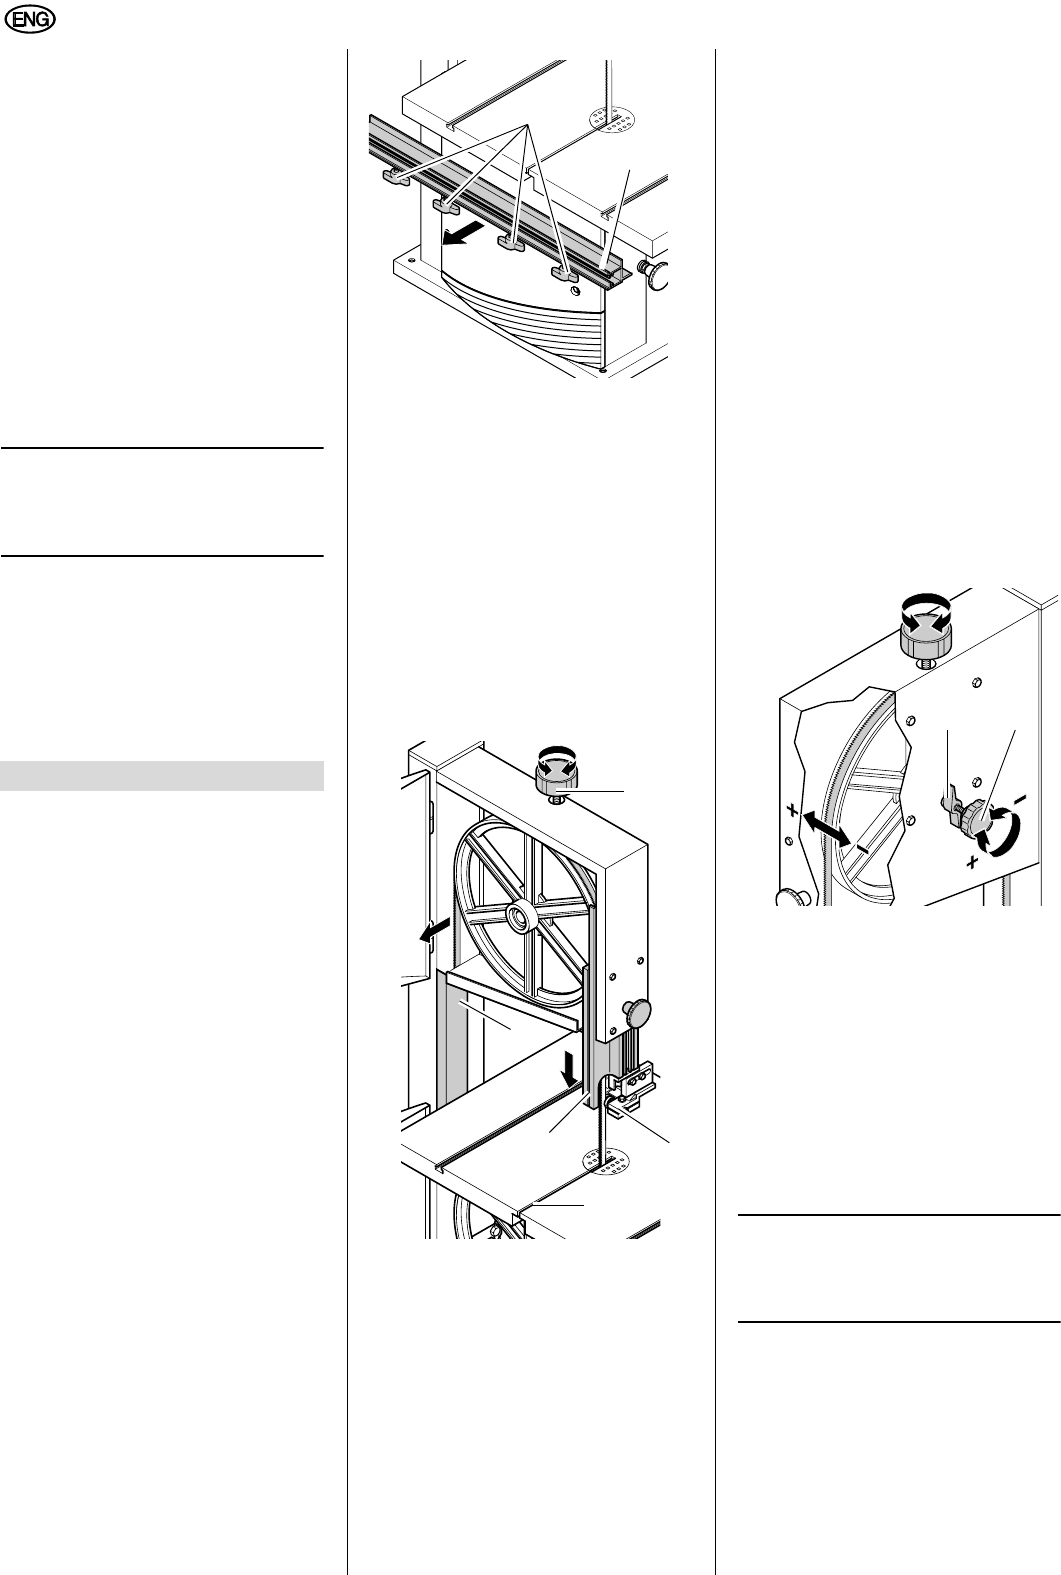
1. Loosen the four thumb screws (50)
and remove the fence guide extru-
sion (51).
2. Open both housing doors.
3. Adjust upper blade guide (52) to its
lowest position.
4. Loosen setting knob (53) until the
band saw blade has slackened.
5. To remove the band saw blade,
guide it through
− the slot in the saw table (54),
− the blade guard on the upper
blade guide (55),
− the blade cover on the saw hous-
ing (56) and
− the blade guides.
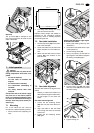
6. Fit fresh band saw blade. Observe
correct position: the teeth point
towards the front (door) side of the
saw.
7. Center band saw blade on the rub-
ber tyres of the band saw wheels.
8. Tighten setting knob until blade
does no longer slip off the band saw
wheels.
9. Close both housing doors.
10. Then:
− tension band saw blade (see “Ini-
tial operation”).
− align band saw blade (see “Care
and maintenance”);
− align blade guides (see “Care
and maintenance”);
− let saw test run for at least one
minute;
− stop saw, unplug and recheck
settings.
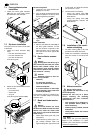
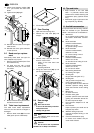
9.2 Band saw blade align-
ment
If the band saw blade does not run in the
centre of the rubber tyres, the tracking
needs to be corrected by adjusting the
tilt of the upper band saw wheel:
1. Loosen locking nut (57).
2. Turn setting knob (58):
− Turn setting knob (58) clockwise
if the band saw blade runs
towards the front of the saw.
− Turn setting knob (58) counter-
clockwise if the band saw blade
runs towards the rear of the saw.
3. Tighten locking nut (57).
9.3 Upper blade guide align-
ment
The upper blade guide consists of:
− a large thrust bearing (supports the
band saw blade from the rear),
− two smaller guide bearings (provid-
ing lateral support).
All bearings need to be readjusted after
every band saw blade change and/or
tracking.
3
Note:
Periodically check the guide
bearings for wear, if necessary replace
both guide bearings at the same time.
1. Turn the ratchet lock lever (59) to
loosen the thrust bearing (60), so it
will easily move in the direction of
arrows.
9. Care and Maintenance
50
51
52
53
54
55
56
57 58