7
Instruction Manual 226
LIQ_MAN_ABR_226 April 2014
Calibration
The nominal cell constant of the 226 sensor is 1.2/cm. The error in the cell constant is about ±10%, so conductivity
readings made using the nominal cell constant will have an error of at least ±10%. Wall effects, discussed below, will
likely make the error greater. For higher accuracy, the sensor must be calibrated. Wall effects arise from the interaction
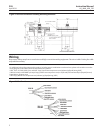
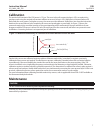
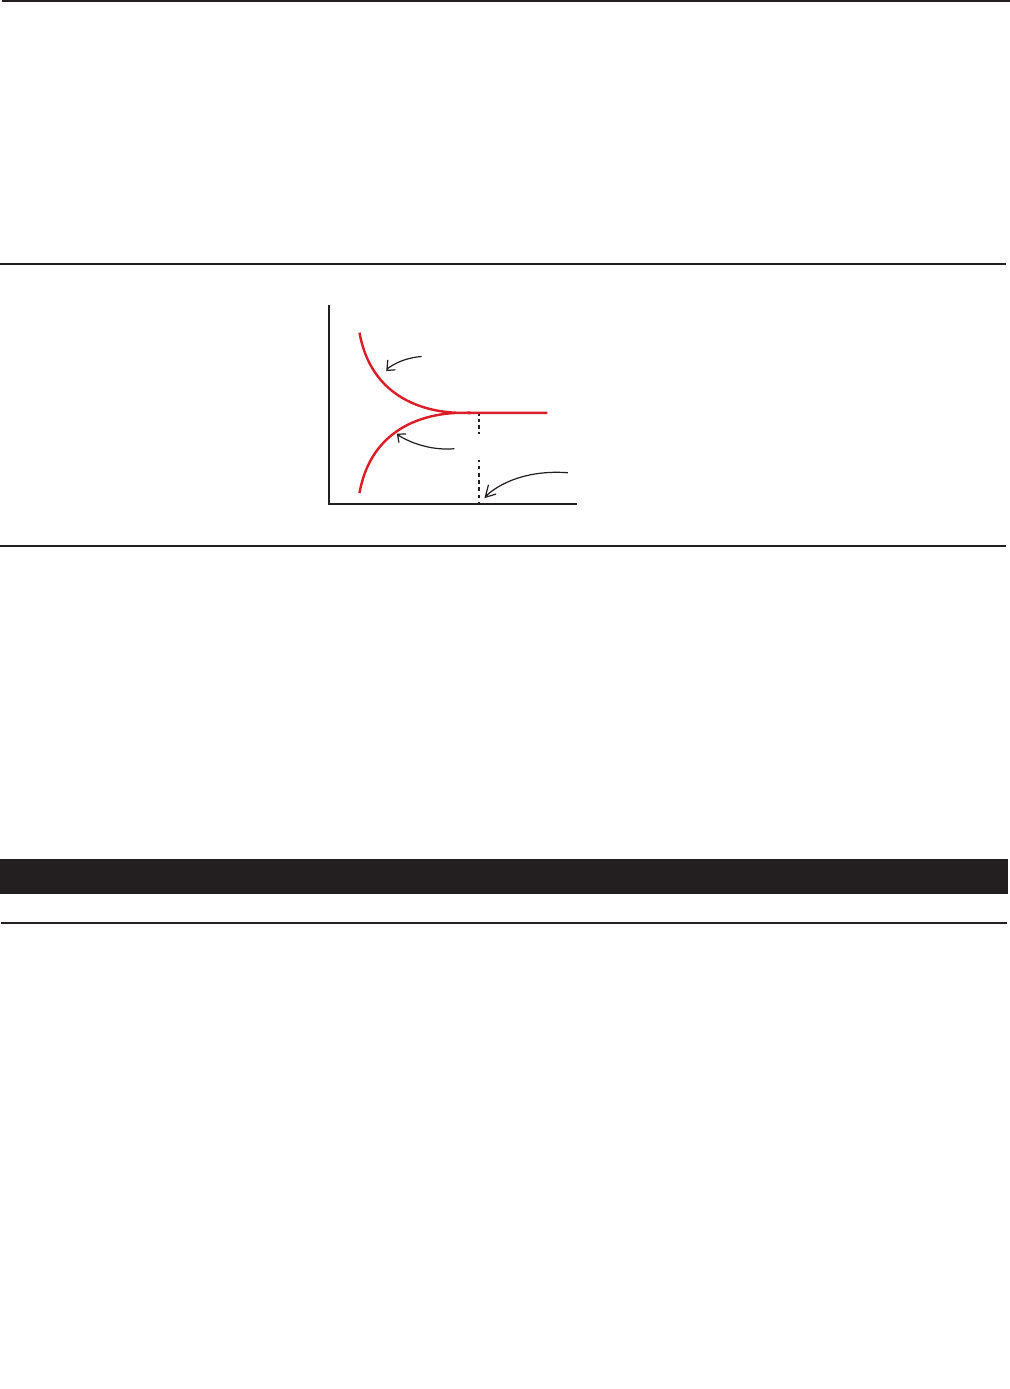
between the current induced in the sample by the sensor and nearby pipe or vessel walls. As Figure 12 shows, the
measured conductivity can either increase or decrease depending on the wall material. Because wall effects do not
disappear until the 226 sensor is at least 2.4 inch (60 mm) away from the nearest wall, wall effects are present in most
installations. Correcting for them is an important part of calibration.
Figure 12. Measured conductivity as a function of clearance between sensor and walls
metal pipe
distance to wall
measured conductivity
true conductivity
plastic pipe
2.4 inch (60 mm)
Conductivity sensors are calibrated against a solution of known conductivity (a standard) or against a previously
calibrated referee sensor and analyzer. If wall effects are present, calibrating a toroidal sensor with a standard solution
is possible only if the vessel holding the standard has exactly the same dimensions as the process piping. If the 226
sensor is installed in a tee, duplicating the process environment in the laboratory or shop might be possible. Otherwise,
calibration against a standard solution is probably impractical. The alternative is to calibrate the sensor in place against a
referee sensor and analyzer, ideally while both sensors are simultaneously measuring the same process liquid. If this is not
practical, calibrate the process sensor against the results of a measurement made on a grab sample.
For more information about calibrating toroidal conductivity sensors, refer to application sheet ADS 43-025 available on
the Rosemount Analytical website.
Maintenance
CAUTION
Be sure sensor has been cleaned of process liquid before handling.
Generally, the only maintenance required is to keep the opening of the sensor clear of deposits. Cleaning frequency is best
determined by experience.
true conductivity
plastic pipe
2.4 inch (60 mm)
metal pipe
distance to wall
measured conductivity


