


8 Carvex PS420 Series
Setup
Changing the Sawblade
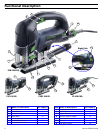
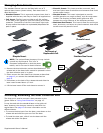
The Carvex jigsaw features tool-free blade changing. Used
blades can be ejected from the saw without touching the
potentially hot blade. New blades are inserted into the
holder with just a simple twist.
Choosing the correct sawblade for the task is important
for optimal results. Refer to “Sawblade Selection” on page
14.
WARNING! Always disconnect the saw from the
power supply (power cord or battery) before making
any adjustments to the saw or installing or remov-
ing the blade.
CAUTION! After prolonged use, the used sawblade
may be hot. Take care not to touch the sawblade
until it has cooled.
1. Unplug the saw or remove the battery. This procedure
may require you to touch the blade with your ngers, so
make sure the saw cannot start unexpectedly.
2. If the splinter guard is installed, remove it as described
on page 12.
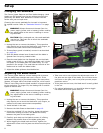
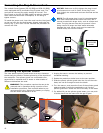
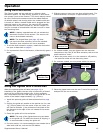
3. Slide the blade release lever forward until the blade is
ejected from the spring loaded holder.
4. Place the new blade into the diagonal slot on the blade
holder, press it fully in, and rotate the blade until it locks
into place. If the blade does not rotate easily, it is not
pressed in far enough. The small tabs on the side of the
blade must be inside the blade holder.
5. Adjust the blade guide as described below.
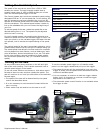
Adjusting the Blade Guide
The Carvex jigsaw features a lower blade guide to ensure
that the blade stays straight and true in the cut. If the
blade was guided only by the blade holder, like many other
jigsaws, the upper half of the blade could ex, which would
make it more likely that the blade wouldn’t be perpendicular
to the workpiece. For longer life, the blade guide is carbide
tipped to reduce wear.
WARNING! Always disconnect the saw from the
power supply (power cord or battery) before making
any adjustments to the saw or installing or remov-
ing the blade.
1. Unplug the saw or remove the battery. This procedure
may require you to touch the blade with your ngers, so
make sure the saw cannot start unexpectedly.
2. Install a blade in the saw.
3. Remove the Main Base as described on page 10.
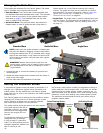
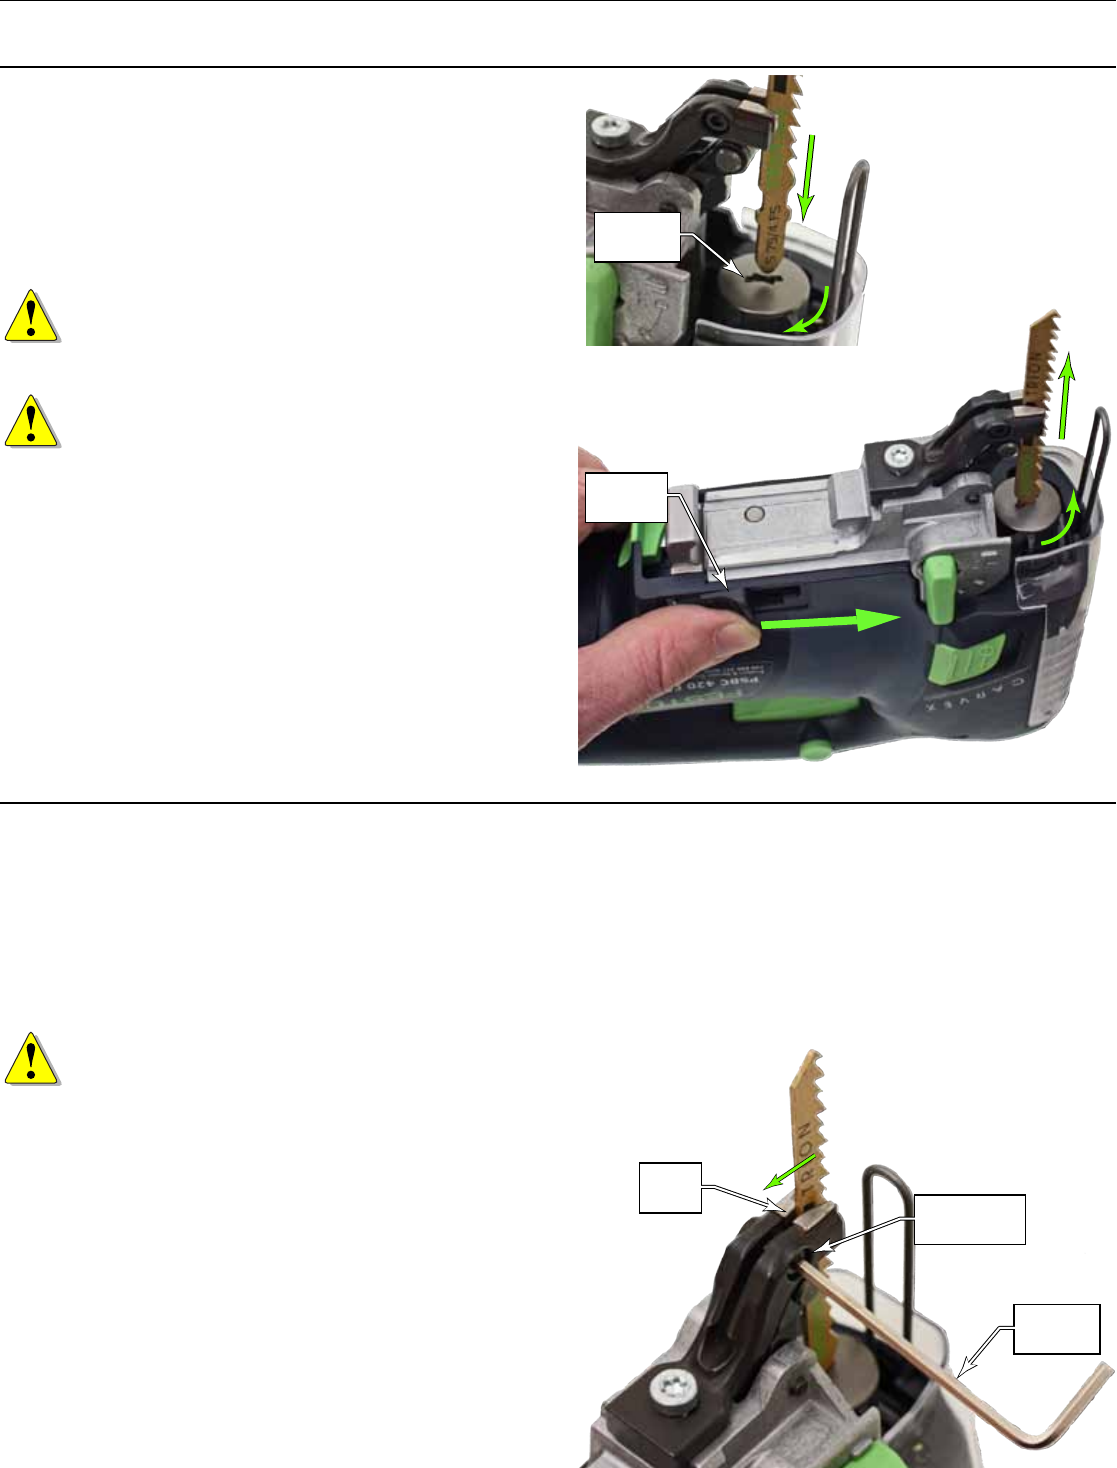
4. Using the provided 2.5 mm hex key, loosen the adjust-
ment screw enough to ensure the blade ts loosely
between the jaws of the blade guide.
5. Carefully push back on the blade to ensure it is tting
between the parallel faces of the blade guide jaws.
6. While wiggling the blade back and forth, tighten the
adjustment screw until the jaws are almost touching the
blade.
► Take care not to over-tighten the adjustment screw. If
the jaws are too tight to the blade, you will have exces-
sive wear on the jaws, and it may even prevent proper
pendulum action.
► If the jaws are too loose, the blade won’t be well guided
in the cut.
► For optimal adjustment, you should be able to wiggle
the blade side-to-side just a little bit.
Blade
Release
Diagonal
Slot
Guide
Jaws
Adjustment
Screw
2.5 mm
Hex Key