


12
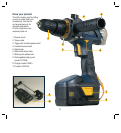
Forward/reverse switch
This switch (4) will allow you
to change the direction of
the motor while the trigger
switch is not depressed.
Drilling uses the forward mode.
The reverse mode is intended
for the removal of screws.
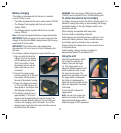
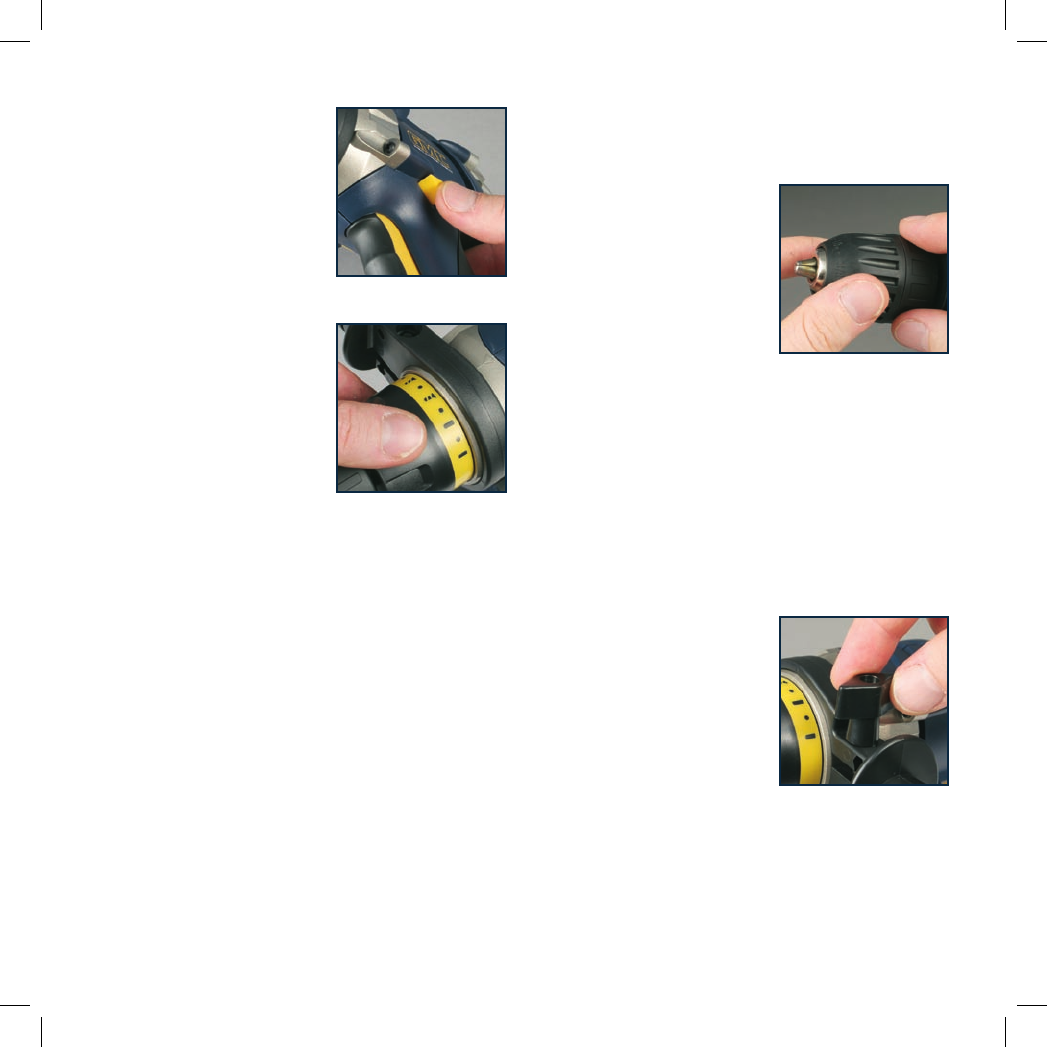
Adjustable torque
This drill is equipped with 21
torque settings plus one drill
setting which are controlled by
the torque collar (2). By rotating
the collar behind the chuck, it is
possible to adjust the torque.
This will allow better control
when using the drill as a
screwdriver as it prevents over-
tightening of the screws.
For drilling, always use the use the Drill position by aligning
the Drill symbol with the triangular indicator on the front face
of the drill near the torque collar.
For setting the torque position, select a low setting on
the torque collar and align the selected symbol with the
triangular indicator on the top of the drill. Increase gradually
to set the correct torque. It is better to use a scrap piece of
material if possible to set the torque.
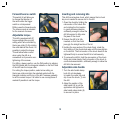
Inserting and removing bits
This drill has a keyless chuck, which means that a chuck
key is not needed to secure a bit in the drill.
1. Open the chuck by holding the
rear section of the chuck firm
and rotating the front section
in a anti-clockwise direction,
sufficiently enough to allow the
drill bit required to fully enter
the jaws of the chuck.
2. Ensure the drill bit is fully
inserted, so that the chuck
jaws grip the straight section of the bit.
3. Holding the rear section of the chuck firmly, rotate the
front section of the chuck clock-wise until the jaws tighten
on the drill bit. The front section of the chuck needs to be
tightened firmly to ensure the drill bit is held securely.
4. To remove the drill bit, hold the rear section of the chuck
firmly and rotate sharply the front section of the chuck in
a anti-clockwise direction, sufficiently enough to allow the
drill bit to be removed.
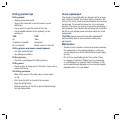
Adjustable side handle
1. Turn the side handle clamp
knob (6) anti-clockwise
to loosen the collar fully and
slip it over the chuck (1) onto
the drill.
2. Adjust the position of the
side handle (5) to suit the
application and tighten the
side handle clamp knob (6)
to secure it in place.