


9
Dust collection
Connect dust extraction equipment to the 40 mm diam.
dust extraction port.
CAUTION. Wood dust and chips in a confined area can
give rise to fire or an explosion. Guard against possible
ignition sources.
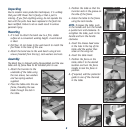
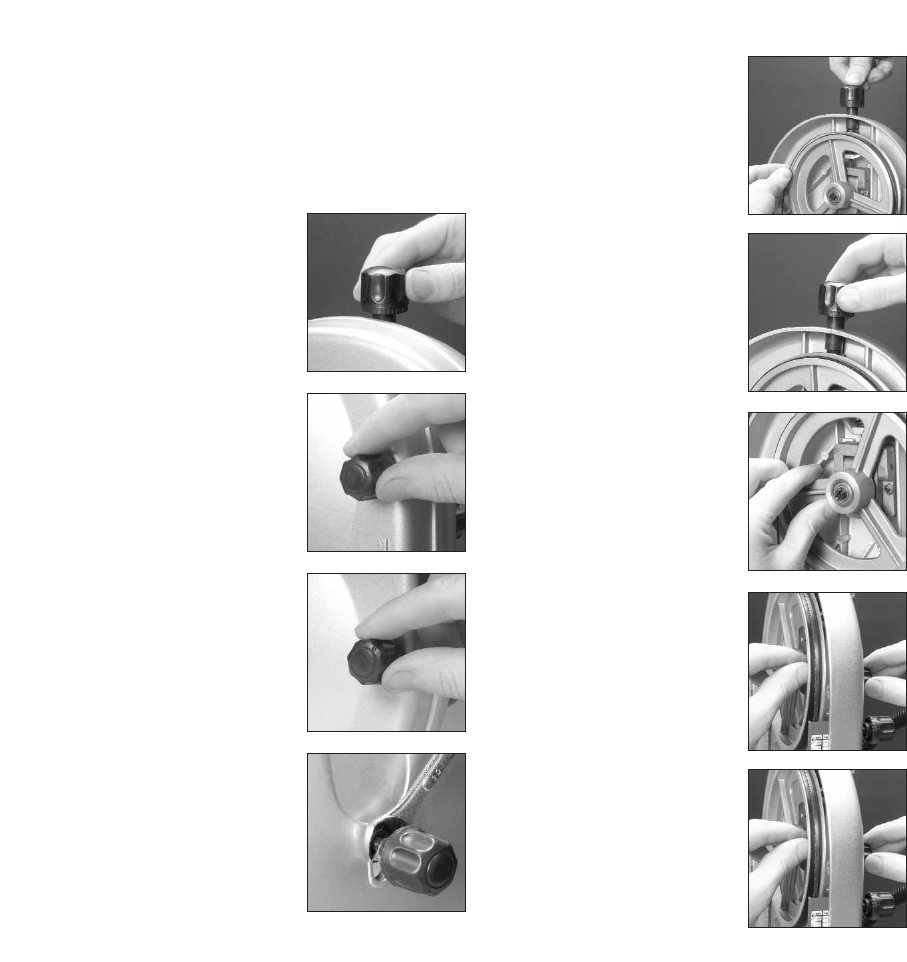
Changing the saw band
The saw is supplied with a
general-purpose woodcutting
blade.
WARNING. Ensure that the mains
plug is removed from the power
socket and remove the locking
insert from the ON/OFF switch
before changing a blade.
1. To change the blade, first
remove the rip fence and the
cheese-headed screw held in
the table with the wing nut.
2. Loosen the locking nut under
the saw band tracking knob.
3. Loosen the two housing locking
knobs and open the housing
door.
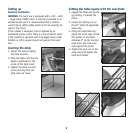
4. Slacken the blade tension by
rotating anti-clockwise the
blade tensioning knob on the
top of the upper wheel
housing.
5. Press down on the blade
tensioning knob to lower the
upper wheel and carefully
remove the saw band.
6. Press down on the blade
tensioning knob as you fit the
new saw band. Tension the
blade lightly by rotating
clockwise the blade-tensioning
knob on the top of the
housing.
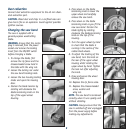
7. Turn the upper wheel by hand
to check that the blade is
running in the centre of the
rubber-lined wheels.
8. To adjust the tracking of the
saw band, turn the knob on
the rear of the upper wheel
housing whilst rotating the
upper wheel by hand. Tighten
the lock nut after adjusting
the knob.
9. Close and secure the wheel
housing door.
10. Replace the rip fence scale.
11. Replace the cheese-headed
screw, washer and
wing nut.
NOTE. The saw band is tensioned
correctly when it runs quietly and
without vibrating.
CAUTION. Always ensure that the
saw is switched off and unplugged
from the power supply before
making any adjustments.