


Overview
The saw is capable of ripping and cross cutting
hardwoods, softwoods and man made boards quickly,
accurately and safely.
If the tool becomes too hot, let it run under no load for
2–3 minutes to cool the motor.
The quality of the cut will improve as the number of blade
teeth increases.
The blade cuts on an upward stroke and may chip the
uppermost surface or edges of your work piece. When
cutting, ensure that your uppermost surface is a non-
visible surface when your work is finished.
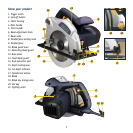
By slackening the bevel adjustment knob (6), the body
and the blade of the saw can be tilted to any
angle up to
45° for making angle cuts. Please note that the maximum
depth of cut is reduced when cutting at an angle.
A fixed guard (13) encloses the upper part of the
blade. As the saw advances through the work piece, the
retracting blade guard (11) is pushed back by the edge
of the wood to expose only that part of the blade which
is needed. When the blade clears the work, the retracting
blade guard snaps back to completely enclose the blade.
Adjusting the cutting depth
Caution. Always ensure that the saw is switched off and
unplugged from the power supply before making any
adjustments.
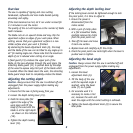
1. Ensure that the saw is facing away from you.
2. Loosen the depth locking lever (15).
3. Hold the base plate flat
against the edge of the
work piece and lift the
body of the saw until the
blade is at the right depth
- as shown on the indicator
(16).
4. Tighten the depth locking
lever (15).
Adjusting the depth locking lever
If the locking lever cannot be tightened enough to lock
the pivot point, it is time to adjust it.
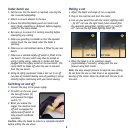
1. Ensure the power is
disconnected from the
mains socket.
2. With a pair of circlip pliers
or a flat screwdriver blade,
carefully remove the circlip
from the pivot point nut.
3. Take off the lever and move
it back one section.
4. Replace lever and carefully re-fit the circlip.
5. Check the pivot point now locks tight when the lever is
pushed over to tighten.
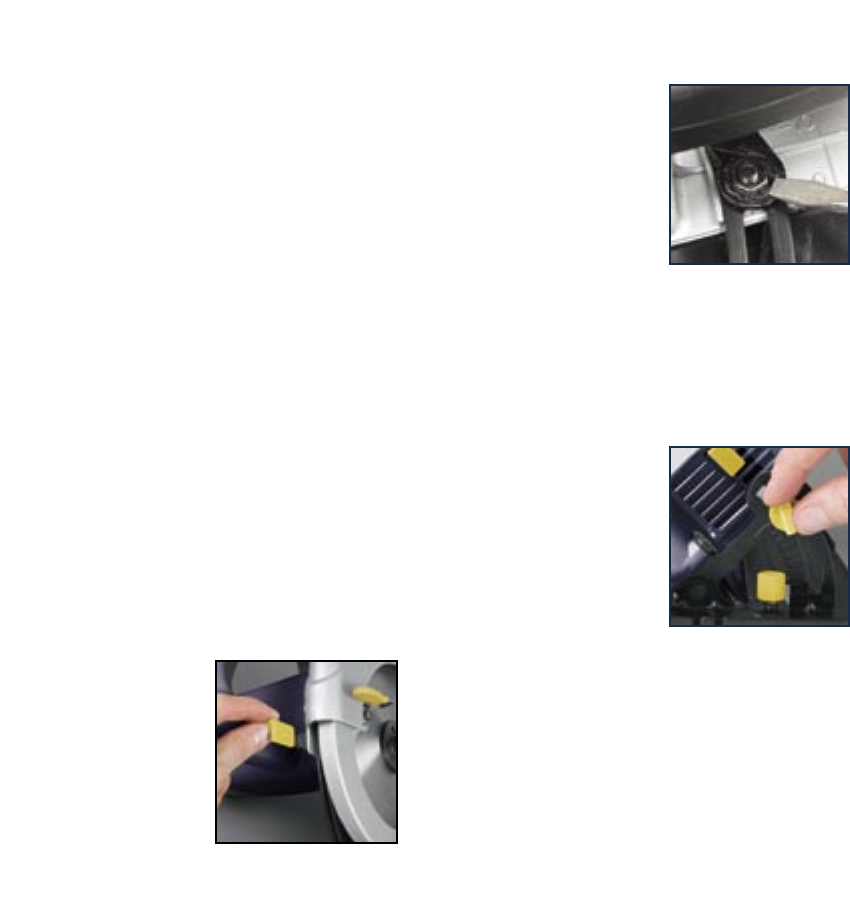
Adjusting the bevel angle
Caution. Always ensure that the saw is switched off and
unplugged from the power supply before making any
adjustments.
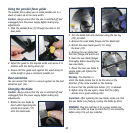
1. Loosen the bevel
adjustment knob (6).
2. Tilt the body of the saw
until the required angle is
reached, using the bevel
scale (7) as a guide.
3. For accurate work it is
necessary to make a trial
cut, measure the work and
reset the angle until the correct setting is achieved.
4. Tighten the bevel adjustment knob (6) to secure the
base plate.
8