


8
Mounting the saw to a workbench
It is recommended that the scroll saw is secured to a
work bench to gain maximum stability and prevent noise
and vibration.
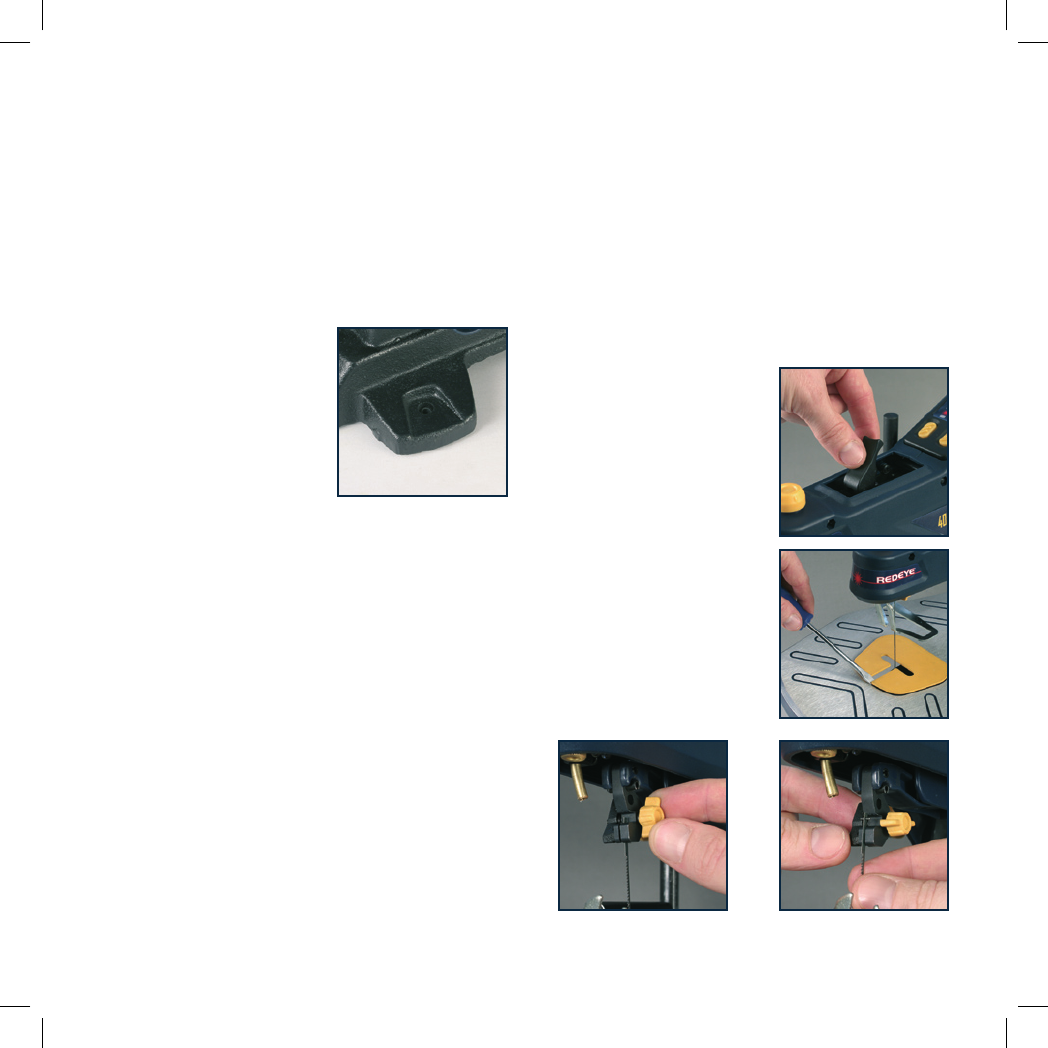
1. Using the base of the scroll saw as a template mark the
holes on the workbench through the holes in the casting.
2. Drill the holes through the workbench using an 8mm
drill bit.
3. Bolt the saw to the workbench using bolts, washers
and nuts.
Note. The fasteners are not
supplied with the machine.
Note. A soft foam pad or carpet
(not supplied) can be placed
between the scroll saw and the
work bench to further reduce
noise and vibration.
Blades
The scroll saw accepts 127mm pin type and flat blades.
A flat blade adapter is not required.
Selecting the correct blade
1. The scroll saw accepts a wide variety of blade widths
and thicknesses for cutting wood and other wood
based materials.
2. The blade width, thickness, and number of teeth per inch
will be determined by the material and size of the radius
being cut.
3. Select a blade that allows at least three (3) teeth to be
in contact with the workpiece at all times.
4. Very fine, narrow blades should be used for curve cutting
in thin wood (6mm or less).
5. To cut thicker wood, use wider blades with fewer teeth
per inch.
6. When cutting wood thicker than 25mm, guide the
workpiece into the blade slowly and take care not
to bend or twist the blade whilst cutting.
7. Most blade packages state the size or thickness of
wood which that blade is intended to cut, and the radius
(size of curve) which can be cut with that blade.
8. Wider blades cannot cut curves as tight or small as
thinner blades.
9. This saw uses 127mm long pin type and flat blades.
10. Blades wear faster when:
a. Cutting plywood which is very abrasive
b. Cutting wood that is thicker than 19mm
c. Cutting hardwood
d. Side pressure is placed
on the blade
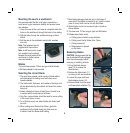
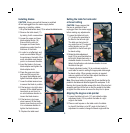
Removing blades
CAUTION. Always ensure that the
saw is switched off and unplugged
from the mains supply before
removing or installing a blade.
1. Lift up the blade tension
lever (12) to reduce the
blade tension.
2. Remove the table insert (11)
by raising it with a screwdriver.
3. Loosen the upper and lower
blade adapter knobs (14).
4. Remove blade from the upper
and lower blade adapters (13).