


Unpacking
Due to modern mass production techniques, it is unlikely that
your GMC Power Tool is faulty or that a part is missing. If you
find anything wrong, do not operate the tool until the parts
have been replaced or the fault has been rectified. Failure to
do so could result in serious personal injury.
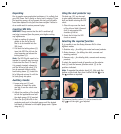
Inserting SDS bits
WARNING. Always ensure that the drill is switched off
and plug is removed from the power point before making
any adjustments.
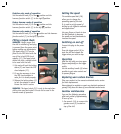
1. Apply a coating of universal
grease to the end of the bit
that is to be inserted into the
SDS chuck.
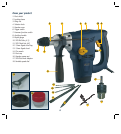
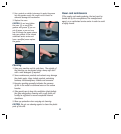
2. Pull back the locking sleeve (2),
insert the SDS Plus bit into the
chuck opening and release the
locking sleeve (2).
Note. The SDS Plus bit needs to be
inserted in a specific way to ensure
it locks into the chuck. To check if
it is properly inserted, attempt to
pull the bit out of the chuck. If it
can be removed without pulling
back locking sleeve (2), rotate the
bit a little and re-insert it until the
bit locks firmly into place.
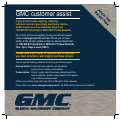
Auxiliary handle
1. Loosen wing nut (3) anti-
clockwise to loosen the collar
and slip it over the chuck onto
the drill.
2. Adjust the position of the handle
to suit the application and add
the depth gauge (9) if required.
3. Place the tip of the drill on the
workpiece and push in the depth gauge until the desired
hole depth is indicated on the depth gauge scale. Tighten
wing nut (3).
Using the dust protector cap
The dust cap (15) can be used
to give added protection against
dust and debris entering the SDS
chuck.
1. Place the cap over the shank
of the bit and slide it forward
until it rests against the
shoulder of the bit.
2. Insert the bit into the SDS
chuck as normal.
Selecting the required function
It is possible to use the Rotary Hammer Drill in three
different modes:
1. Rotation only – for drilling into metal and wood products.
2. Rotary hammer – for drilling into brick, concrete and
masonry products.
3. Hammer only – for chiseling brick, concrete and masonry
products.
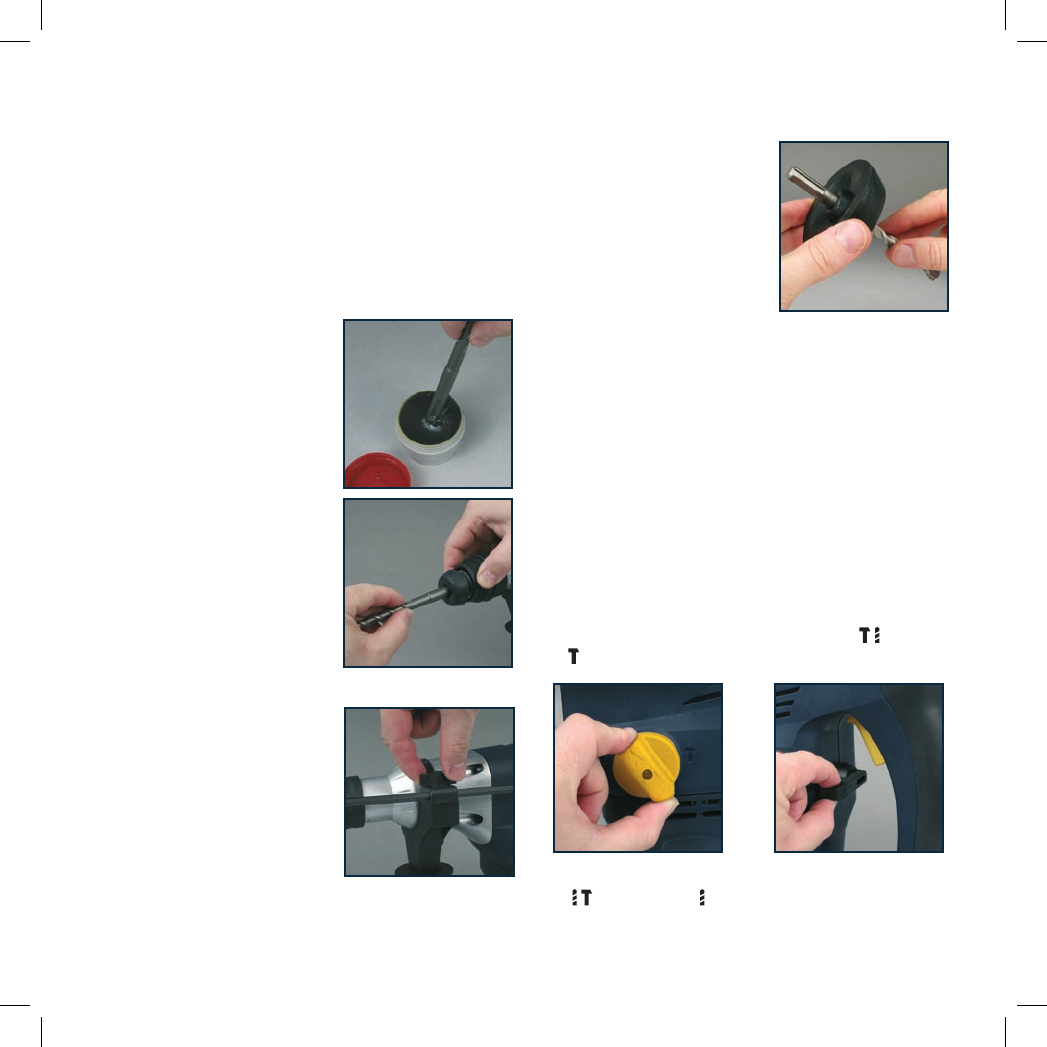
To select the required mode of operation set the selector
knob (4) and the hammer function switch (7) to the
positions indicated.
Note. To operate the selector knob (4), first push the
button on the knob then turn it either to the
or to
the
position as required.
The hammer function switch (7) can be turned to the
left
or to the right as required.
9