


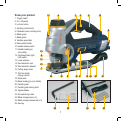


9
2. With a blade fitted move the variable speed dial (8) to
number 3 (low speed).
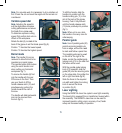
3. Apply pressure to the front of the anti splinter guard on
the edge of a work surface until it is flat with the front
edge of the shoe plate (18) (fig Ha & Hb).
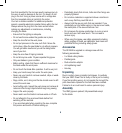
Changing a blade
Note. This jigsaw is fitted with a tool-free mechanism for
fast and simple “T” and “U” shank blade removal and fitting.
WARNING. Always ensure that the saw is switched off
and plug is removed from the power point before changing
blades or making any adjustments.
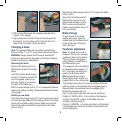
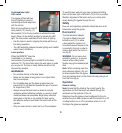
Removing the blade
Remove the blade guard (6) to
afford better access to the blade
clamp.
Push the tool-free blade change
control (17) upwards towards the
top of the jigsaw, making sure
that your fingers do not contact
the teeth of the blade (fig I).
With the blade change control (17) in its uppermost position,
remove the blade by pulling it downwards towards the base
of the jigsaw.
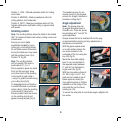
Refitting a new blade
Push the blade change control (17) to its uppermost position
and slide the new blade into the locating groove in the blade
clamp with the teeth pointing forward. Make sure that the
back of the blade is located and supported by the blade
guide (7) (fig I).
Release the blade change control (17) to secure the blade
firmly in place.
Reposition the blade guard (6).
Replace the plug and run the
jigsaw under no load to check
that it runs smoothly and the
blade is secure before using it to
cut any materials.
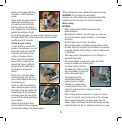
Blade storage
To gain access to the blade
storage areas (24), open the
release tabs (25) located at each
corner of the rear of the shoe
plate (18) (fig J).
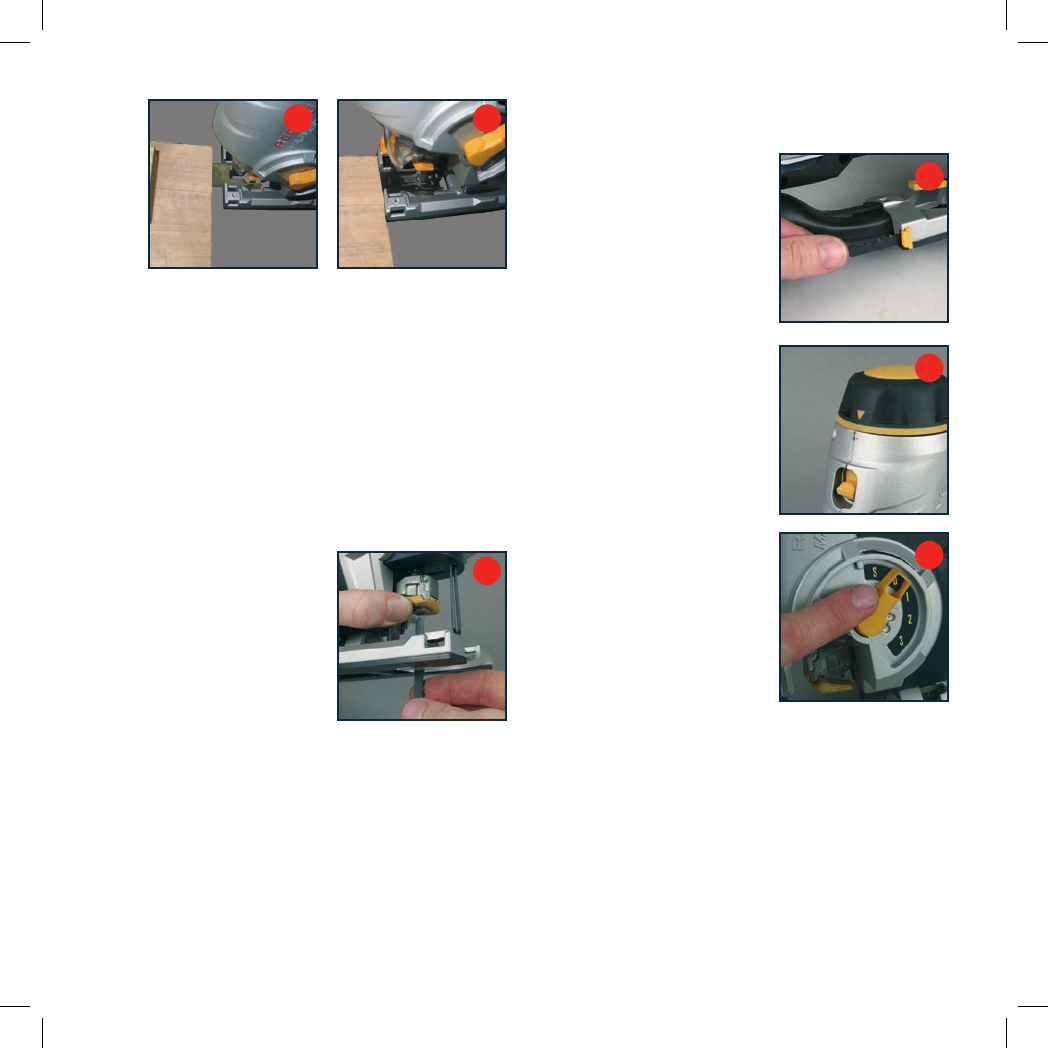
Pendulum adjustment
Note. The blade can be set to
produce a front to rear swinging
(pendulum) action when cutting.
This can increase the jigsaws
cutting efficiency, depending on
the material being cut.
The pendulum action is functional
on pendulum lever positions 1, 2
& 3 – the higher the setting the
greater the pendulum action.
Note.Increasing the swing of
the pendulum action results in a
rougher finish to the cutting edge.
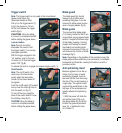
The scrolling control knob (4) must be positioned forward
(with the arrow on the scrolling knob and jigsaw housing
aligned) before the pendulum can be engaged (fig K).
Rotate the pendulum lever (5)
(fig L) to the position that best suits the job, as follows:
Position S. SCROLLING – for the cutting of all materials
and with manual 360° rotation of the blade using the
scrolling controlling knob (4).
Position 0. SMOOTH - for cutting mild steel / soft materials
/ all materials with normal up and down blade motion with
minimal splintering.
I
J
K
L
Hb
Ha