


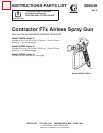


308645 9
Installation/Operation
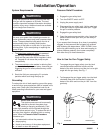
How to Flush the Gun
WARNING
To reduce the risk of serious bodily
injury, including splashing fluid in the
eyes or on the skin, or static electric
discharge when flushing:
D Be sure the entire system, including flushing
pails, are properly grounded.
D Remove the tip guard and spray tip.
D Maintain metal to metal contact between the
gun and the flushing pail.
D Use the lowest possible pressure.
Always flush the pump and the gun before the fluid
being sprayed can dry in it.
NOTE: If it is available, the flushing procedure
provided in your pump or sprayer manual should be
used instead of this procedure.
1. Follow Pressure Relief Procedure on page 5.
2. Remove the tip guard and spray tip. Soak and
clean the parts.
3. Put the pump intake in a grounded pail of water or
solvent.
4. Start the pump at its lowest pressure.
5. Trigger the gun into the original pail. When water
or solvent appears, release the trigger.
6. Follow the Pressure Relief Procedure, page 5.
WARNING
Do not spray paint from the gun with the gun safety
latch set to the cleaning position.
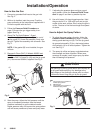
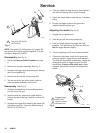
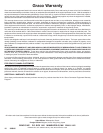
7. Trigger the gun. Rotate the latch clockwise all the
way up to the cleaning position as shown in Fig. 7.
Release the trigger. The gun is now in continuous
cleaning mode without the need to manually trigger
the gun.
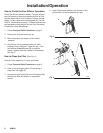
8. Aim the gun into the solvent pail. Start the pump at
its lowest pressure. Circulate the fluid until the
system is thoroughly flushed.
9. Trigger the gun and turn the latch counterclock-
wise to rotate the pin parallel with the gun.
Release the trigger to stop flushing.
10. Follow the Pressure Relief Procedure, page 5.
Fig. 7
05969
PIN
LATCH